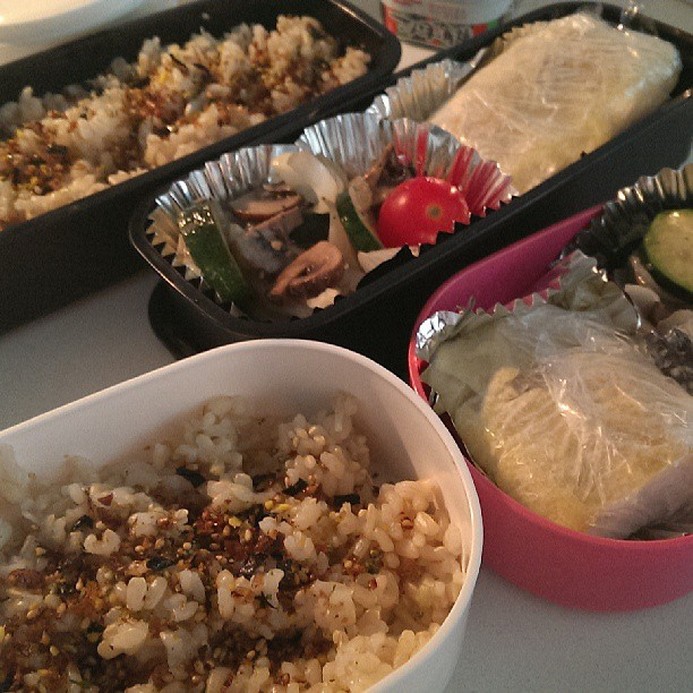
So I've begun my life as a fulltime employee in San Francisco. Absolutely loving it so far. Starting my second week, I decided to pack obentos to work! There are cute cafes around office but they are all crowded and the last thing I want to do is wait in line! I've never really packed true Japanese obentos myself. I've always watched my mom though. I decided to start simple. A bed of rice with furikake, tamagoyaki and some stir fried veggies. Absolutely perfect. How to make a simple but delicious and safe to eat obento? Read below! Rice
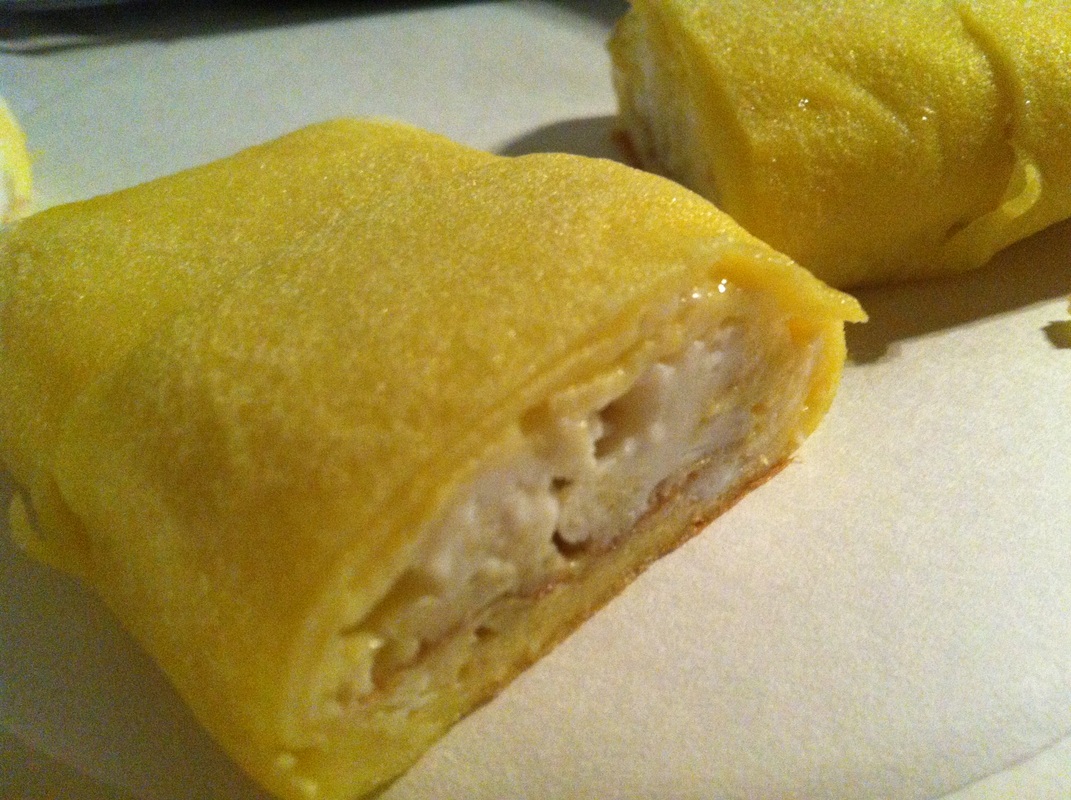
Tamagoyaki (Japanese sweet omelette)
Stir fry veggies
0 Comments
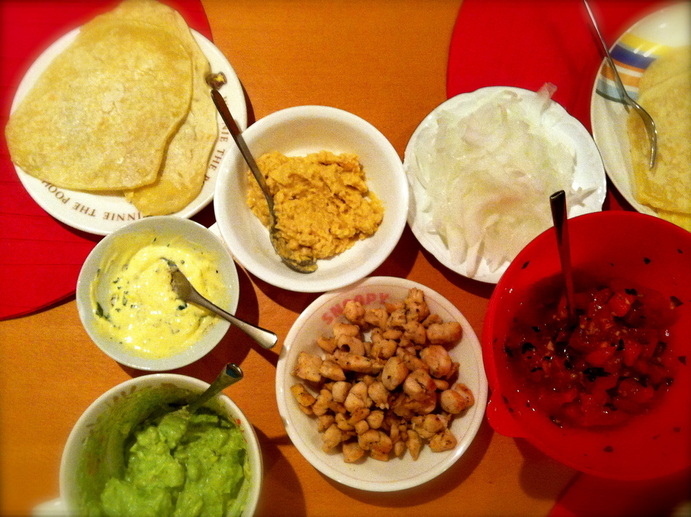
Tortillas are very expensive here in Japan. I went to a local supermarket (known to provide low prices) and found 10 tortillas for around $6. Ouch. This didn't stop me from sharing the concept of wraps, dips and spreads to my family in Japan. I decided to make my own tortillas instead! I make my own pizza with my boyfriend sometimes so this tortilla making ended up being very similar to that.
- - - T O R T I L L A - - - My first homemade tortillas ended up being chewy, soft and on the thicker side. Instead of wrapping things inside, we ended up dipping or placing the spreads and dips on top. After thorough research online about making tortillas, here's what I used:
Steps:
- - - D I P S / S P R E A D S - - - Simple Yoghurt Guacamole
Garlic Basil Mayo
Tomato and Basil Marinade
Hummus
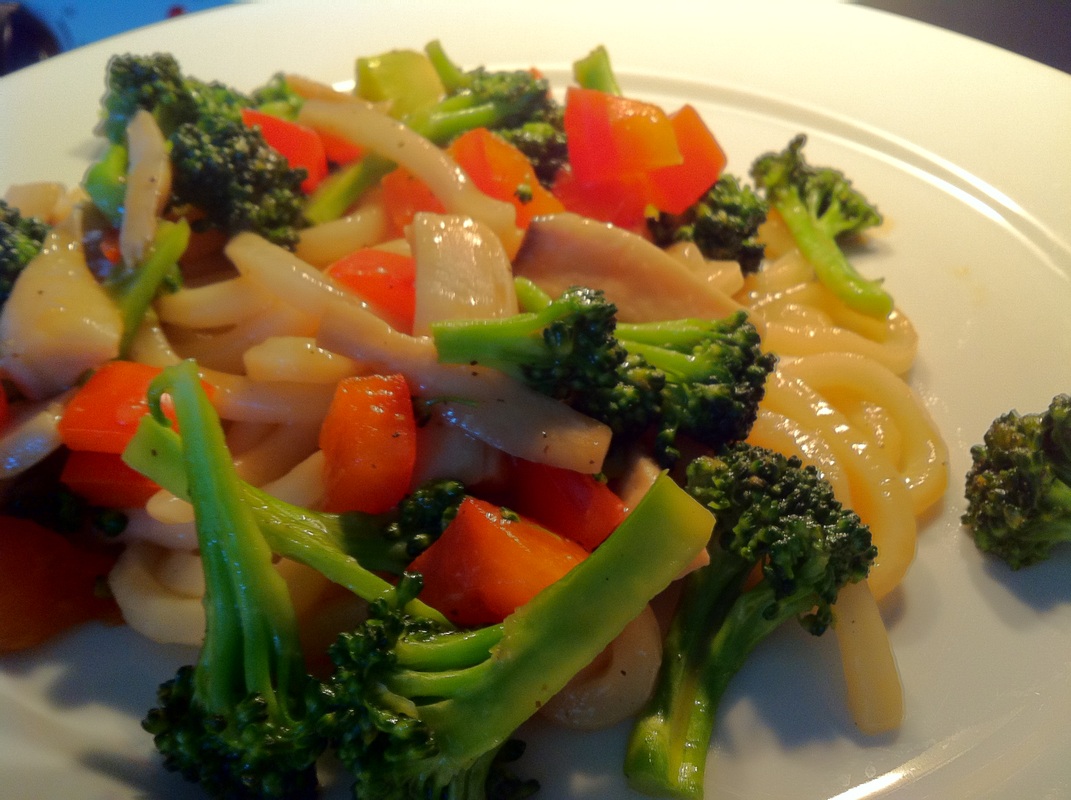 Time taken: 5 - 10 minutes Approximately 300 kcal per serving About This Dish: I head over to my freezer when I find myself hungry and in need of a substantial and healthy Japanese meal at home. Why? Because I usually have a stash of udon hidden in my freezer! Yaki-Udon (Fried Udon) is one of Japan's most popular noodles, udon, stir fried with a bunch of vegetables and optionally meat. This recipe adds a delicious taste to the dish by adding a little bit of sesame oil and Japanese soy sauce! Be creative in your additions and you might end up with an amazing dish for lunch! My mom actually used to make this for me for breakfast. Good old days :) While you're at it, why not check out my other udon recipe as well? What You Need: (Makes 2 servings)
Steps:
 Throwback Recipe: Japanese Ginger Pork, "Shoga-Yaki" . Amazing sauce, goes wonderfully with rice.4/29/2013 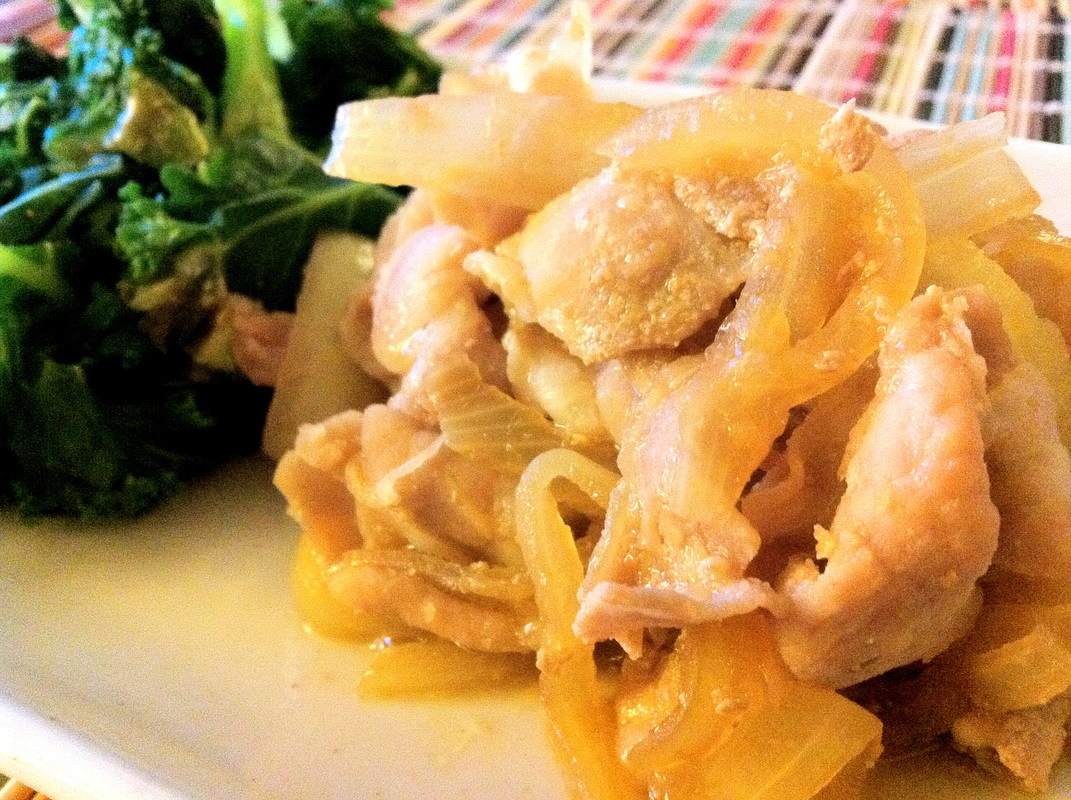
Shoga-Yaki, a dish with grilled pork (thin sliced) mixed with a savoury sauce made of soy sauce, Japanese sake and mirin. It's a very easy dish to make and despite its simplicity, it tastes absolutely delicious! My boyfriend loved this dish tonight and mentioned that it's better than any Japanese dish served at a typical Japanese restaurant in Boston. Yay!
I posted a recipe for this dish earlier so click here to access it. Most of all, ENJOY! 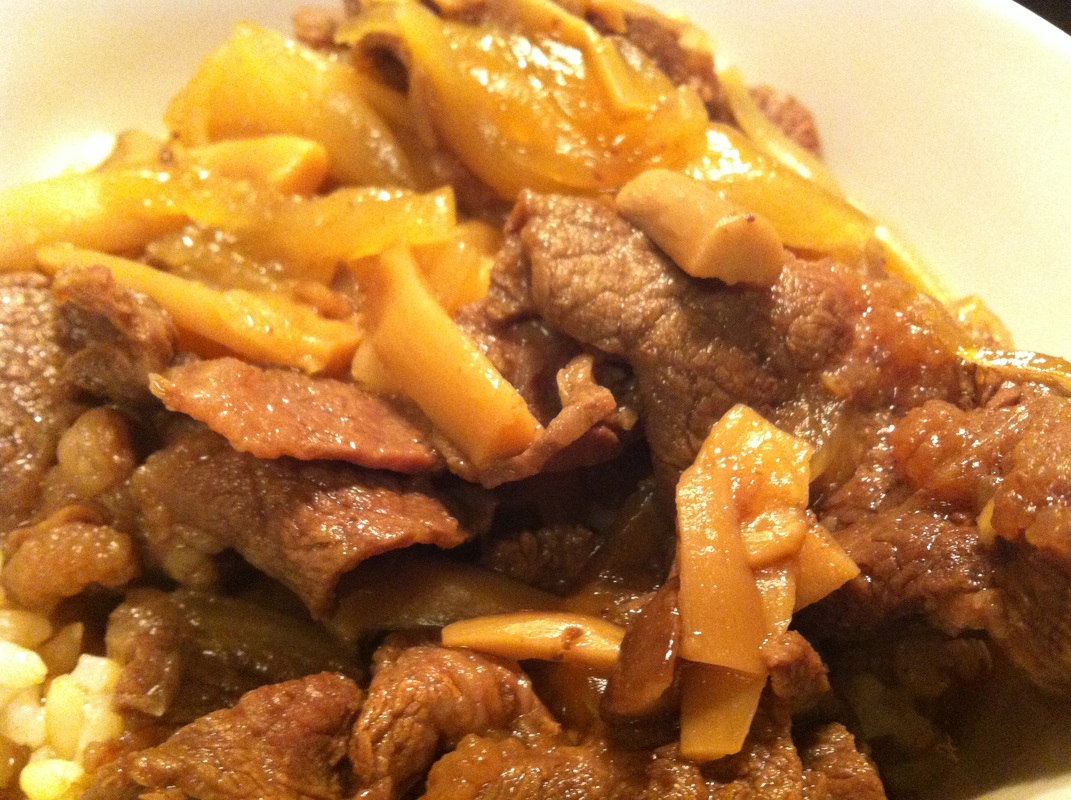
Have you tried making this amazing beef bowl using this recipe I posted a while ago?
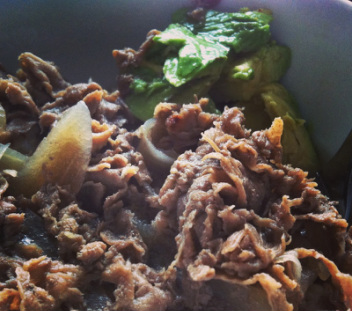
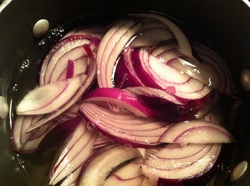
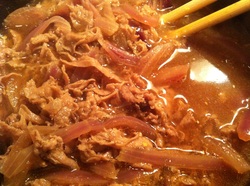
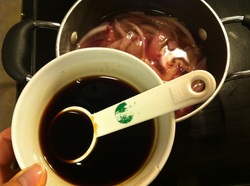
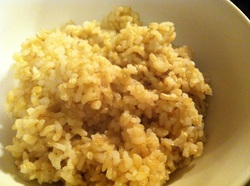
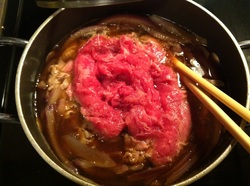
Since I had the chance to go to a large Korean supermarket (H Mart in Burlington, MA), thanks to Zipcar, I stocked up on thin sliced beef and pork usually used for Shabu Shabu or Japanese style stir fry dishes! Since the meat is usually packed in large portions, I usually wrap the meat up in smaller portions using saran wrap and freeze them for future usage. Using the fresh thin sliced beef, the first thing I made was gyu-don! Beef bowl! Perfectly sweet, perfectly savoury. Rice turns heavenly and irresistible when topped with this beef dish! I changed around the ingredients this time. I didn't use mirin! What I Used: (Makes 2 servings)
Steps: I used the same procedures as this recipe, but I'll post it in text here anyway :)
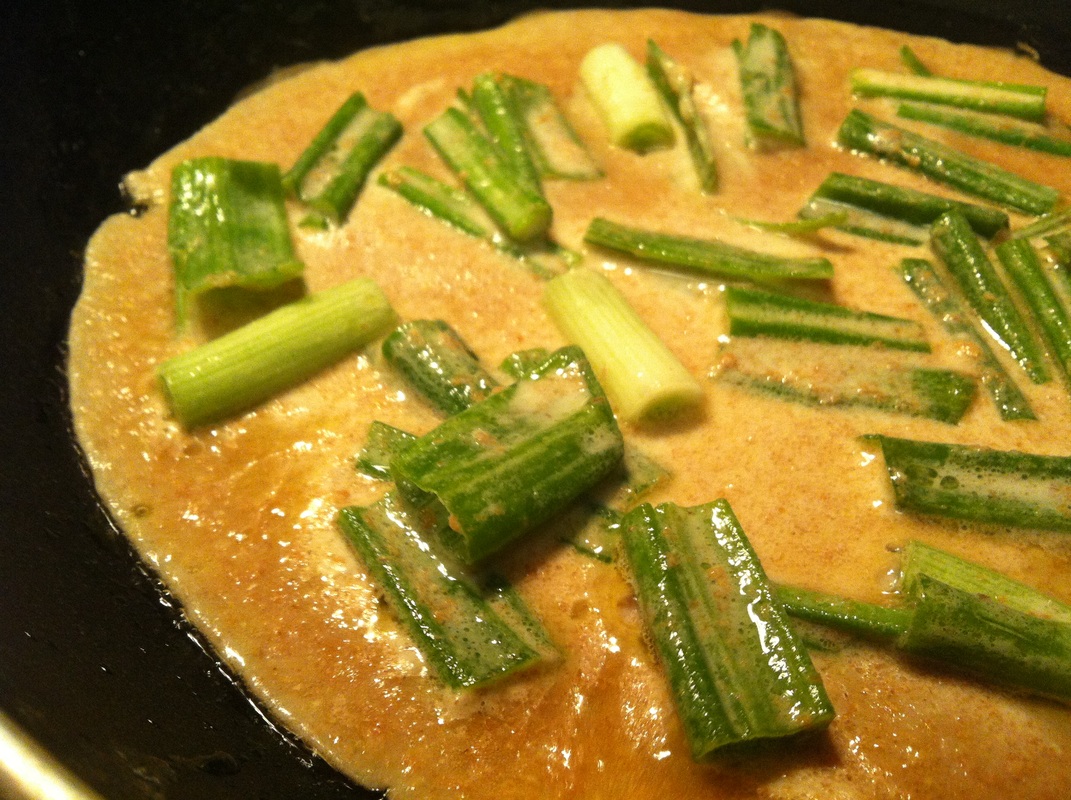
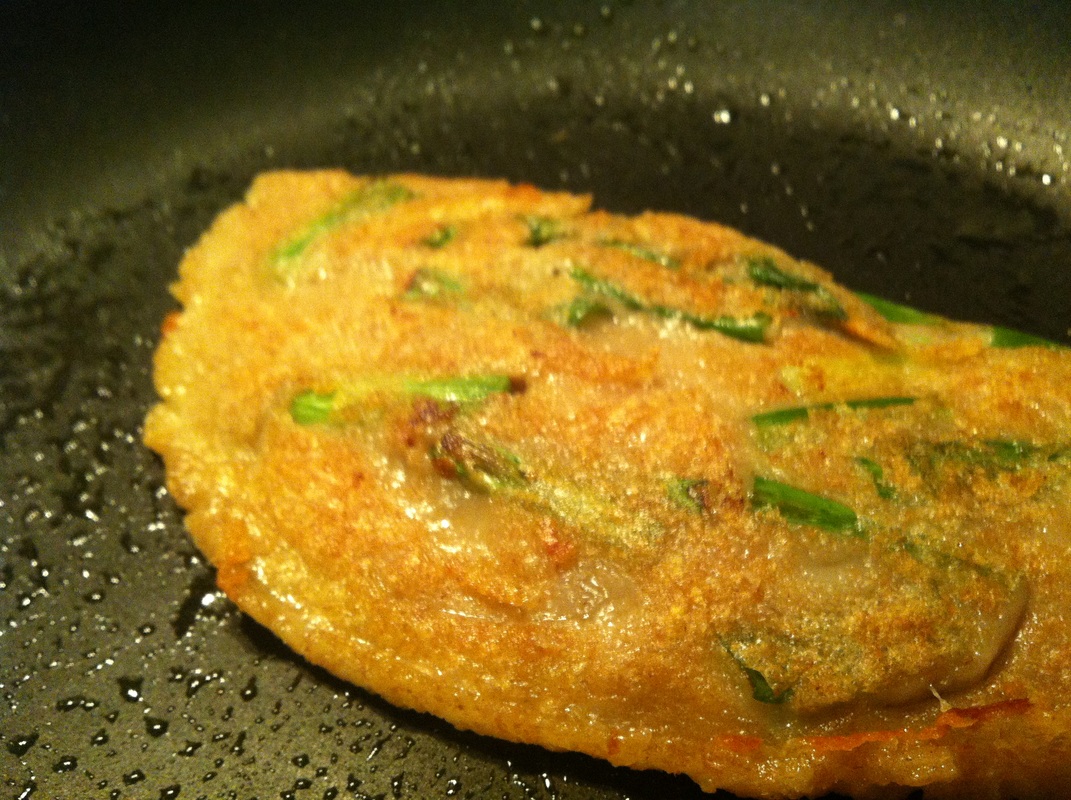
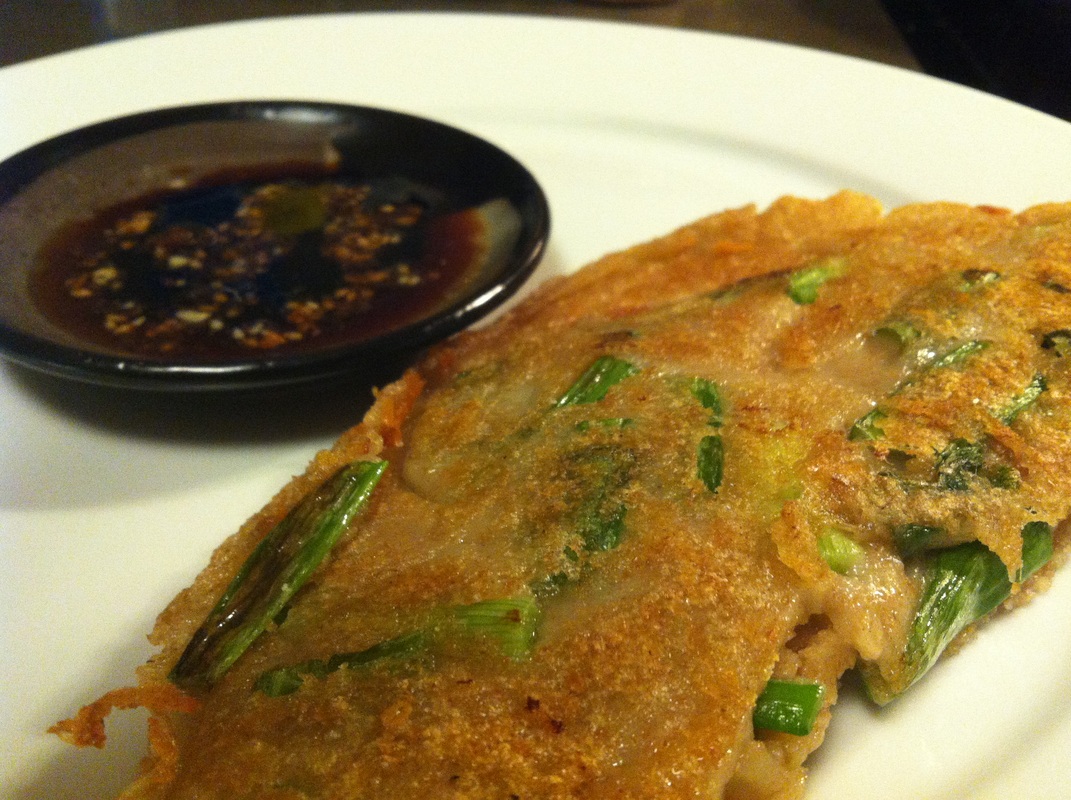 As you all probably know, Boston has been going through a chaotic couple of hours with the suspect of the Boston Marathon Bombing incident on the run. With a "shelter in place" order, it was a great chance to use up some left over ingredients in the fridge! "Negi Yaki" is basically a savoury pancake made with just green onions ("Negi"). You usually fold the pancake up and enjoy it like a crepe. I hid some cheese in mine. Since you fry it, the outside becomes very crunchy and since we use starch in the mix, the pancake itself becomes pleasantly chewy. The smell of the sesame oil is perfectly appetizing as well. I mixed some soy sauce, sesame seeds and chopped up garlic as a dipping sauce. What You Need: (Makes 1 pancake)
Steps:
Izakayas are basically casual restaurants who concentrate on serving drinks and small Japanese tapas dishes such as edamame, fried chicken, salads, etc. Back when I lived in Japan, I went to an izakaya on a regular basis to enjoy the "All you can drink" menu as well as regular menus. There are fancy izakayas to regular type of izakayas. Izakayas made for specific target customers too; some izakayas focusing on seafood lovers, some on older business men. It's really fun to scavenge around for your favourite izakaya since there are so many; especially around popular stations.
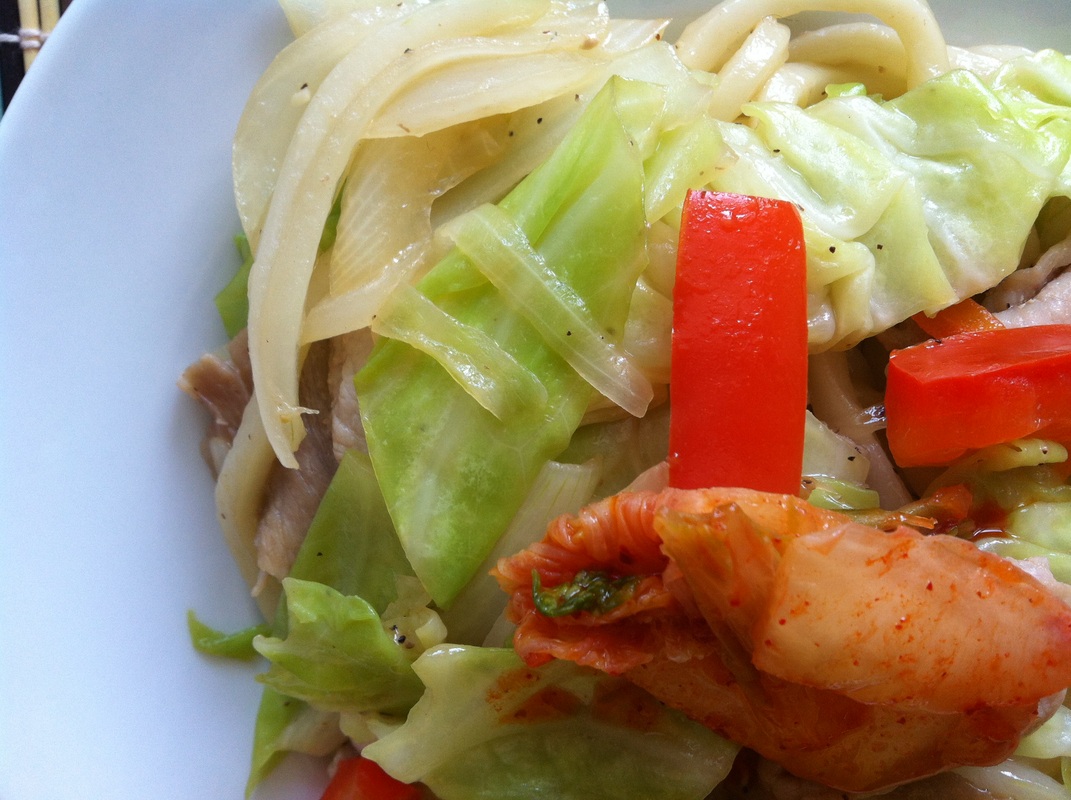
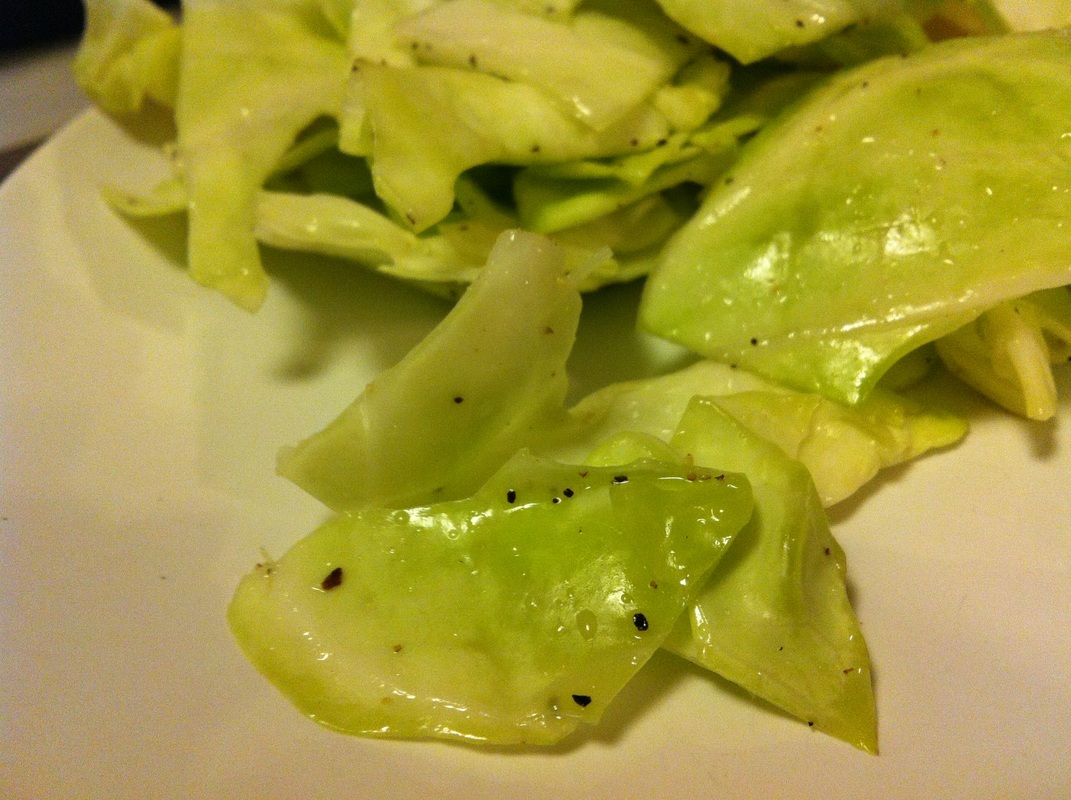
Back to this recipe of cabbage mixed with salt and sesame oil called "shio-kyabetsu" in Japanese. It's a very simple dish and very popular amongst izakaya lovers and yakiniku (Korean bbq) lovers. It's always served as an appetizer. It's just a perfect salad to accomodate other meaty dishes or alcoholic beverages. Please give it a try, it only takes a minute to make! What You Need:
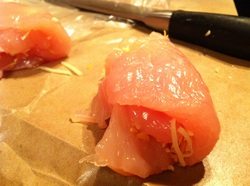
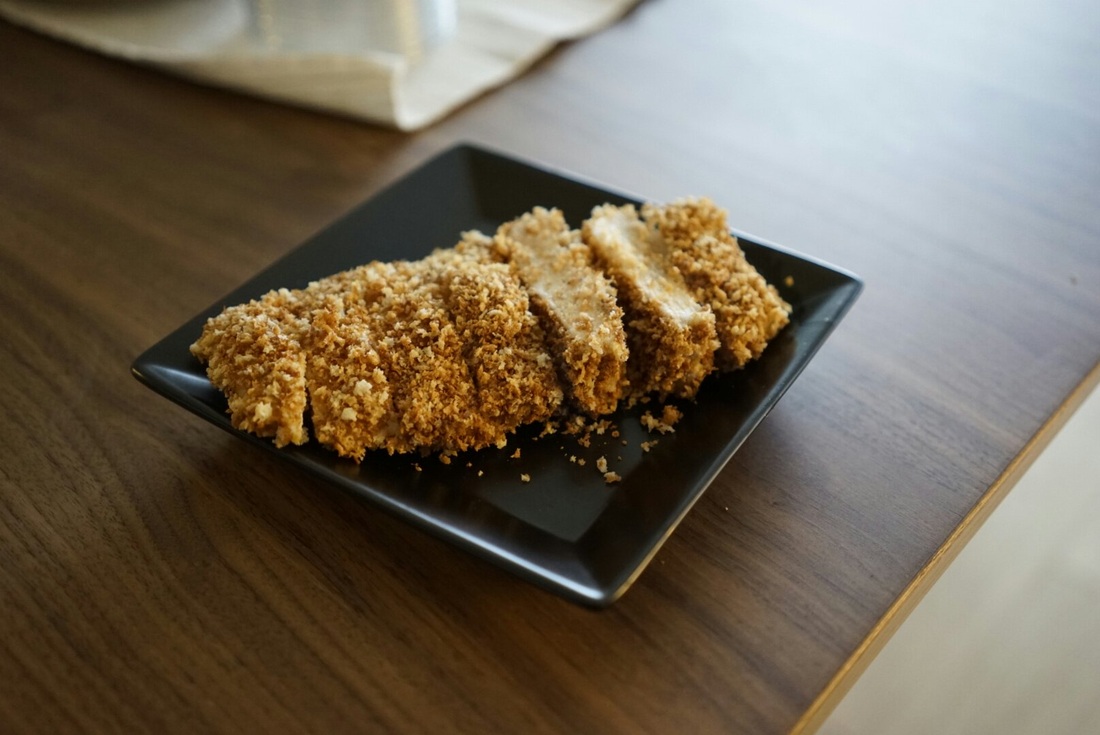
Simply mix all the ingredients together. Yup, that's it. 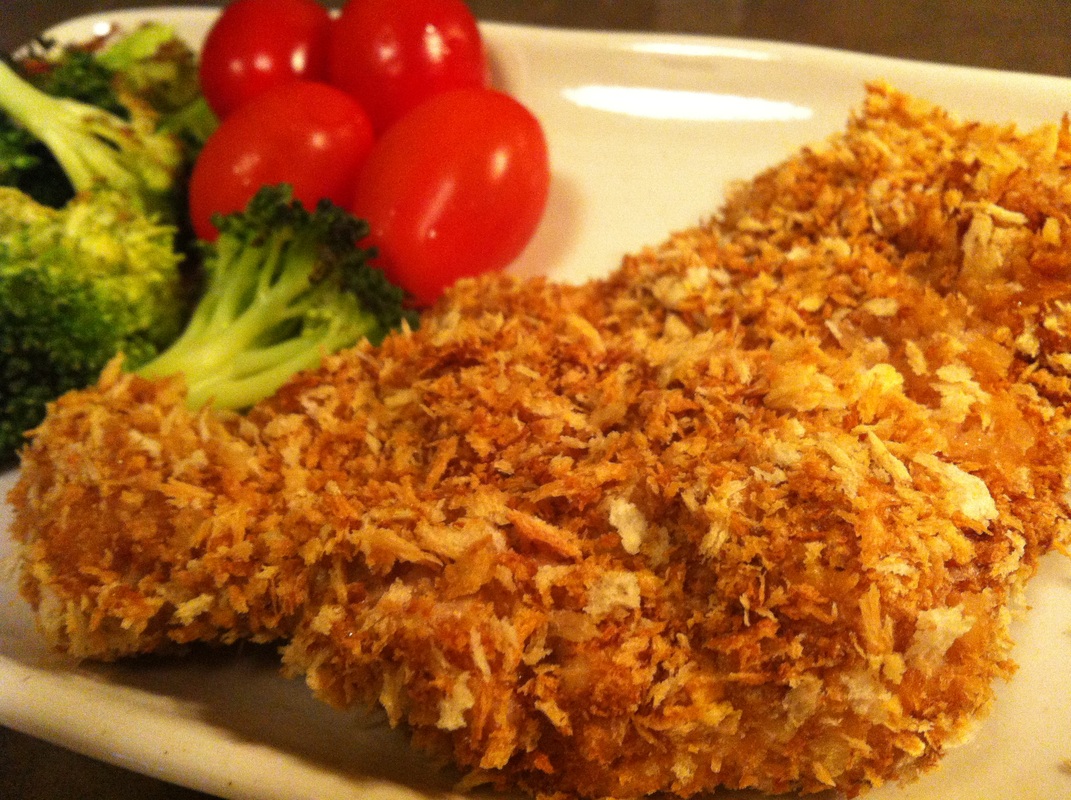 For those of you who haven't tried this popular recipe on my blog, YOU MUST! Chicken or pork katsu (essentially Japanese style fried chicken or pork) is a very popular dish in Japan and in the US. This recipe provides a healthy alternative; it uses absolutely no oil. It's as crunchy, delightful and satisfying as the deep fried version, I promise. I also must mention that it is much less of a hassle to make since you don't have to clean up the oily mess on your counters. Instead, you pop it in the oven to bake! Last night, I topped one of the katsus with some mexican cheese. It simply melted in my mouth! Why did I decide to make katsu last night? Not only because it's delicious; but also because it signifies good luck! Many students applying for schools/jobs eat katsu dishes to wish for a good result; to win ("katsu" (勝つ) in Japanese) ! 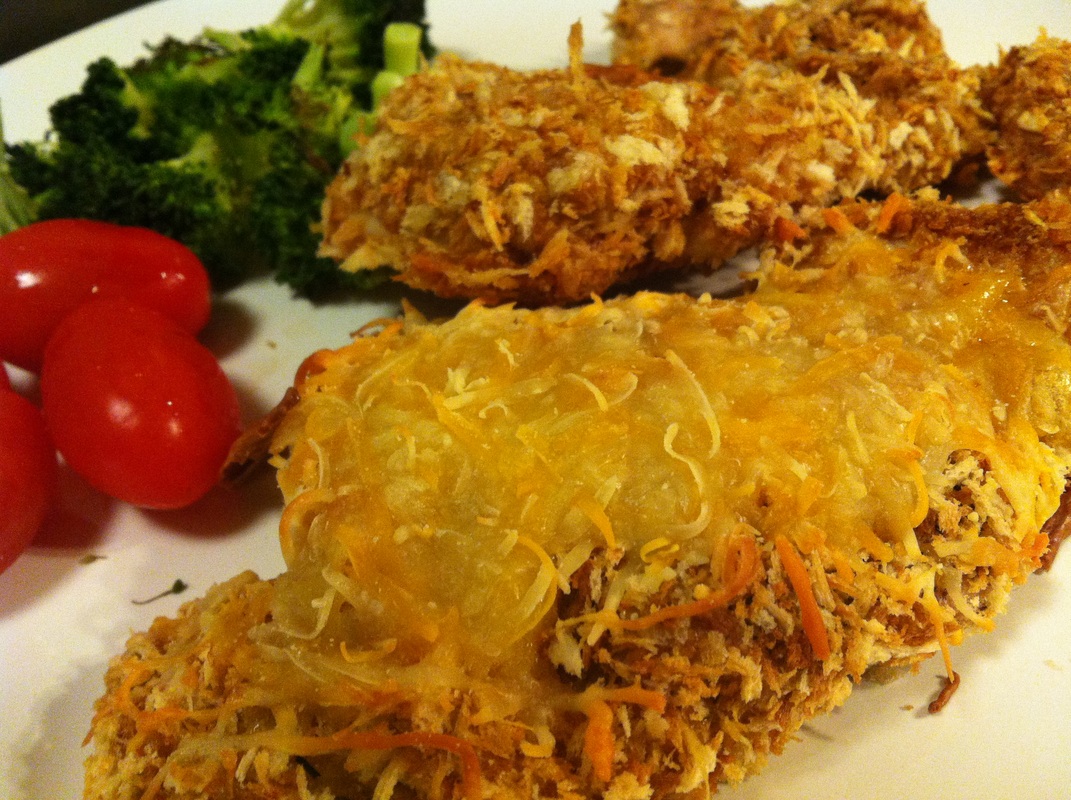 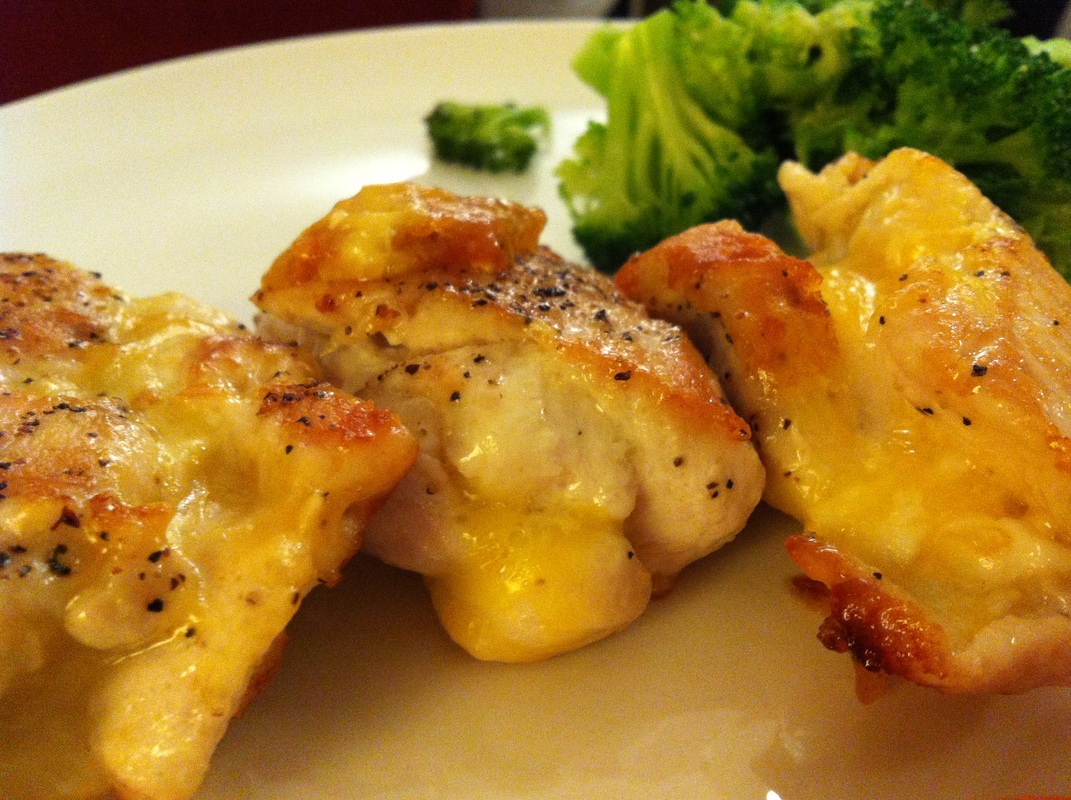 Number of steps: 5 steps Time taken: 15 - 20 minutes Approximately 240 kcal per serving About This Dish: If you have followed my blog you probably know by now that I love chicken! With so much shredded cheese leftover in my fridge, I had to think of a quick and simple dish to make for dinner. This dish may sound childish and too simple, but let me tell you...It is definitely worth trying! The cheese is placed in the center of the chicken then is wrapped up. After cooking, the cheese then melts in your mouth. Additionally, the pan makes some of the melted cheese crunchy and irresistible. Enjoy with just salt and pepper! The taste of the chicken and cheese is perfection. You could also try frying or making this chicken a fake katsu using this popular recipe! What You Need: (Makes 3 servings)
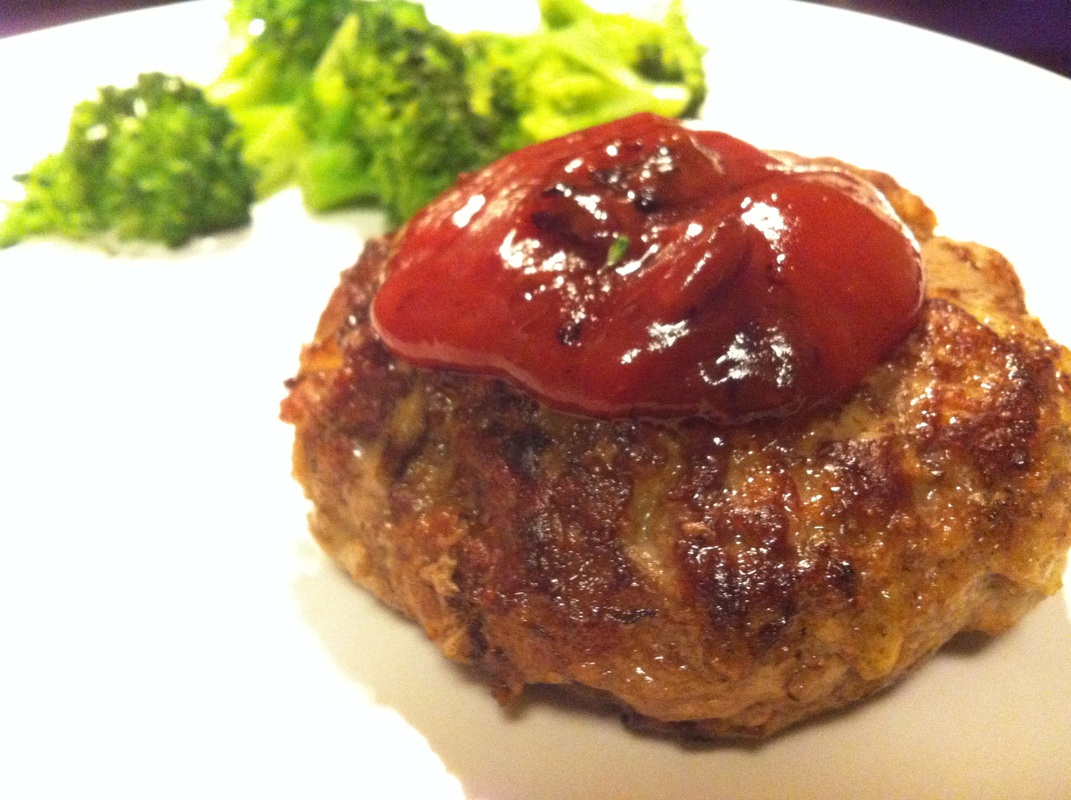
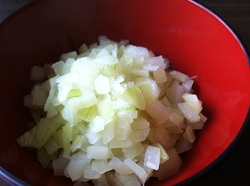
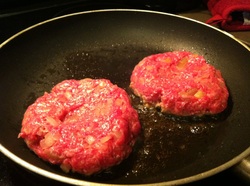
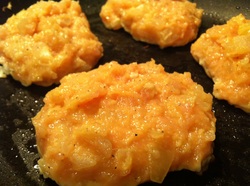
Number of steps: 5 steps Time taken: 15 - 20 minutes Approximately 280 kcal per serving About This Dish: As mentioned in my past recipes, Japanese hamburger steaks (called "Hambaagu" in Japaneses) are a very popular dish in Japan for all ages. Casual family restaurants serve great Hambaagus! Not to mention all the moms and dads around Japan who are great at it too. There are restaurants like Hungry Tiger who solely serve Hambaagus (and steaks). I've posted a recipe using ground turkey, tofu, ground chicken and a quick recipe for delicious demi glace sauce which is superb with these "Hambaagu"s. I've been posting healthy options for Hambaagu in the past, but today I'll be posting a recipe for a legitimate beef hambaagu (most restaurants serve these). My boyfriend and I melted after eating a bite, so I hope you enjoy it too! One important tip I have is to make sure the onion and whatever you mix into the ground meat to be cold when mixing. Even your hands; stick them into ice water. We don't want the juicy fat of the meat to run away, we aim to trap it into meat until we serve these goodies. What You Need: (Makes 2 servings)
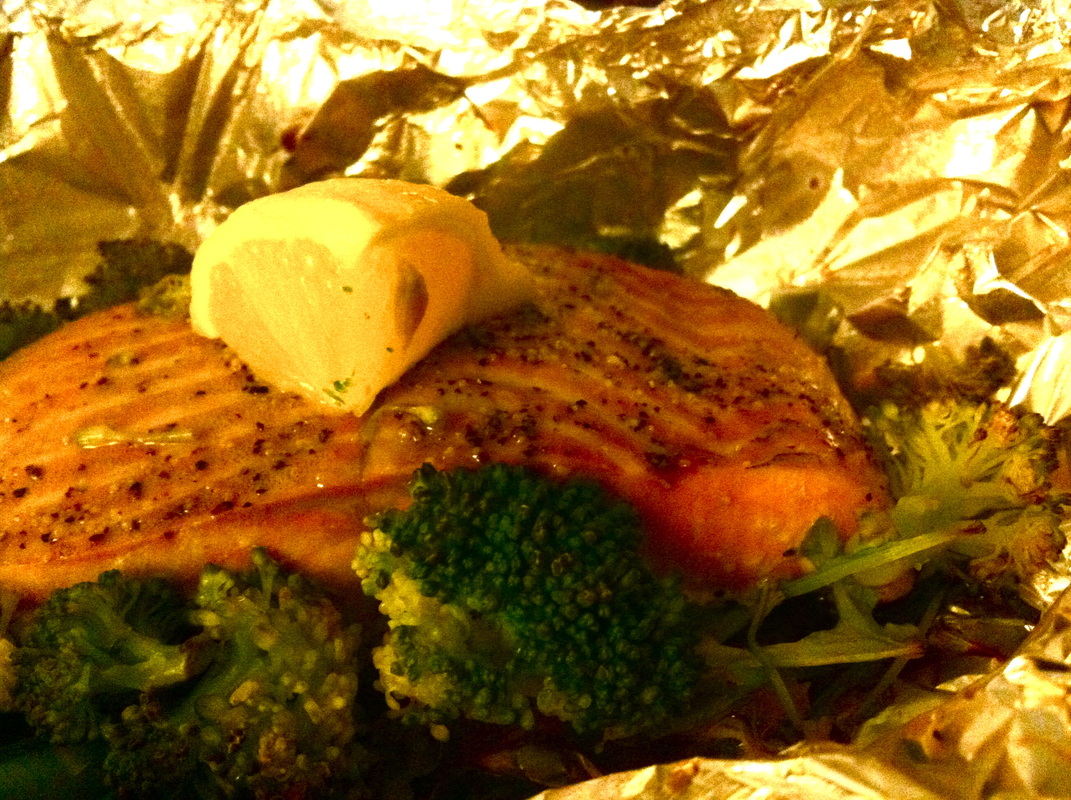
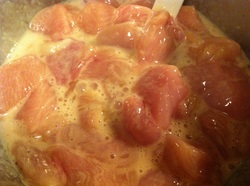
My favourite fish to cook is probably salmon. I especially love to cook it in foil! It's mess free and best of all, I can throw in all the veggies I want. I've posted a recipe for this in the past using miso-mayo as a sauce on top.
Today, I layered chopped raw onions, raw arugula, raw broccoli then the raw salmon (salt & peppered) and put a tablespoon of Japanese soy sauce and a tiny bit of butter on top. Popped it in a 470F oven for 15 minutes. EASY and DELICIOUS. Fresh squeeze of lemon prior to eating too :) 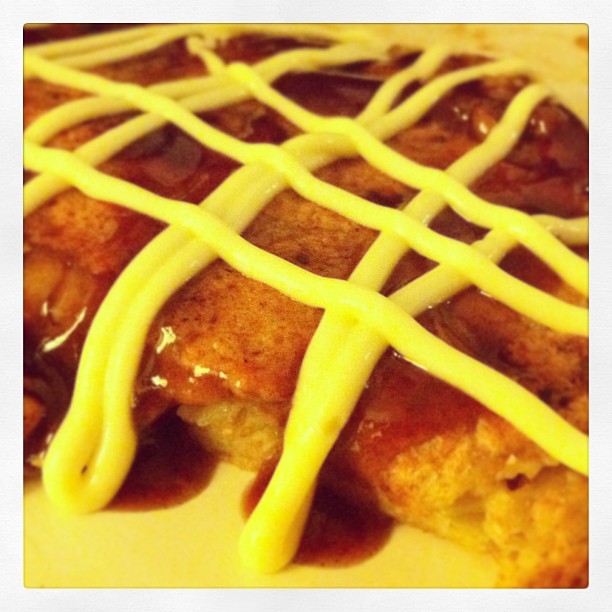
Number of steps: 6 steps
Approximately 100 kcal per serving About This Dish: Okonomiyaki is a savoury Japanese pancake containing various ingredients varying by region. Osaka has different types, Hiroshima has different types and Tokyo has different types! Some areas like to put in meat, some areas like seafood. Some put a layer of noodles underneath and top it with a cracked egg. Some mix rice into the mix! Basically, you can throw in whatever you like into these pancakes. In Japan, "Okonomiyaki Parties" are very popular. People basically set up a hot plate at home and make okonomiyakis! There are many restaurants serving gourmet to casual okonomiyakis as well. The best thing about this dish is that you can throw in the craziest ingredients of your preference whether it be natto, cheese or pickles! The main ingredients for an okonomiyaki is cabbage, flour and the toppings (sauce, mayo). The toppings are usually the same where ever you go. You can buy the sauces on Amazon.com or at any asian supermarket; I saw it at Shaws recently too. This recipe is the simplest of them all. Minimal ingredients. I even had to use whole wheat flour since I had run out of the regular kind. It still worked! What You Need: (Makes 4 servings/pancakes)
Topping (Consistent among regions)
Steps: Since the recipe is so simple, I'm going to go with just text!
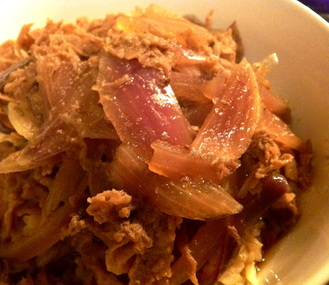
Number of steps: 5 steps Time taken: 15 - 25 minutes Approximately 190 kcal per serving (when serving 5) About This Dish: Beef bowl (Gyu-don) is a very popular dish in Japan. Usually served in fast food chains such as "Yoshinoya" and "Sukiya", gyu-dons are affordable, filling and delicious. It is also a popular dish served at home. The last time I was back home in Japan, my boyfriend and I grabbed a bowl at Yoshinoya for only 260 yen (that's around $3.00). At these chains, you can pick the size of bowl, normal to extra large. You can even add toppings like egg, natto, kimchi and so on. How fun! So how about trying to make your own at home? For those of you who are unfamiliar with the dish, it's savoury but slightly sweet because of the sugar and mirin which goes into it. This recipe is easy, quick and tastes absolutely amazing. It made me feel like I was home. Unfortunately I couldn't find thin sliced beef in my nearby Asian market, so I ended up having to use Shaws' shaved beef steak; it still worked. I highly recommend using thin sliced beef sold in your nearby Asian supermarket, if you can! P.S. As you can see on the photo, I added avocado as a topping and it went very well together. What You Need: (Makes 4-5)
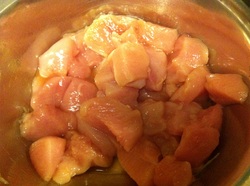
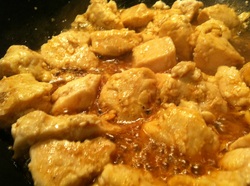
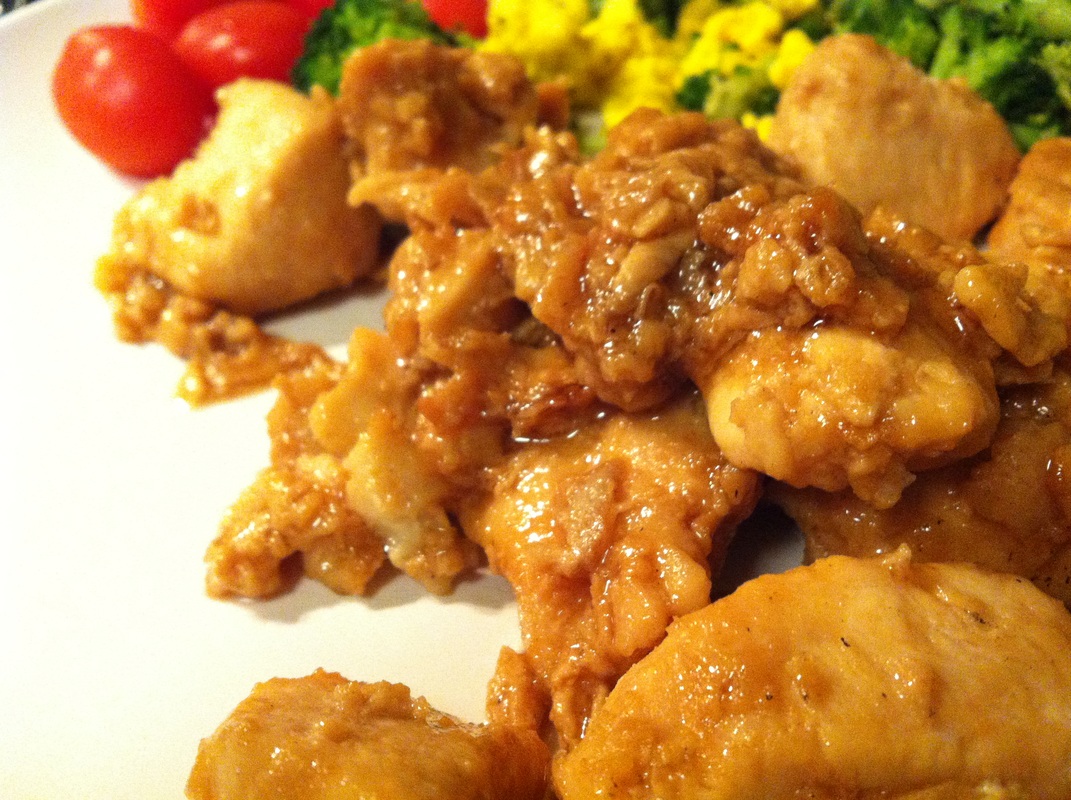 Number of steps: 4 steps Time taken: 15 minutes Approximately 200 per serving (when serving 4) About This Dish: Chicken, chicken, chicken. One of my favourite meats, especially for cooking at home. It's versatile and goes great with various Japanese sauces. As you can see on my recipe list, lots of dishes can be made with chicken! This dish like any other Japanese chicken dish goes perfectly with rice. I found myself pouring the chicken and leftover sauce all over my Japanese brown rice like a "donburi" which is literally a bowl of rice with food on top like this dish with a bed of chicken and eggplant with delicious eel sauce! By using egg white and potato starch, the chicken becomes soft and chewy as well as helps to thicken the delicious vinegar sauce. Vinegar has various health benefits; given the increase in health consciousness in Japan, vinegar has become popular and have been used greatly in dishes in the recent years. What are the health benefits? The main 5 benefits of vinegar according to this article in Japan is: Recovery, better appetite, increase in ability for the body to take in calcium, reduction in body fat, blood sugar level and blood pressure. What You Need: (Makes 3-4 servings)
Marinade
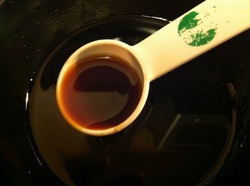
Sauce
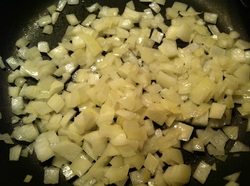
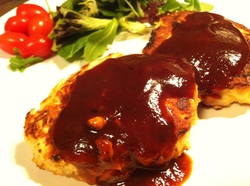
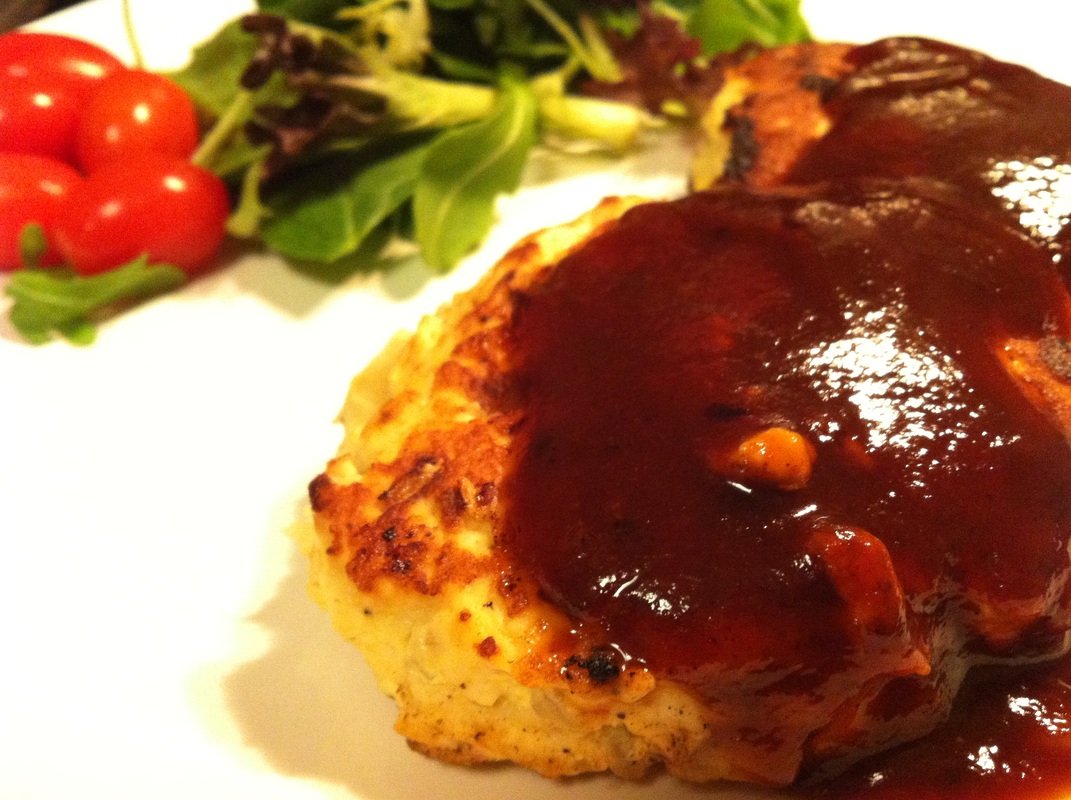 Number of steps: 5 steps Time taken: 15 - 20 minutes Approximately 130kcal per serving (using ground turkey) About This Dish: Japanese hamburg steaks are basically burger patties eaten without buns. It's a very popular dish in Japan, served in many restaurants/cafes/fast food chains and for dinner at home. Beef or pork is usually picked as the choice of ground meat, however I've picked turkey just for a more lean option. For an even healthier option, check out the tofu hamburg recipe or the chicken patty recipe I've posted. Various sauces are used; demi glace, ponzu, teriyaki, ketchup, etc. I've posted a super easy demi glace recipe so check that one out if you've got the time! People of various ages are seen eating this dish in Japan, whether it be children or a senior. You could even make a Hawaiian dish, locomoco with leftovers! One important tip I have is to make sure the onion is cold upon mixing with the ground meat. If the meat is warm or hot, it causes the juicy fat of the meat to run away, making the patties soggy! :[ Serve with Japanese rice and plenty of veggies! What You Need: (Makes 4 servings)
|
Subscribe via emailFeatured Fyuse:Popular Posts
Kinkakuji, Kyoto
Non-oil Chicken Katsu

Kawaii! Socks
instagram: @jpinsiderCategories
All
|