jpinsider
  • Feed
  • travel & culture
  • Beauty
  • Recipes
    • Shop Japanese Groceries
  • About Me

Holiday Potluck Series - Super soft mochi-like potatoes with salty turkey bacon.

12/15/2014

0 Comments

 
Picture
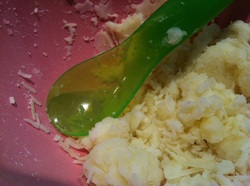
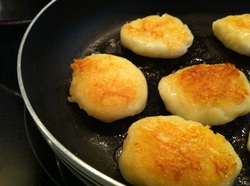
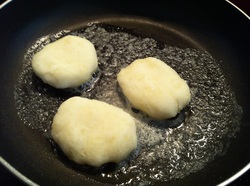
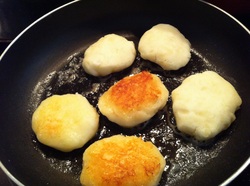
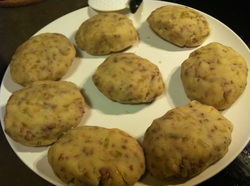
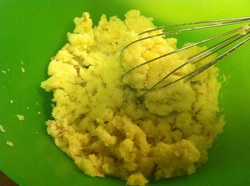
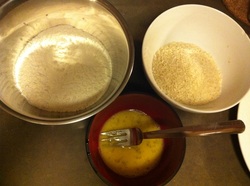
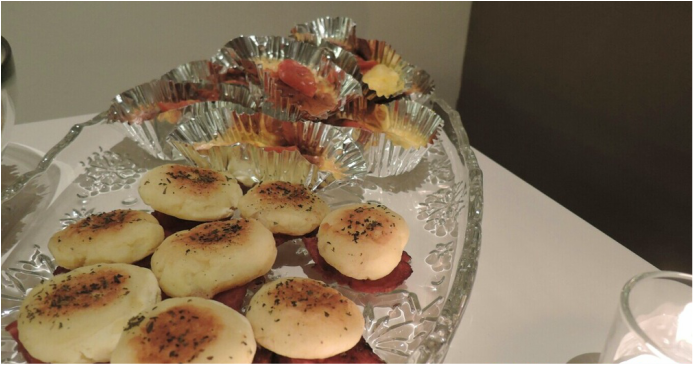
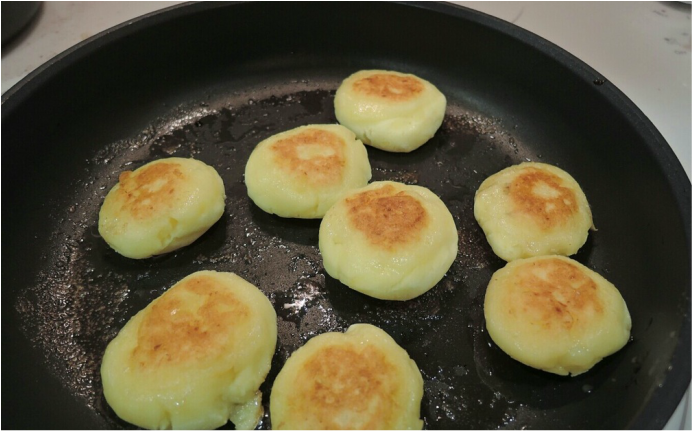
Long time no see!
I'm back! 

Holiday season is here. 
My boyfriend and I have been to multiple potlucks this month....So, introducing the Holiday Potluck series! I will share with you what I have been making this busy season. Of course, all of these recipes are EASY, FAST and HEALTHY.

The first recipe I'm sharing: Super soft mochi-like potato pancakes on turkey bacon.
The potatoes are cooked in butter and have a little bit of mozzarella cheese in them. Sweet but salty, perfect as an appetizer!

Things you need:
- 1 medium sized potato
- 4 slices of turkey bacon, cut into bit sized pieces
- 1/2 - 1 tbsp of unsalted butter
- As much cheese as you want (I used shredded mozzarella)
- Potato starch (3-4 tbsp), or until the potato paste becomes dough-like.
- (Optional) Sprinkles of basil for decoration

Steps:
  1. Peel and cut the potato into bite sized pieces and boil until super soft (you can also microwave them).
  2. While you're boiling the potatoes, you can start cooking the bacon and cut them into pieces afterwards.
  3. Once they are soft, start mashing them up, until it becomes super smooth.
  4. Add potato starch (optionally, cheese, salt & pepper)
  5. Keep massaging the potato paste. Once it becomes like dough, start separating them into small flat balls.
  6. Heat your pan with butter (medium to high heat)
  7. Once the pan is hot enough, cook the patties! We want them nice and brown.
  8. Place on top of the bacon & sprinkle some greens.

Picture
0 Comments

Recipe: Who says mochi has to be sweet? It can be savory too! Jaga-Mochi, a.k.a. Potato Mochi. These little things are easy to make and are super cute looking. 

1/8/2013

1 Comment

 
Picture
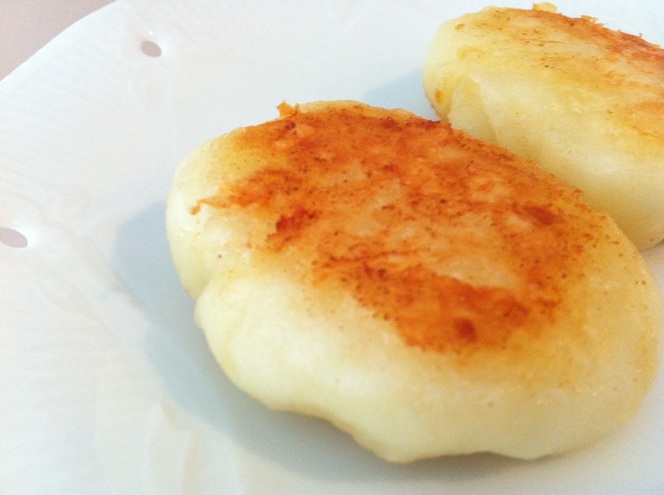
Number of steps:  3 steps
Time taken: 10-15 min

About This Dish:
Mochi, mochi, mochi. My favourite word and food. I whipped this dish up for my father who was craving for an "otsumami" with his sake and beer. In the fridge, I had a potato, so I used that! It turned out to have a great texture, very mochi like. I put in some butter and cheese so the taste is something an adult or child will love. You can make a ton of it and freeze it for future use.

What You Need:
(For 6 mini jaga-mochis)
  • 1 medium to large potato
  • 2 tbsp of potato starch (I guess corn could work too?)
  • Pinch of salt
  • 1 tbsp butter (or margarine)
  • Cheese (however much you like)
Picture
1. Wash and peel the potato. Put it in the microwave (for a couple min) or boil the potato until it gets cooked through enough to mash. Mash it while the potato is hot and add starch and salt.
 

Picture
4. You could saran wrap each mochi and freeze it up for future consumption (you can put it in the microwave for 1-2 min). Also, my father loved having this with ketchup. 

Picture
2. Knead the mixture until it gets very smooth. If you have a hard time with this, add some water! After it becomes smooth, add the cheese and knead some more. Create little mochis and put it on a heated pan with butter. 

Picture
3. Heat the jaga-mochis 2 min on each side (that should be enough) and 1 extra minute with the lid on the pan. Just make sure there is a golden crust on the outsides (trust me, it makes it much more tasty). 

1 Comment

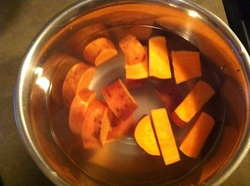
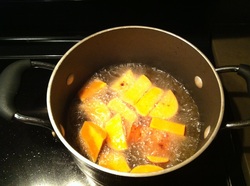
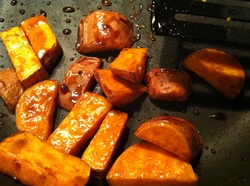
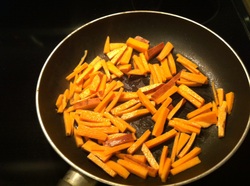
Recipe: "Daigaku-imo", fried sugar coated sweet potatoes! A famous dessert or side dish in Japan.

11/20/2012

0 Comments

 
Picture
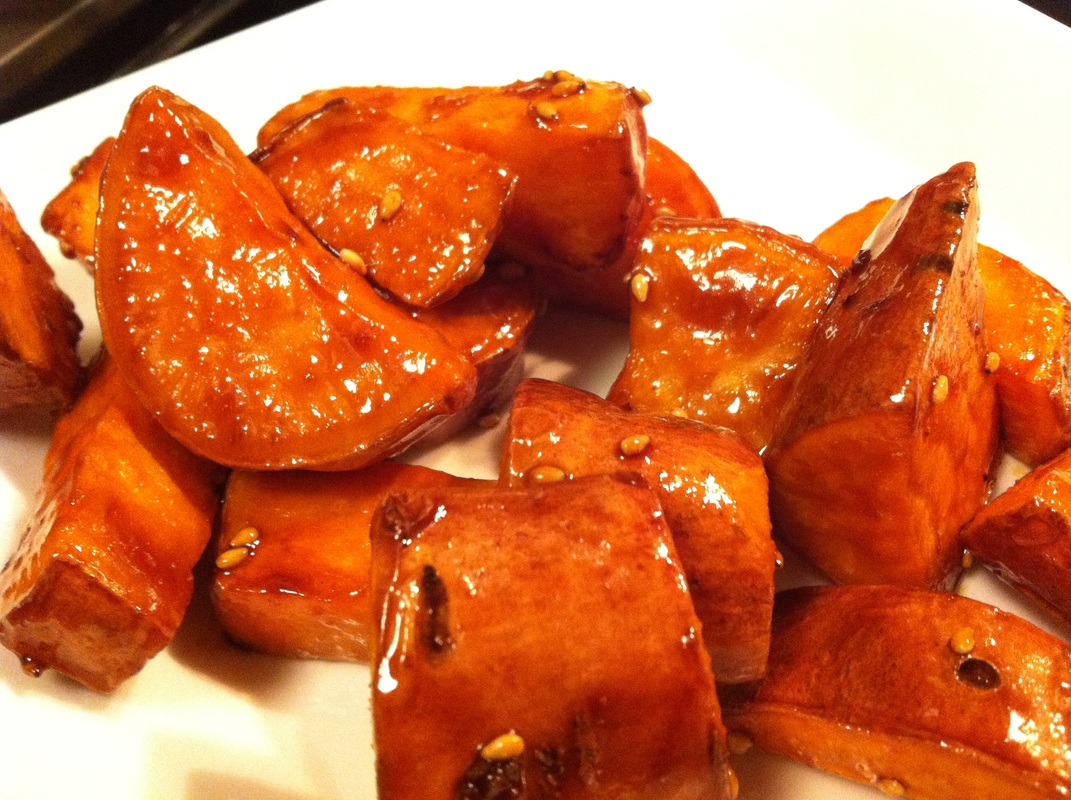
Number of steps:  3 steps
Time taken: 10 min
Approx. 120 kcal per serving

About This Dish:
 Though I've been attending school for the last 4 years in the United States, I still have no clue on how to celebrate Thanksgiving...We ended up ordering a "Thanksgiving dinner package for 2" at Whole Foods. Delicious, and it lasted us 2 days. 

With the mountain of sweet potatoes in my fridge, I decided to make this Japanese snack, "Daigaku-imo". Deep fried sweet potato coated with sugar (or honey). Some people eat it as a snack, some eat it as a side dish for dinner. All up to you :) The crunch and the softness which comes after is just something you must try. According to Wikipedia, this dish is called "University-potato" since it was a trending snack near Tokyo University in the Taisho period.


What You Need:
(2 serving, plenty to share between two)
  • 1 large sweet potato or 2 small ones
  • 1.5 tbsp sugar
  • 1 tbsp soy sauce
  • Oil for deep frying
  • Pinch of sesame seeds
Picture
1. Wash the potatoes well. Then, cut the sweet potato into bite size pieces and soak in water to get rid of the bitterness. 

Picture
2. Heat up some oil in a pan (I heated up 2 - 3cm of oil). We want the heat to be around 170C. If you don't have a thermometer, just throw in some bread crumbs. If it instantly starts frying, your oil is ready. Carefully put in the potatoes and fry them for 3 - 5 minutes.

Picture
3. In a pan, place the sugar and soy sauce on MEDIUM heat. Once the sugar melts and the sauce starts bubbling, put in the potatoes and heat for a couple of minutes. Add the sesame seeds at the end! 

0 Comments

Recipe: Sweet potato "kinpira"! Japanese cooking style involving sautéing and simmering with soy sauce and rice wine. 

11/19/2012

0 Comments

 
Picture
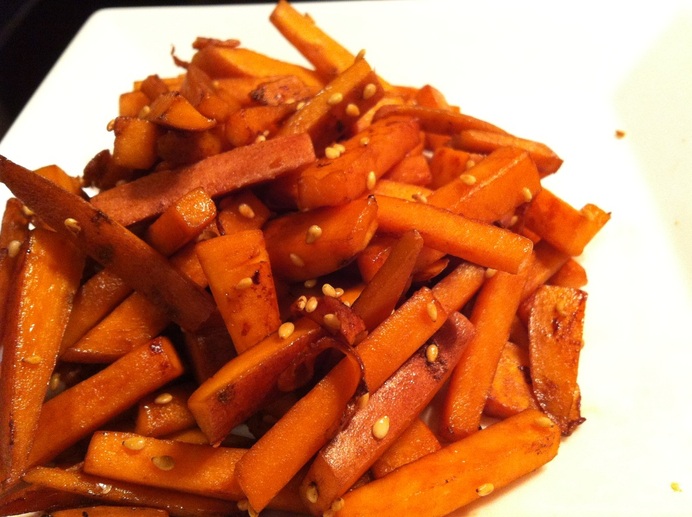
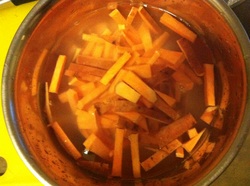
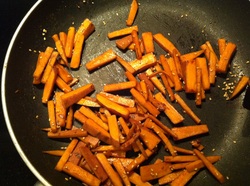
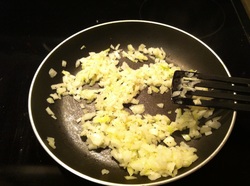
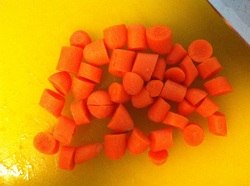
Number of steps:  3 steps
Time taken: 10 min
Approx. 220 kcal per serving

About This Dish:
It's fall in Boston and all I see at supermarkets are pumpkins, sweet potatoes and more potatoes! This recipe uses sweet potato and transforms it into a savoury side dish which will make you crave for Japanese rice. "Kin-pira" is a cooking style which involves sautéing and simmering a vegetable (most commonly lotus root, carrot, tofu or seaweed) with soy sauce and mirin. The potato ends up being slightly crunchy, just hard to resist for another batch!

What You Need:
(2 serving, plenty to share between two)
  • 1 large sweet potato (around 200g or 0.4lb)
  • 1/2 tbsp sugar
  • 1 1/2 tbsp soy sauce
  • 1 tbsp sake (or mirin)
  • 1 tsp sesame oil
  • Sprinkle of sesame seeds
Picture
1. Cut the sweet potatoes into small rectangles and soak it in the water. Once the water gets muggy, refill the water with clean water. Repeat this 3-4 times to get rid of the bitterness.

Picture
2. Heat up a pan with 1 tbsp of oil on HIGH heat and throw in the potatoes. Cook for 2-3 minutes. Then, throw in the sugar, soy sauce and sake. 

Picture
3. Finally, put in the sesame oil and sprinkle the sesame seeds. All done!

0 Comments

Recipe: Japanese potato korokkes! Basically Japanese style croquettes. It involves deep frying but easy and worth 20 min of cooking!

11/10/2012

0 Comments

 
Picture
Picture
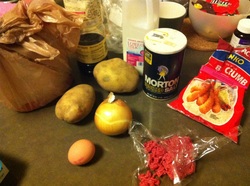
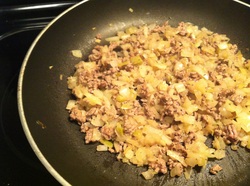
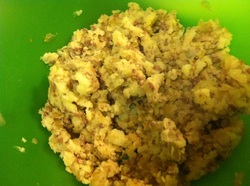
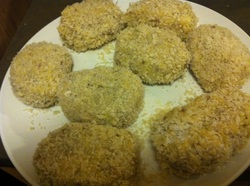
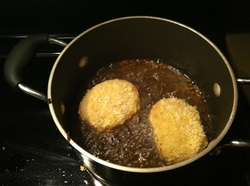
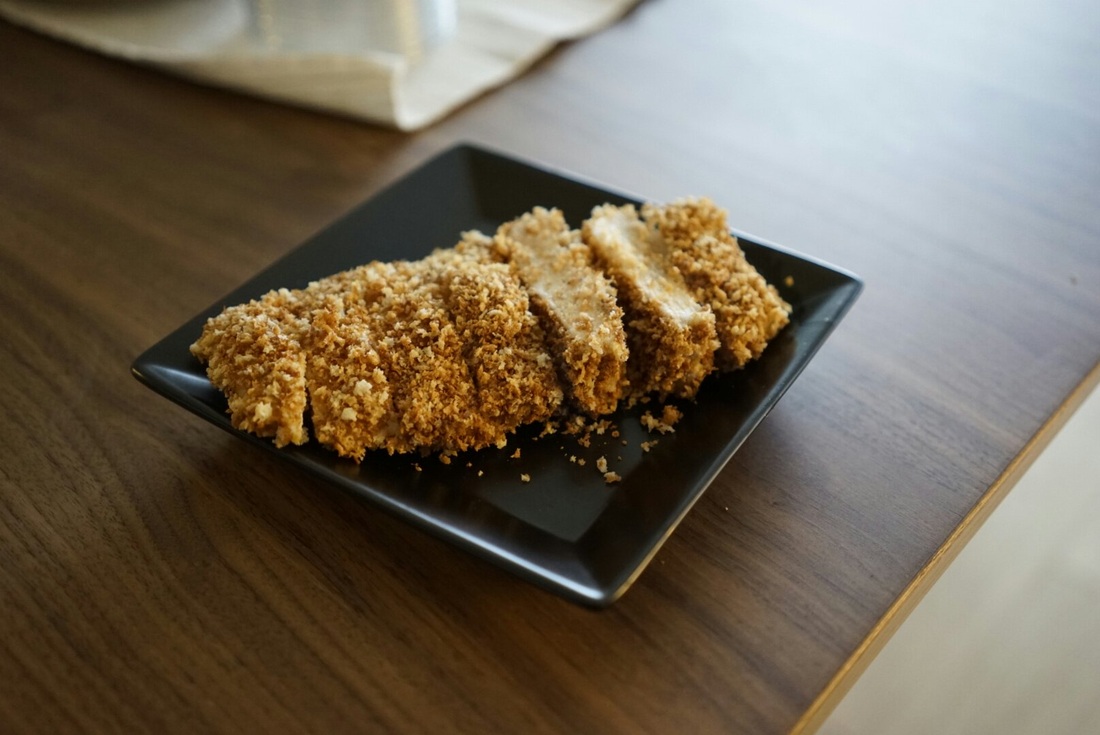
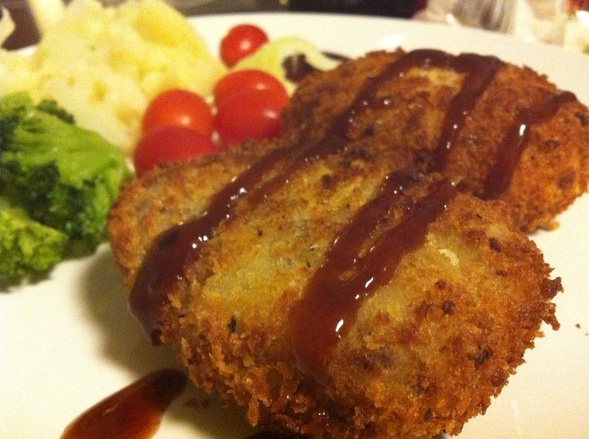
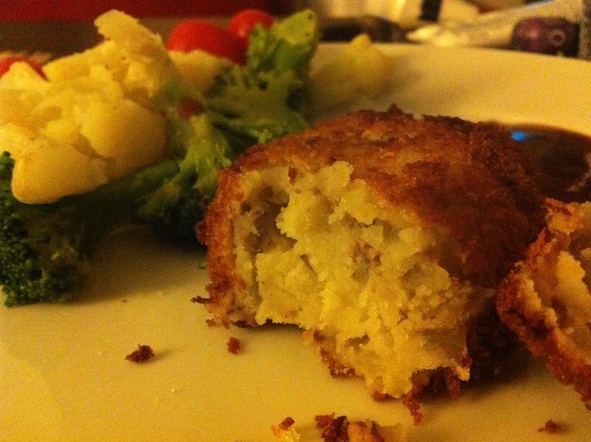
Number of steps:  9
Time taken: 20-30 min 
Approx. 170kcal per korokke 

About This Dish:
Japanese korokkes are said to have a great influence from French croquettes. French croquettes are known to have cream inside, but original Japanese croquettes have potato and ground beef inside. My first impression was "Wow, it's deep frying stuffed potato and meat, it must be so hard". After trying it out few nights ago, I realized that it was VERY easy to make, even though it involves deep frying. 

Many Japanese families get creative with their korokkes. Though the original korokke is known to be potato with ground beef, some make it with cream + bits of crab, yakisoba, veggies, tofu, cheese, the list goes on. This recipe is the original potato and ground beef filling! Additionally, there are korokke stands in Japan selling these goodies. I used to get 1 korokke after school and eat it in the winter while walking to the station. If serving at home, eat it with rice and cabbage with katsu sauce! Yum! 

What You Need:
(Makes 8 korokkes; suggested 2 korokkes per serving)
  • 2 large potatoes
  • 100g (1/4 lb) ground beef or less *Keep in mind that the potato is the leading actor here! 
  • 1 small onion 
  • 1 tbsp of milk
  • 1 tbsp of soy sauce
  • Pinch of salt and pepper
Batter
  • Breadcrumbs/Panko (start off with half a bowl) 
  • All purpose flour (start of with half a bowl) 
  • 1 egg (add more if you run out)
  • Oil (for deep frying)
Picture
Here is a glance of all your ingredients! 


Picture
3. Add the meat in the skillet to cook. Add soy sauce, salt and pepper according to your taste.


Picture
5. Add the meat/onion from the skillet into the bowl with mashed potatoes and mix. Add the milk here too.


Picture
7.2. The korokkes all battered up should look like this :)

Picture
1. Wash the potatoes well, then cut them in half, place on a microwave safe plate, place saran wrap loosely on it and place it in the microwave for 8 minutes or until soft. You can check by sticking a stick into it. If it goes in smoothly, it is done.

Picture
4. Check if the potatoes are done by simply sticking a stick into it. If it goes in without problem till the end, you're all set.

Picture
6. Using your hands, shape the korokkes! I made mine the size of my palm, but the size is all up to you of course.


Picture
8. Heat up the oil for deep frying in a pan. We want the oil to be hot, hot, hot, but be careful and do not burn yourself! You can simply check if the oil is hot enough by throwing in some of the panko. If you hear it frying, it should be hot enough. Throw in the korokkes, then deep fry each side for 20 seconds each, that's approximately 40 seconds per korokke! 

Picture
2. While the potatoes are in the microwave, you can start preparing the meat and onions. Heat a skillet with oil and heat the onions until they get clear. 


Picture
4.2. Mash the potatoes! 


Picture
7. Prepare your batter station. Dip the korokkes in this order: flour, then the egg, then the panko/breadcrumbs.


Picture
9. Deep fry each korokke and place onto a paper kitchen towel to soak up the oil. You can store these delicious things in saran wrap and toss it in the freezer too. 

0 Comments

Recipe: Nikujaga, Japanese dish with beef and potato in sweetened soy sauce. Perfect dish while waiting for Sandy to hit! 

10/28/2012

0 Comments

 
Picture
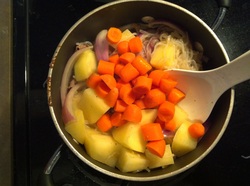
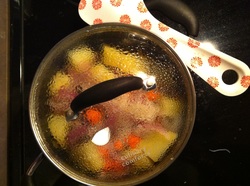
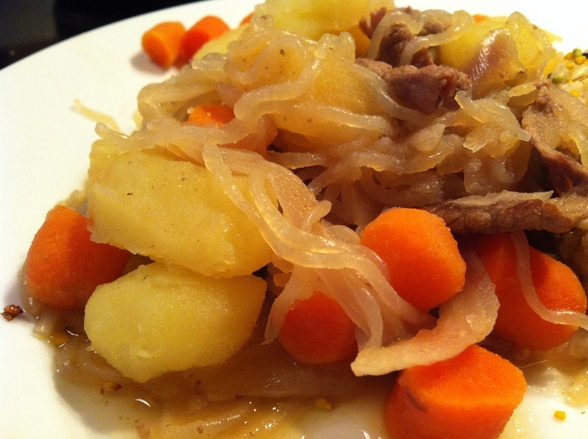
Number of steps:  7
Time taken: Approx. 30 - 40 min
Approx. 250kcal per serving (this recipe makes approximately 2 servings)

About This Dish:
Today I was stuck at home because of Sandy the hurricane, so I ended up making this Japanese homemade winter dish! This is also a type of comfort dish where every family has a distinct taste; some families might make it a strong taste using more soy sauce where some might make it more light. It's eaten with rice and miso soup (and other veggies like salad of course). Yes, I guess we love carbs. This plate is more potatoes than anything else so don't kill it with too much meat! 

What You Need:
(Makes 2 servings)
  • 1/3 pound of thin sliced beef or pork (I used beef and put of it, around 15 slices maybe?)
  • 1 large potato
  • 1/2 onion (I used red onion but it's usually regular onions)
  • 7 baby carrots 
  • 1/2 - 1 pack of shirataki noodles (They sell these at wholefoods or shaws, click here to see what the packaging looks like) 
  • 2 cup water
  • 1 tbsp Japanese sake
  • 1/2 tsp of hondashi 
  • 1/2 - 1 tbsp sugar
  • 1/2 tbsp mirin (adjust to your taste, I ended up putting in 1 tbsp)
  • 1 tbsp soy sauce (adjust to your taste, I ended up putting in 1.5 tbsp)
Picture
1. Cup up the onions like so. While you do this, boil some water in a pot. We're going to boil the shirataki real quick (to get rid of the smell)!

Picture
2. Once the water is boiling, boil the shirataki for 2 minutes or so. Once it's done, drain and cut it up in to edible sizes.

Picture
5. Add the potatoes and carrots. Continue heating on MEDIUM heat until the ingredients are warm.

Picture
1.2. Peel the potatoes and leave it in the water for a couple minutes.


Picture
3. Heat up a pot and fry the thin sliced meat on MEDIUM heat.


Picture
6. Add the water, sake and hondashi. Put a lid on the pot and put down the heat a little bit. Heat for 10 minutes while skimming the skum. After 10 minutes, check to see if the potatoes are cooked through then, add the mirin and sugar. Heat on low for another 5 minutes with the lid on. Mix whenever you think is right but don't crush the potatoes! Be gentle.

Picture
1.3. Cut up the baby carrots too.


Picture
4. Add the shirataki noodles and onion. Heat for 2 minutes  or until the ingredients are warm.


Picture
7.After 5 minutes, add the soy sauce and heat on low for another 5 minutes without the lid. Mix carefully as it heats. Start tasting it and add more soy sauce or mirin depending on the outcome.

0 Comments

    Subscribe via email

    ​Featured Fyuse:

    Popular Posts

    Picture
    Kinkakuji, Kyoto
    Picture
    Non-oil Chicken Katsu
    Picture
    Kawaii! Socks

    instagram: @jpinsider

    Categories

    All
    About Japan
    Appetizer
    Beef
    Chicken
    Dessert/sweets
    Dinner
    DIY
    Egg
    Japanese Breakfast
    Japanese Food
    Japanese Music
    Japanese Quality Series
    Japanese Recipes
    Lunch
    Matcha/green Tea
    Noodles
    Obento
    Pasta
    Pork
    Potato
    Rice
    Salmon
    San Francisco
    Sauce
    Savoury
    Seafood
    Side Dishes
    Tips/how To
    Tofu
    Traveling Japan
    Tuna
    Turkey
    Vegetables
    When In Tokyo
    Yokohama

Powered by Create your own unique website with customizable templates.
  • Feed
  • travel & culture
  • Beauty
  • Recipes
    • Shop Japanese Groceries
  • About Me