jpinsider
  • Feed
  • travel & culture
  • Beauty
  • Recipes
    • Shop Japanese Groceries
  • About Me

Weekend Brunch Quick Recipe: Japanese people love fluffy omelettes.

2/1/2015

0 Comments

 
Picture
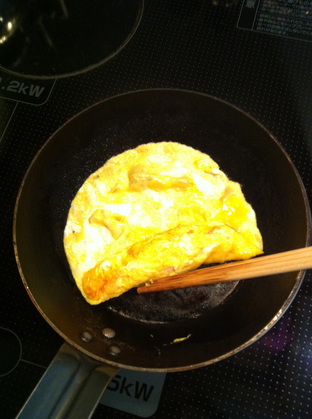
Who doesn't love super fluffy omelettes?

Japanese girls like me are into fluffy snacks, fluffy food, fluffy anything right now. 
Pancakes, omelettes, pastries....The list goes on.

So instead of lining up for 1hr to get fluffy omelettes, why not try it at home?

This applies to those living in San Francisco too!


Recipe for 1 omelette:

  • 1 large egg (or 2)
  • 2-3 tbsp of milk (I use Whole)
  •  (Optional) Cheese, veggies


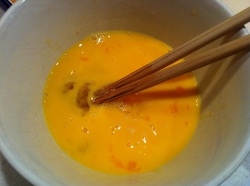
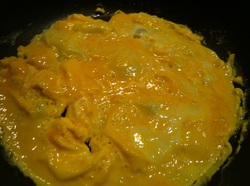
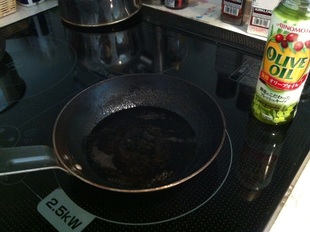
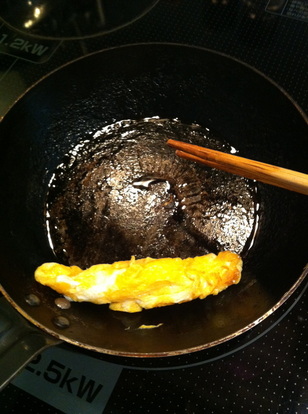
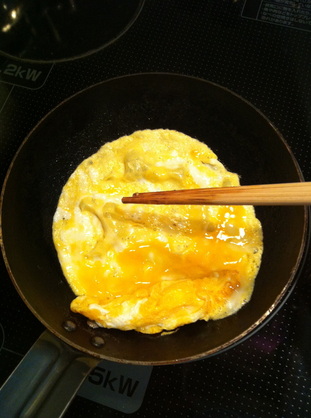
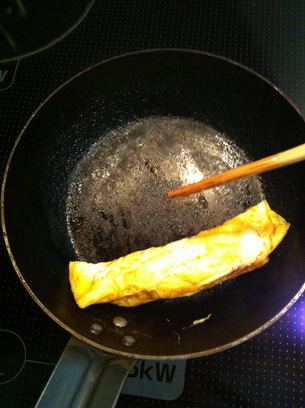
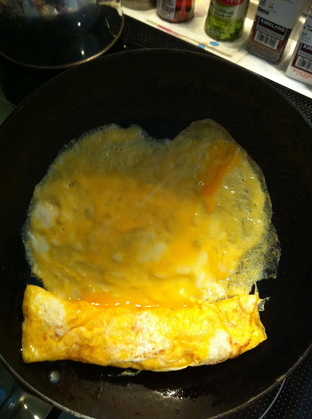
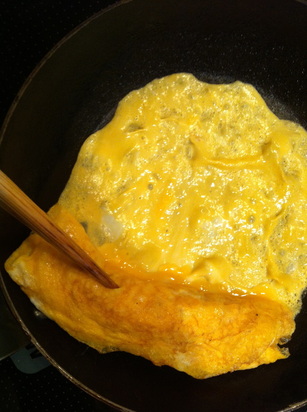
Steps:

1. Whisk the egg and milk. Try to get some air in there!
2. Heat a pan on medium heat.
3. On the heated pan, add a little olive oil or butter to prevent sticking.
4. Pour in the egg, add any optional goodies if any and mix the top layer so it gets a little scrambled.
5. Put the heat down to low and start cooking the egg to your favourite consistency slowly. Slowly!
6. Fold the egg and cook a little more.

fwah-lah!
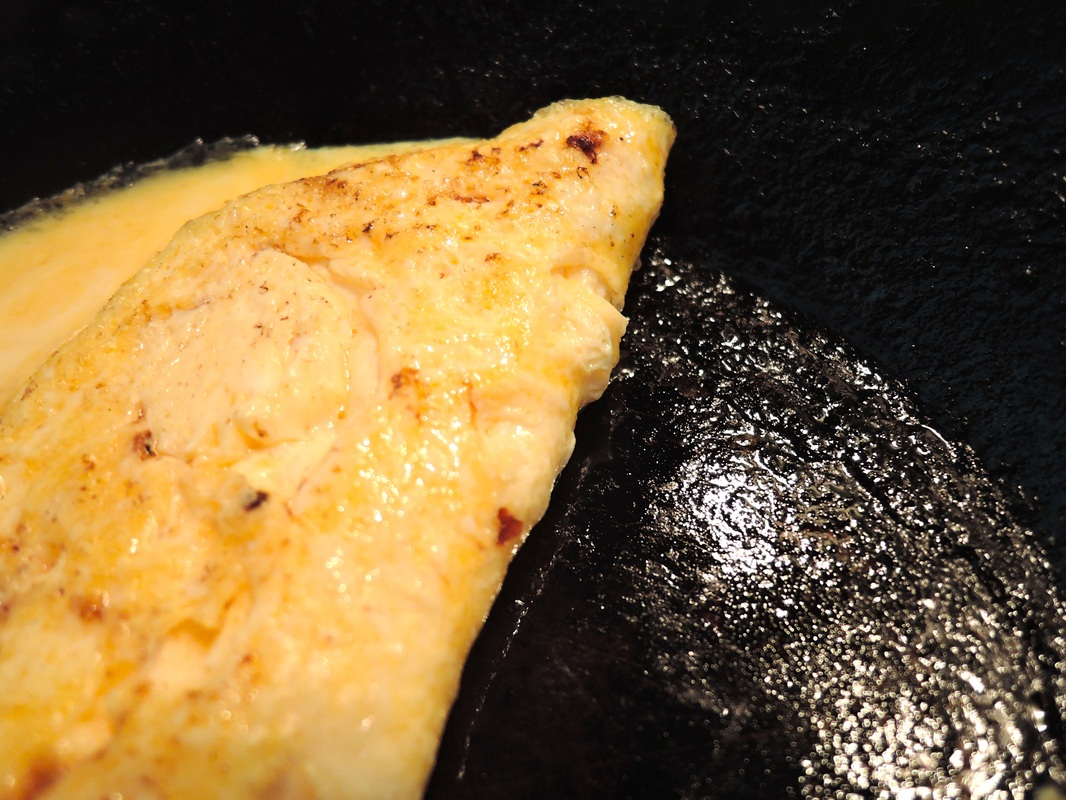
Picture
0 Comments

How To Make Japanese Instant Noodles

5/18/2014

0 Comments

 
Picture
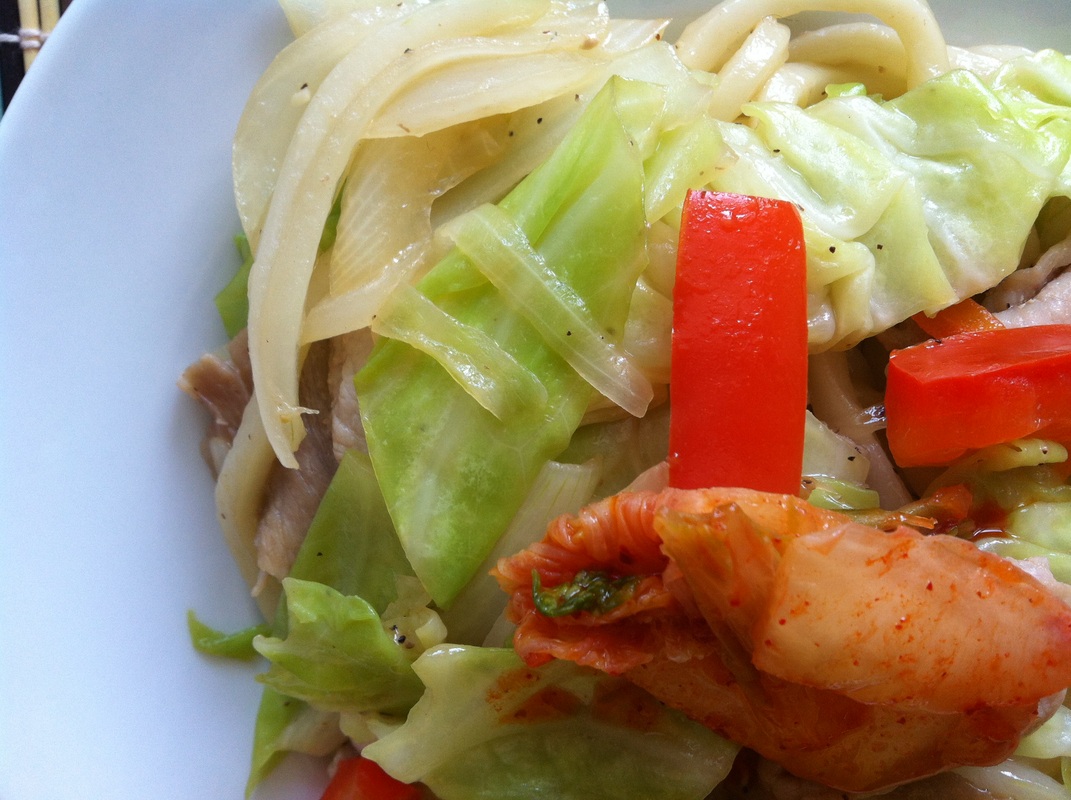
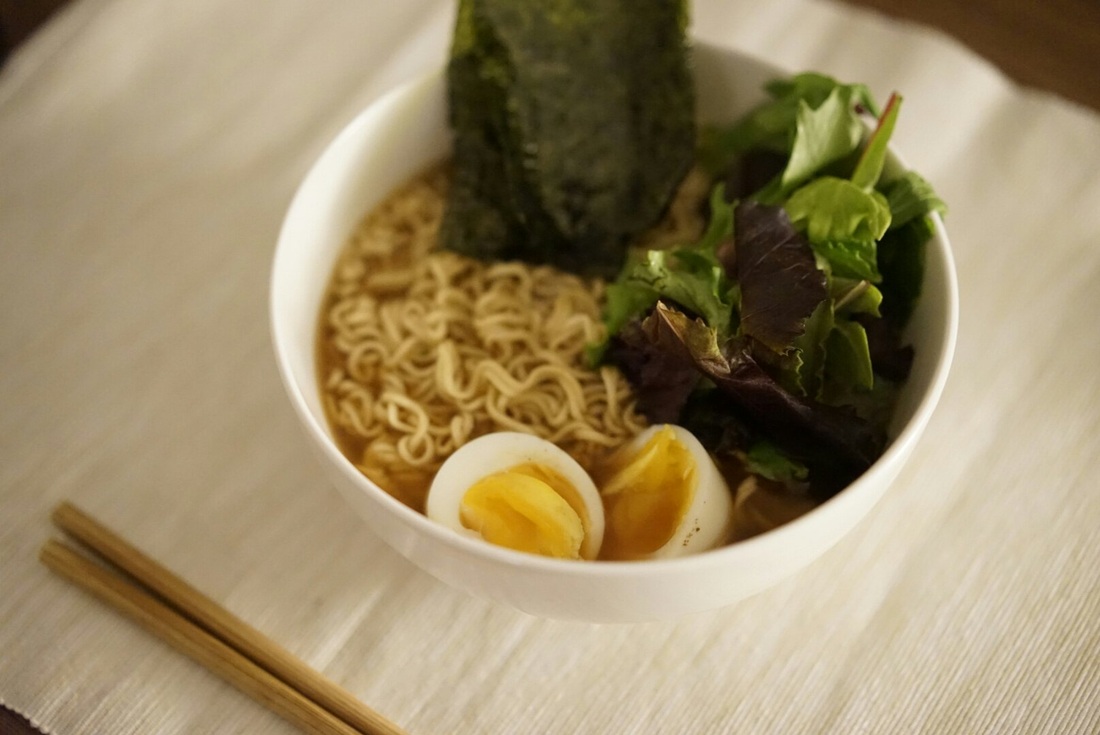
Instant noodles don't have to look "cheap".

Add delicious toppings to make it a proper, healthy, satisfying meal!

  • Boiled eggs
  • Stirfried veggies
  • Seaweed
  • Meat
0 Comments

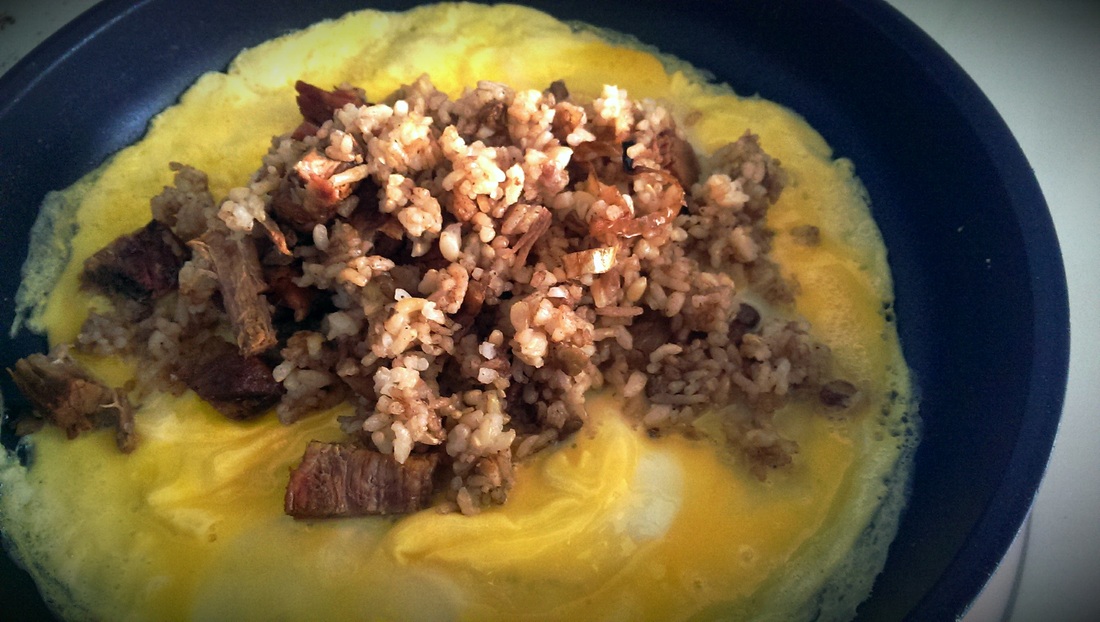
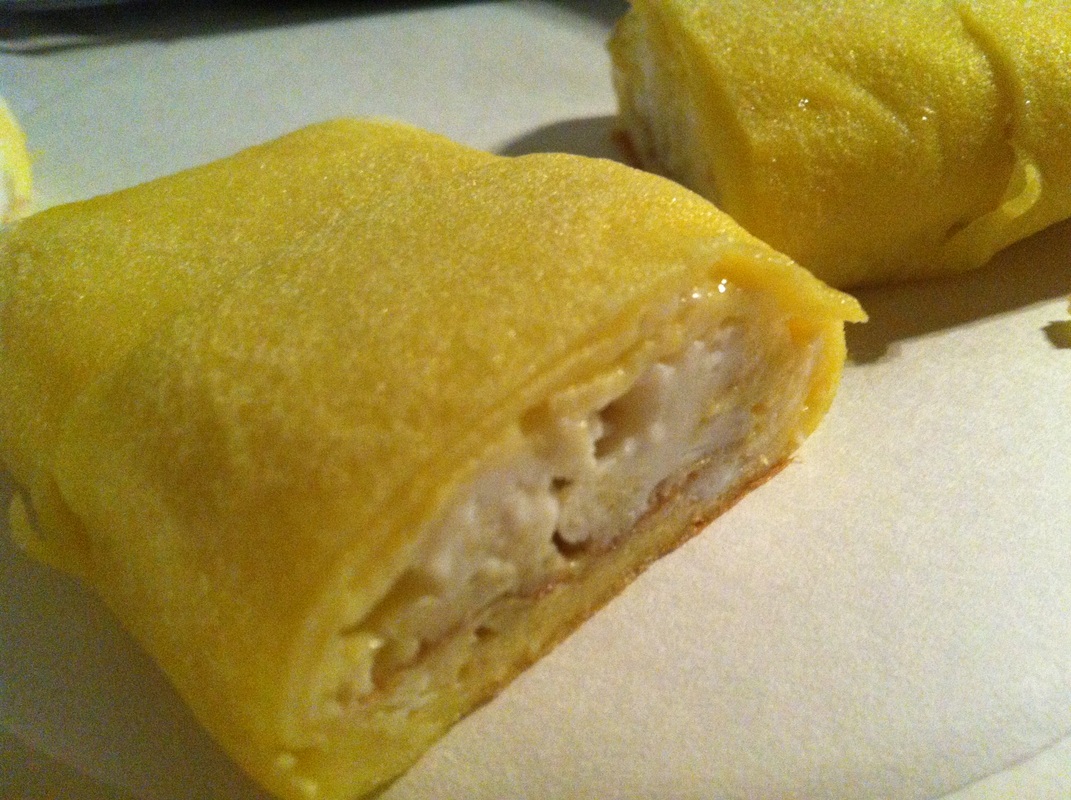
Recipe: Super fluffy omelette stuffed with chicken rice. We call is "om-u-rice" in Japan! 

10/29/2013

2 Comments

 
Picture
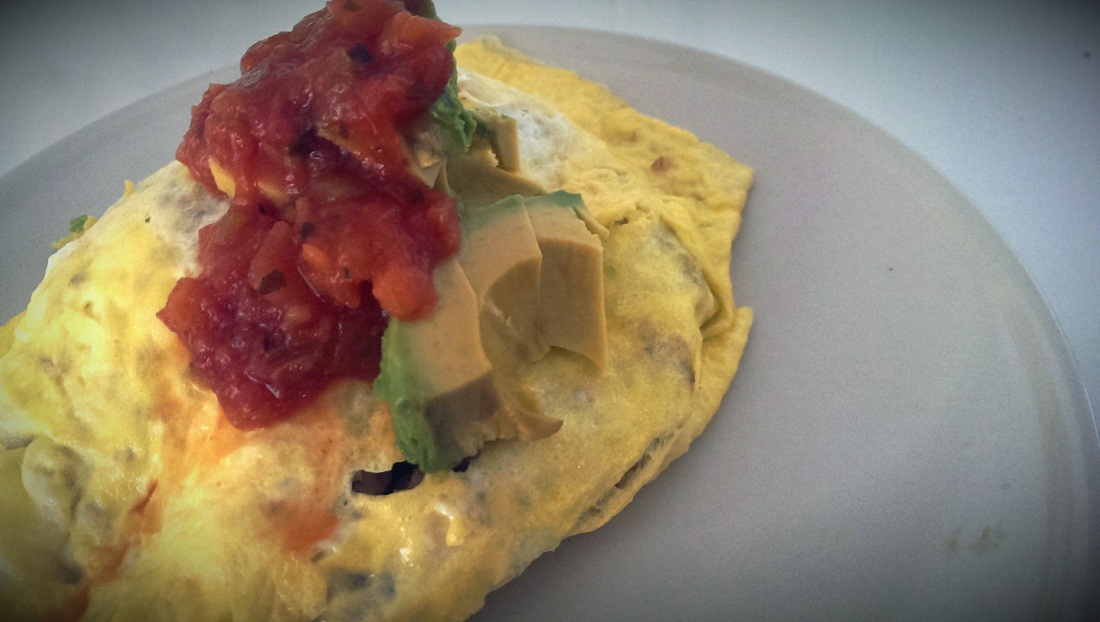
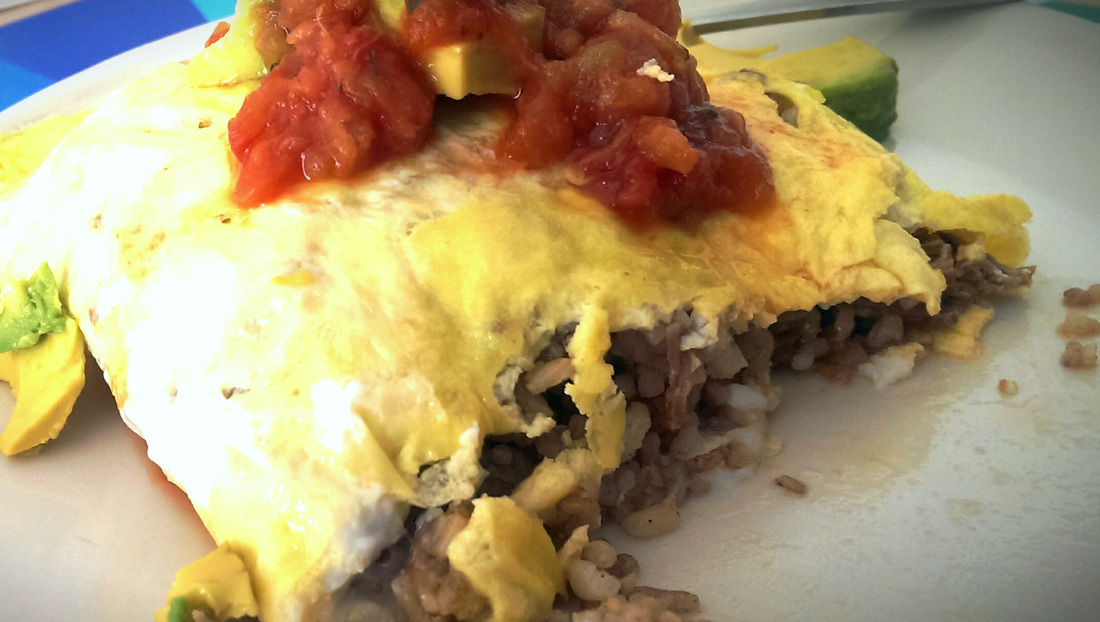
Though I've already introduced this recipe for omelette rice (omu-rice), I'm posting it again. 

Very fun dish to make. Popular dish to make for your boyfriend in Japan ;) Show some love! 

Ketchup chicken rice is a typical stuffing for this dish in Japan but you can get creative as well. This time, I stuffed my omelette with some left overs from burrito night; rice with black beans and some South American spices. Mm! 

What you need (serves 1 dish) :

  1. 2 large eggs
  2. Oil
  3. Rice (chicken rice, ketchup rice, any type of rice works here. See this recipe)
  4. (optional) Veggies 


Steps
:
  1. Start by preparing the stuffing. You can use this recipe or simply stir fry some rice with optional veggies and chicken. It's good to throw in some ketchup or tomato sauce before adding in the rice. This will help prevent blotches of ketchup/sauce in the rice. Throw in the rice after and you'll see a more even tone.
  2. Put the rice out of the pan and keep it to the side while you prepare the omelette.
  3. Heat the pan on HIGH, put a little bit of oil. Mix the egg in a separate bowl and pour it into the heated pan. Quickly scramble the egg and throw in the rice. 
  4. Start wrapping the egg up on one side of the rice (Be careful not to overcook the egg here). Flip the omelette+rice onto a plate. It's okay to toss the omelette onto the plate by turning the pan up side down! :)
  5. Top it off with ketchup or be fun like me and place some pineapple salsa and avocado! 


Note: Steps #3 and #4 should only take 2-3min as the egg heats fast! 
Picture
Picture
Picture
2 Comments

Practice makes perfect. 

7/11/2013

0 Comments

 
Picture
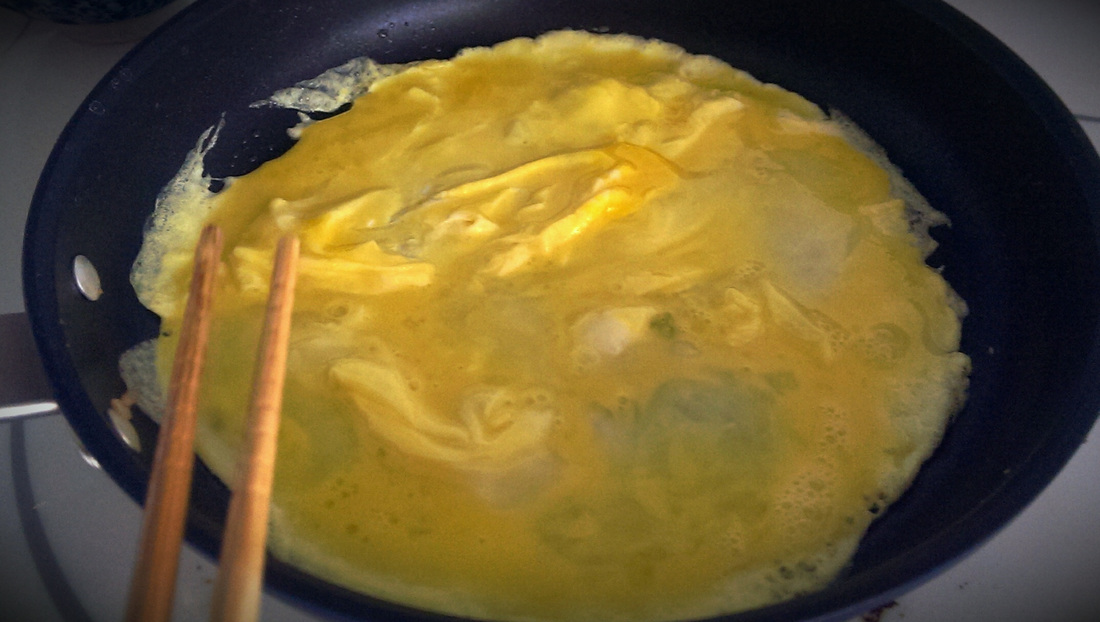
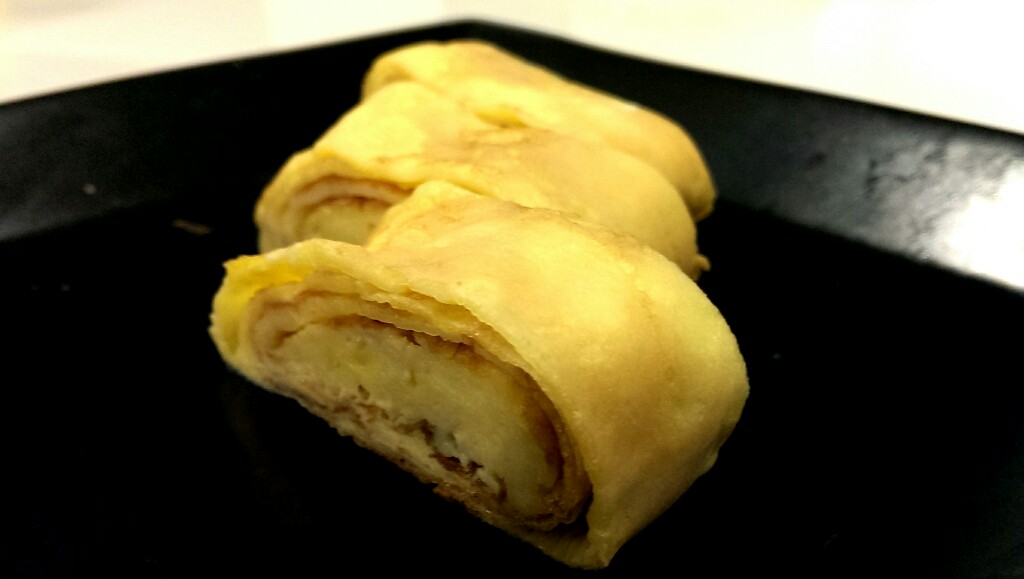
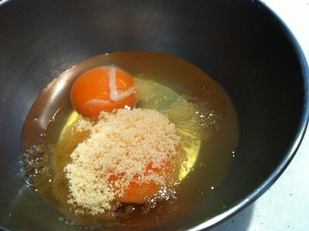
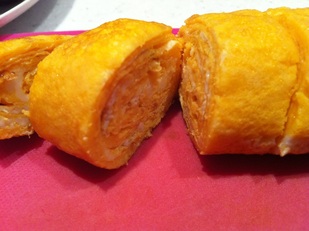
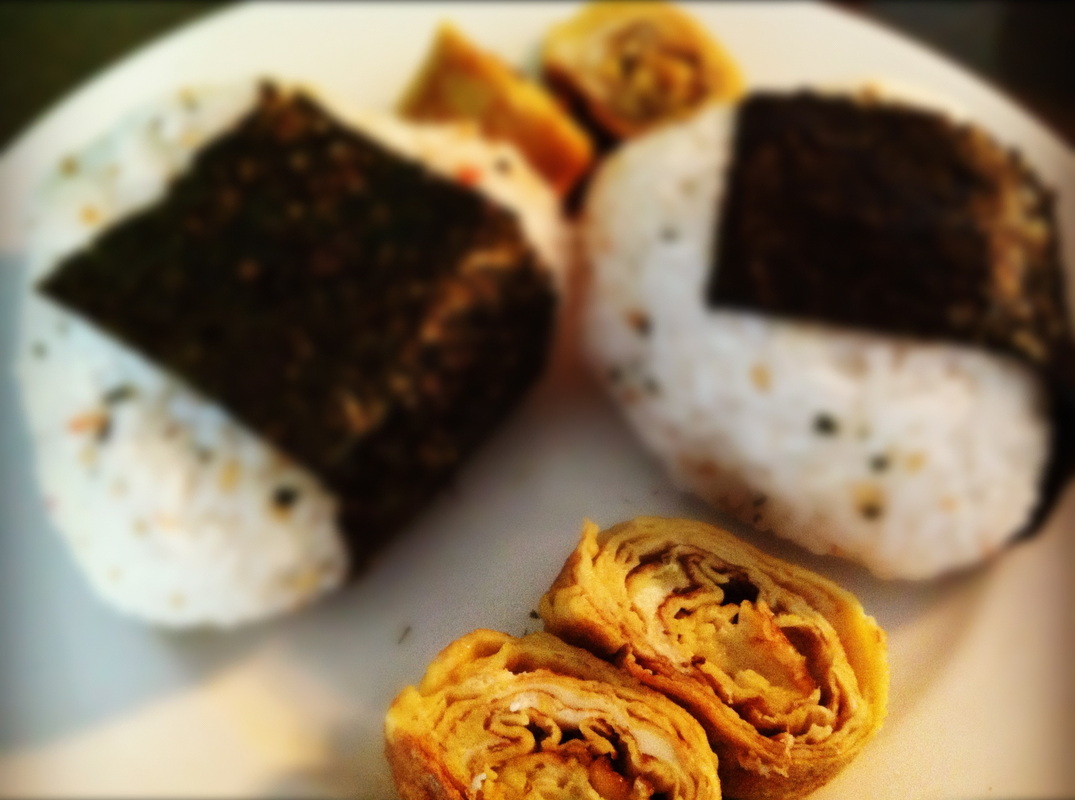
I've got multiple comments about Tamagoyakis, Japanese sweet omelettes. 

According to some research, Japanese people only started to eat egg during the Edo period (16th to 18th century). Even then, I'm sure it was a luxury item. Now tamagoyakis are often made as a form of comfort food. Moms and Dads pack it in children's lunches a.k.a. obento. Every time I eat a tamagoyaki I always reminisce my mom's homemade lunches back in elementary school. 

Just like an onigiri (rice ball), it's a dish which reminds you of your family. Somehow tastes different depending on the family though the ingredients being used are probably the same. 

Ingredients being used are eggs and sugar with a dash of oil on the pan. Use a small pan for perfect results.

It may seem difficult at first but practice makes perfect. The more you try, the more easier it gets. I promise! 

As I mentioned earlier, I sometimes make these at night, cut them, freeze them in saran wrap and take it for lunch in its frozen state in the morning. By lunch time, they are defrosted and taste delicious! 

They go perfectly with rice; especially onigiri. I hope you check out the recipe I posted for this dish and try it out yourself! 
Picture
0 Comments

Recipe: Bento life. Starting simple. 

6/25/2013

0 Comments

 
Picture
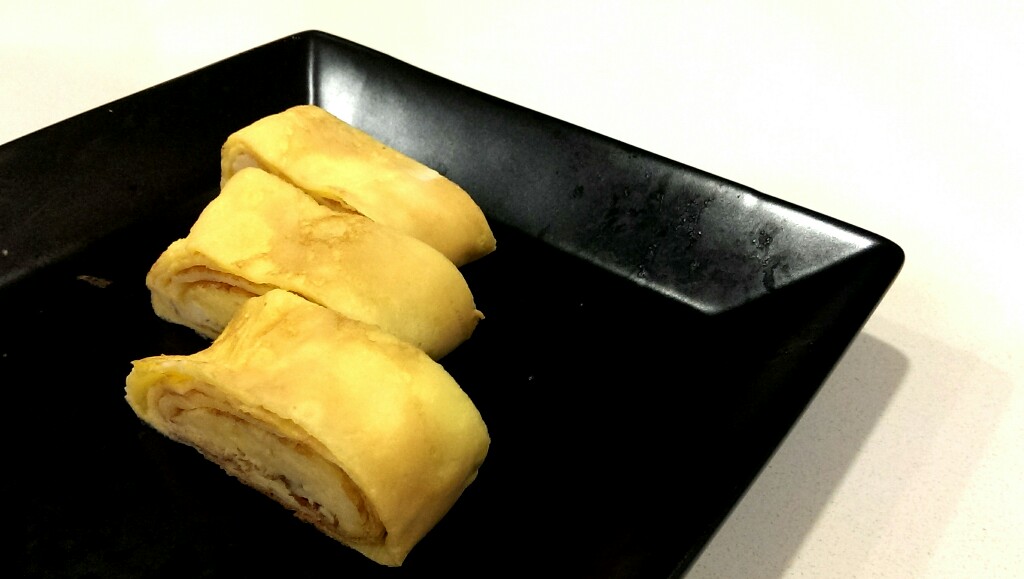
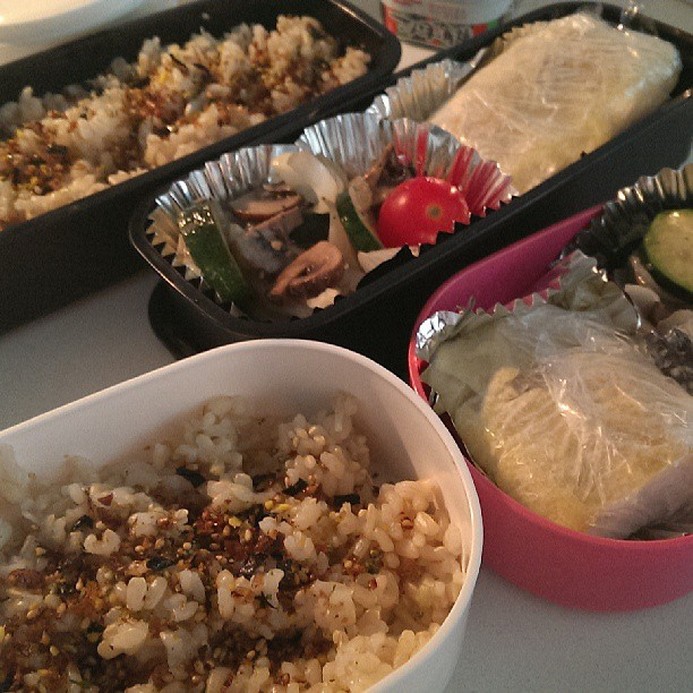
So I've begun my life as a fulltime employee in San Francisco. Absolutely loving it so far. Starting my second week, I decided to pack obentos to work! There are cute cafes around office but they are all crowded and the last thing I want to do is wait in line! I've never really packed true Japanese obentos myself. I've always watched my mom though. I decided to start simple. A bed of rice with furikake, tamagoyaki and some stir fried veggies. Absolutely perfect. 

How to make a simple but delicious and safe to eat obento? Read below! 

Rice
  • I cooked the rice on timer mode so I can pack fresh rice in the morning. Let the rice out to cool before packing it up.


Tamagoyaki (Japanese sweet omelette)
  • Click here for the link to the recipe. Once you have cooked it, wrap it up in saran wrap and store it in the freezer! In the morning, take it out of the freezer and pack it into your obento. By the time it's lunch time, it will be defrosted and delicious. I promise.
  • After learning the successful result of my frozen tamagoyaki defrosted by lunch time, I've decided to make batches of them before hand on the weekends so I don't have to do it every night prior. (Yes, my boyfriend and I absolutely LOVE tamagoyakis and can't get enough of them)


Stir fry veggies
  • I simply stir fried veggies (like zucchini, onion, garlic, mushroom, salt and pepper) and store it in the fridge until next morning.
Picture
0 Comments

Recipe: Simple "Yaki Udon", fried udon recipe! My go to recipe when I'm starving and in need of a healthy, substantial lunch! 

5/5/2013

1 Comment

 
Picture
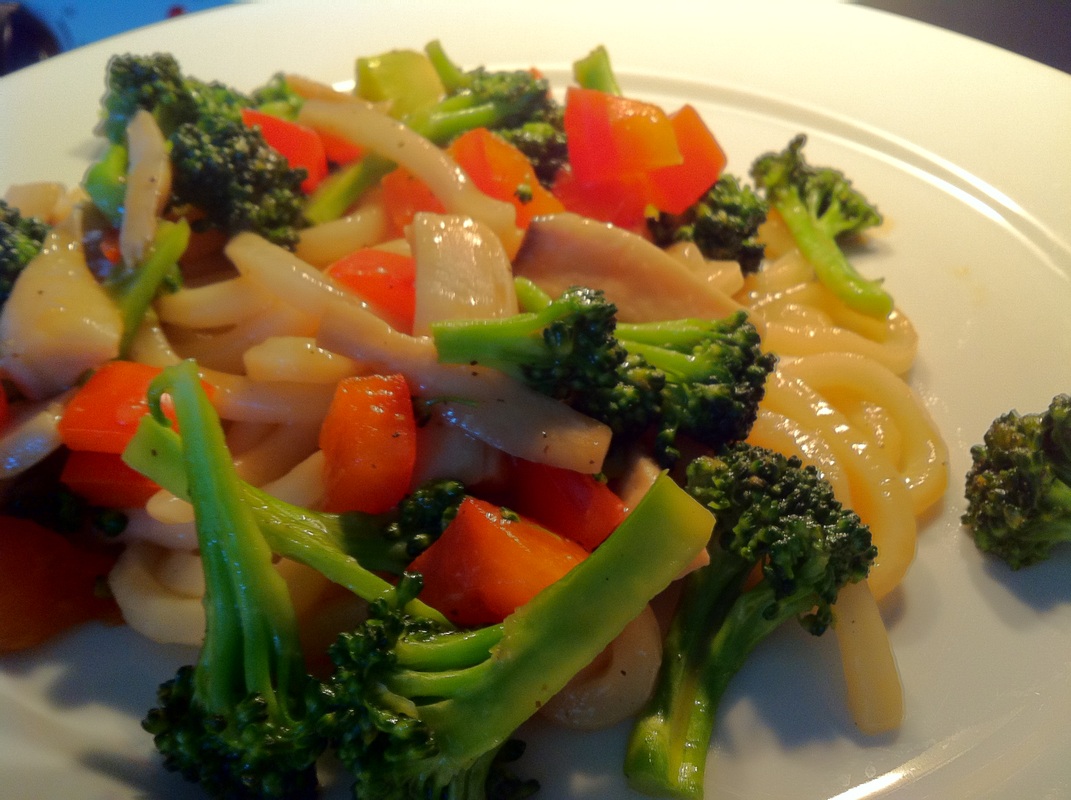
Time taken: 5 - 10 minutes
Approximately 300 kcal per serving

About This Dish:
I head over to my freezer when I find myself hungry and in need of a substantial and healthy Japanese meal at home. Why? Because I usually have a stash of udon hidden in my freezer! Yaki-Udon (Fried Udon) is one of Japan's most popular noodles, udon, stir fried with a bunch of vegetables and optionally meat. This recipe adds a delicious taste to the dish by adding a little bit of sesame oil and Japanese soy sauce! Be creative in your additions and you might end up with an amazing dish for lunch! My mom actually used to make this for me for breakfast. Good old days :) 


While you're at it, why not check out my other udon recipe as well? 

What You Need:
(Makes 2 servings)
  • 1 package of udon noodles (I use frozen ones)
  • (Optional) Vegetables of your choice (I use onion, cabbage, red pepper, mushrooms, carrots...)
  • (Optional) Meat of your choice (I often use thin sliced pork)
  • 1/2 tsp sesame oil
  • 1 - 2 tbsp Japanese soy sauce
  • Salt & Pepper to taste


Steps:
  1. Cook the udon noodles as instructed on package (I usually throw in the vegetables in the last few minute or so to boil together with the noodles)
  2. Heat a pan on MEDIUM heat and throw in the noodles, vegetables and meat (if you have it). Season with soy sauce, salt and pepper. 
  3. At the end, season with sesame oil and serve! 
Picture
1 Comment

Recipe: Japanese Omurice! Omelette made with fried rice. Want to impress your significant other? Whip this up for dinner tonight! 

1/10/2013

0 Comments

 
Picture
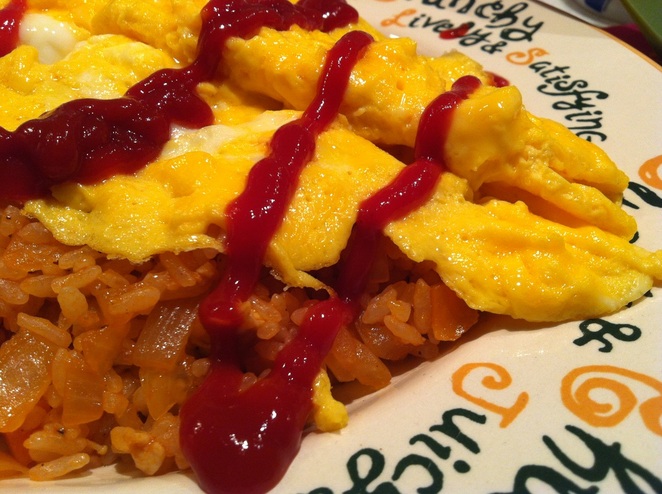
Number of steps:  9 steps
Time taken: 15 - 20 min

About This Dish:
Omurice is essentially a soft and fluffy omelette topped on chicken rice which is usually ketchup flavoured. Some people wrap the chicken rice into the omelette and some top the omelette carefully on top of the bed of rice. This dish is popular as a homemade dish and as a lunch/dinner dish in western restaurants. You could add some more ketchup on top of the dish or pour beef stew on top (a.k.a. Hayashi rice, which I will post in the future). I cannot tell you how great the rice tasted. It tasted as though I had been cooking it for hours or in my crockpot! 

What You Need:
(For 2 dishes)
  • 2 cups of rice (Of course, I used Japanese rice. Usually rice previously in the fridge works best)
  • Mixed vegetables (I used half an onion and some carrots)
  • 50g of chicken (around 2oz)
  • 1-1.5 tbsp of butter
  • 2 tsp soup stock powder/cube
  • 100ml water (0.4 cups)
  • 2 tbsp ketchup (Adjust as needed, I ended up putting a little more than this)
  • 1 tsp sugar
  • Pinch of salt and pepper
  • Oil
  • 4 eggs (2 eggs per person shall do!)
  • Optional: Couple tsp of milk
Picture
1. Cut the veggies and chicken into small pieces like the photo. Heat up a pan, place the butter, then throw in the veggies and chicken. Cook until the onion becomes fairly clear.


Picture
4. Add the rice and season with salt and pepper as you wish! I personally would recommend adding warm rice to the mixture.


Picture
7. Once you make sure the pan is hot hot HOT, pour in the egg. I put my heat up to HIGH here.

Picture
2. Add the soup stock, water, ketchup and sugar to the mixture and as you continue to stir, cook it on MEDIUM heat. Make sure to keep mixing to avoid any burns! 


Picture
5. In a bowl, crack open 2 eggs and add a tsp of milk and mix roughly. Don't over mix.


Picture
8. Mix the egg 3-5 times in a circle using a utensil and remove from heat.

Picture
3. Cook the mixture until most of the water evaporates. This is very important. We don't want the rice to be soggy.


Picture
6. Heat up a different pan with 1-2 tbsp of oil. I know this could sound like a lot of oil, but it helps make the egg fluffy.


Picture
9. Top the egg carefully on top of the bed of rice and add your favourite sauce on top. I would just go with ketchup on lazy nights. 


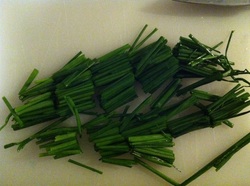
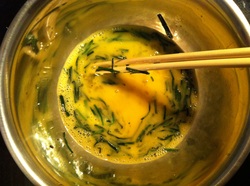
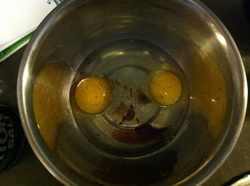
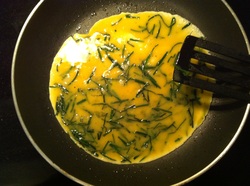
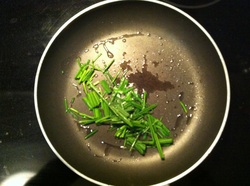
Note: If you want to wrap your chicken rice with the egg, simply put the bed 
of rice on top of the egg at step 7. Place on the edge so you can roll the egg up like an omelette!
0 Comments

Recipe: Bored of the eggs you eat for breakfast? Try "niratama"; scrambled eggs with chives. A popular, casual, savoury Japanese breakfast dish! 

10/31/2012

0 Comments

 
Picture
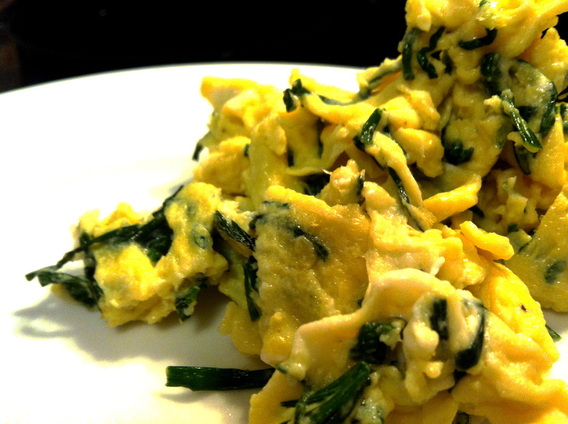
Number of steps:  6
Time taken: Approx. 5 min
Approx. 200 kcal per serving

About This Dish:
If you're bored of your regular scrambled eggs, you should definitely try "nira-tama", chives and eggs. Many Japanese moms make this in the morning since it's so easy to make but still so tasty! Goes great with rice (I love rice with natto), Japanese mayo and miso soup! 

What You Need:
(Makes 1 serving)
  • 2 eggs
  • 1/3 cup of raw chives (Honestly, however much you want!) 
  • 1/2 - 1 tbsp olive oil
  • 1 tsp soy sauce
  • 1 tsp Japanese sake
  • (Optional) You can add sugar, mirin, sesame oil etc. Be creative :)
Picture
1. Wash, then cut up the chives to 3 - 4 cm lengths.


Picture
4. Once the chives are heated, place them into the bowl with eggs and stir.

Picture
2. Crack the eggs into a bowl and add the soy sauce, sake. Optionally you can add  a little bit of sugar, mirin, sesame oil; all up to you.

Picture
5. Using the same pan, scramble the eggs. I usually keep the pan on MEDIUM HIGH heat and swiftly mix the eggs. Quick and easy!

Picture
3. Heat up a pan on MEDIUM HIGH heat and pour the olive oil in. Once the oil is heated, place the chives in and cook for 2-3 minutes.

0 Comments

Recipe: Super simple to make Japanese style beef donburi (rice bowl) while weathering out Sandy. 

10/29/2012

0 Comments

 
Picture
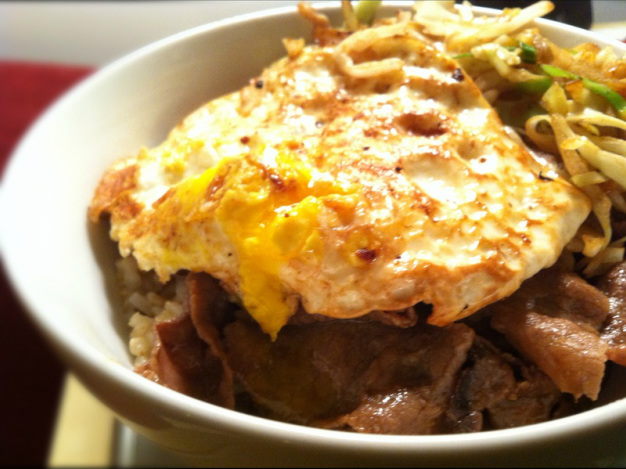
This donburi (rice bowl) was so easy to make I'm not even going to post step by step pictures! I have a bunch of frozen rice in my freezer so I used that which makes the process even quicker! 

Number of steps:  4
Time taken: Approx. 5 - 10 min

What You Need:
(Makes 1 bowl)
  • 100g of thin sliced meat (I used beef, just put in as much meat as you like)
  • Bowl of rice (I used brown rice)
  • 1 egg
  • Vegetables (I only used cabbage)
  • (sauce) 2 tbsp soy sauce 
  • (sauce) 1 tbsp sake or mirin
  • (sauce) 1 tbsp sugar
  • (optional for the sauce) shredded garlic, shredded onion, sesame oil


Steps:
  1. Cook or heat up the rice and put it in a bowl you will be eating from.
  2. Heat up a pan on MEDIUM HIGH and place a table spoon of oil. Once the pan and oil is heated, throw in the slices of meat and cook until the colour changes. Then, add the ingredients of the sauce.  Adjust the amount of sauce according to your taste. Mix until the sauce reaches throughout and put it all on top of the rice.
  3. Now, using the same pan, fry the egg! Place oil on the pan again, drop the egg, drop a couple of droplets of water onto the egg and put a lid on the pan. Flip the egg once it is fried enough and cook it for 1 minute or so. Place it on top of the meat! 
  4. Using the same pan, fry the vegetables! You can even steam your veggies if you are looking for a healthier option. 


0 Comments

Recipe: Nostalgic and Appetizing Tamagoyakis (Japanese Sweet Omelette)

9/5/2012

2 Comments

 
Picture
Number of steps: 8         
Time taken: 10-15 min


About This Dish:
This type of tamagoyaki is usually eaten for breakfast or lunch when onigiri (rice balls) or rice is served. Believe me, this goes terrifically with onigiri! Japanese mothers usually pack this into their children's lunch boxes making this dish a comfort food. 


What you need:

(Makes 6 pieces of tamagoyaki, enough for 2 people!)
  • 2 large eggs
  • 1.5 TBSP sugar (brown or white)
  • Oil for the pan (I use olive oil)
  • A small pan 


Additional Comments:
  • Some people like to add soy sauce and vinegar. Play around and see what you like best! You can even try to add veggies.
  • I recommend using a small pan for this dish (circular or rectangular). I use a circular pan that is roughly 15-20cm in diameter. Amazon sells rectangular pans for making tamagoyakis :)
Picture


1. Place 1 tbsp of oil on the pan and start heating it up using medium heat. We want to make sure the pan is hot hot before placing anything on it.

Picture


2. While you are heating up the pan, place 2 eggs and 1.5 tbsp of sugar (I used brown sugar here) and mix it, just like when you make scrambled eggs.

Picture


3. Pour in a sixth of the mixture from (2) and scramble it up. Put it all to one side (like the photo). This will be the center piece of the rolled up Japanese omelette!

Picture


4. Pour in the second sixth of the egg mixture on top of (3). Lift the inner side of (3) so that the new mixture pours beneath it. 

Picture


5. Roll the egg up! From bottom to top, starting from the heavy side of the egg where the center piece is.

Picture


Picture


6. Move the rolled up egg from (5) to the bottom of the pan once again. If there is not enough oil, drop in some more of it before you move on to prevent the egg from sticking onto the pan.

Picture


7. Repeat processes (4) through (6) four more times until you run out of the egg mixture. Remember, always lift the center piece up a little bit to pour the new mixture into the bottom (please look at photo below). This really helps when you roll the egg up; it sticks the new egg mixture to the already existing one.

Picture
Picture


8. After you complete the process, cut the omelette up into 6 equal pieces! 

This dish is eaten usually for breakfast and lunch when onigiri (rice balls) and rice is served with other meat and veggies. Enjoy and please let me know of any feedback you may have! 

2 Comments

    Subscribe via email

    ​Featured Fyuse:

    Popular Posts

    Picture
    Kinkakuji, Kyoto
    Picture
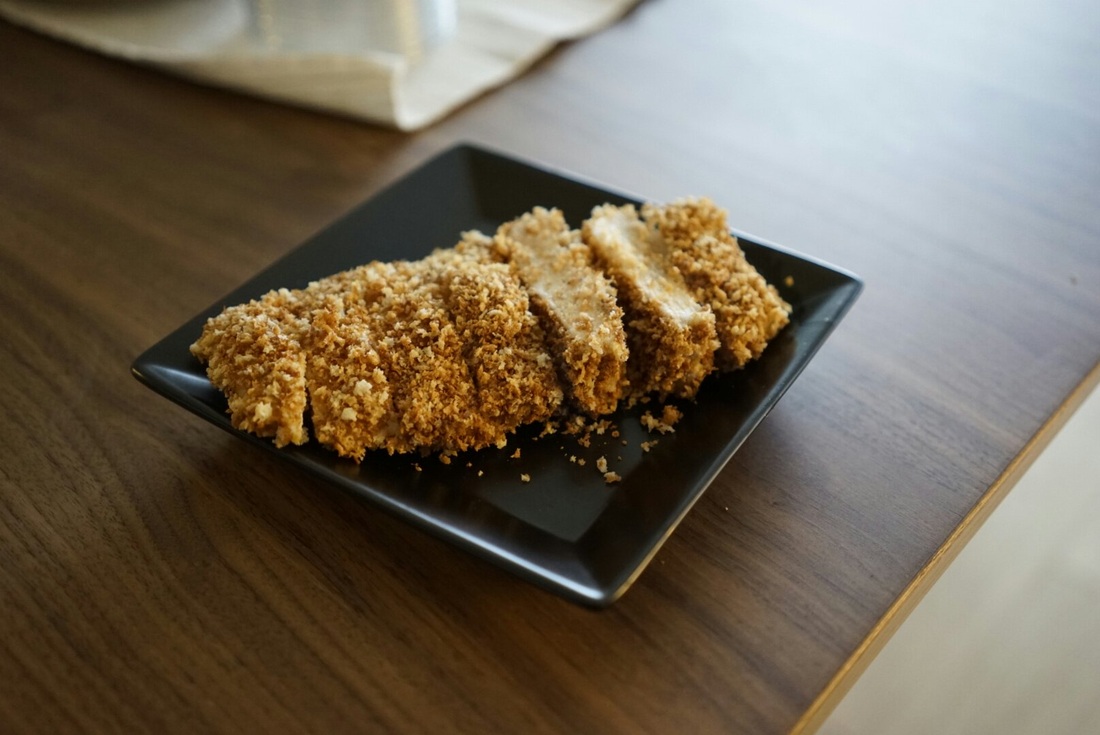
    Non-oil Chicken Katsu
    Picture
    Kawaii! Socks

    instagram: @jpinsider

    Categories

    All
    About Japan
    Appetizer
    Beef
    Chicken
    Dessert/sweets
    Dinner
    DIY
    Egg
    Japanese Breakfast
    Japanese Food
    Japanese Music
    Japanese Quality Series
    Japanese Recipes
    Lunch
    Matcha/green Tea
    Noodles
    Obento
    Pasta
    Pork
    Potato
    Rice
    Salmon
    San Francisco
    Sauce
    Savoury
    Seafood
    Side Dishes
    Tips/how To
    Tofu
    Traveling Japan
    Tuna
    Turkey
    Vegetables
    When In Tokyo
    Yokohama

Powered by Create your own unique website with customizable templates.
  • Feed
  • travel & culture
  • Beauty
  • Recipes
    • Shop Japanese Groceries
  • About Me