jpinsider
  • Feed
  • travel & culture
  • Beauty
  • Recipes
    • Shop Japanese Groceries
  • About Me

Recipe: Got Thin Sliced Beef? Time For Super Easy, Savoury Sukiyaki Then...

7/7/2014

0 Comments

 
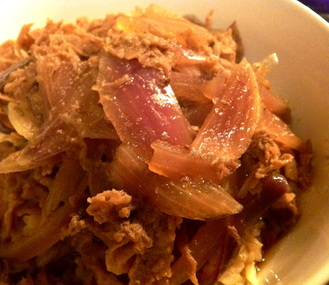
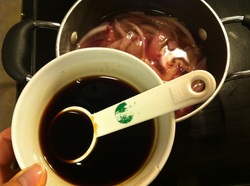
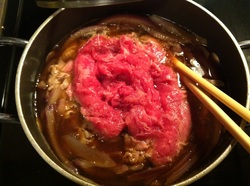
Here in San Francisco, I'm lucky enough to have a Japanese market. Every 29th of this month, thin sliced meat is 20 percent off. We buy 5 to 7 packs of meat and freeze them all. What to do with thin sliced beef? Sukiyaki style stew!

For those of you who don't know, sukiyaki is a savory, sweet meat dish. It is usually cooked with a bunch of vegetables, but since I was lazy tonight, I only used meat.

Every Japanese house hold has their own taste of Sukiyaki. Some like it with a very strong salty taste, some like it weaker. People in Kansai like it bold where as Kanto like it more bland. I love it the Kansai style, so keep that in mind!

All you need is:
  • Thin sliced beef (half a pound)
Sauce
  • Japanese soy sauce (2-3 tbsp)
  • Sugar (1-2 tbsp)
  • Mirin (1 tbsp)
  • Sake (1 tbsp)
  • Dashi stock (1/2 cup)
  • Optionally, add all different kinds of veggies, egg and tofu as you wish! (e.g. Cabbage, green onion)


Steps:
  1. Cook the thin sliced beef quickly and pour in the sauce and simmer. That's it! 


Belos is my Lekue Steamer. Scroll to read more! 
Picture
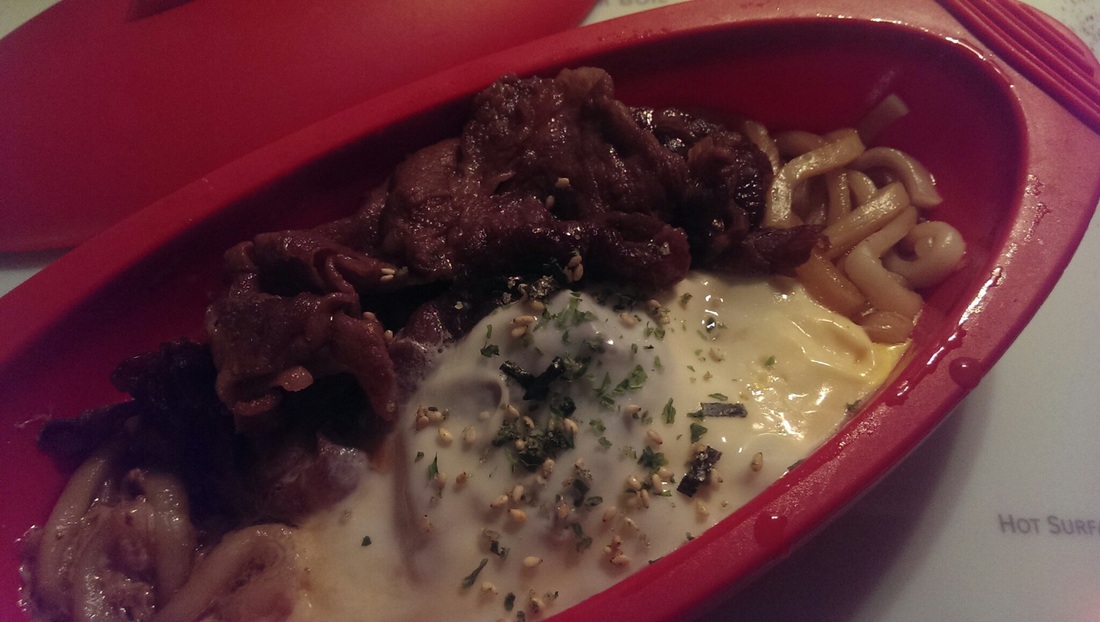
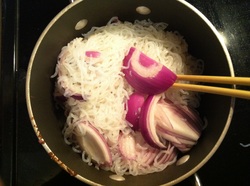
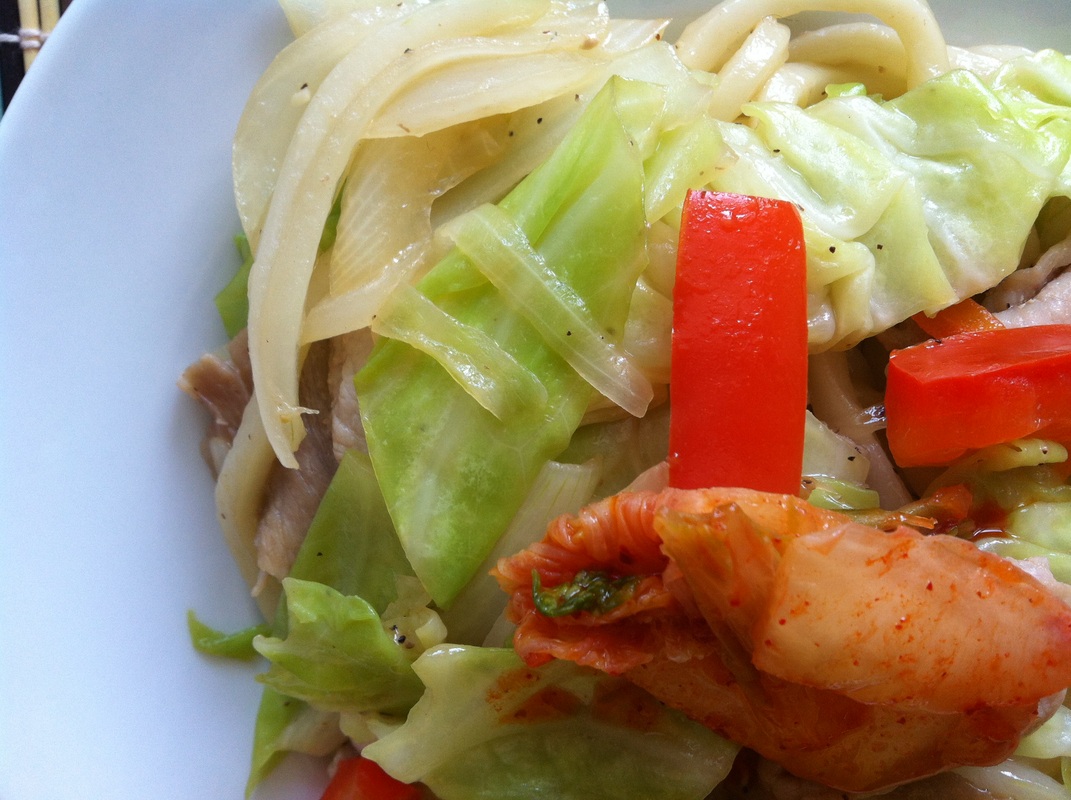
I also experimented with a Lekue (Steamer) to make a similar dish with udon! Even more simple. Simply throw in all these ingredients and put it in the microwave! 

All you need for this Lekue Steamer Recipe is:
  • How ever much meat you want (I put in 4 slices of thin sliced beef)
  • 1 pack of Udon (I used frozen)
  • 1 egg
  • (Optional) Veggies 
  • Sauce: Half the ingredients for the sauce above. 

Steps:
  1. Lay the Udon, veggies and meat into the Lekue steamer. Pour in the sauce.
  2. 5 min in the microwave for Power level 6 (or ~600 watts)
  3. Crack in the egg after step 2. Using a fork, puncture the egg and heat for 2 min.
0 Comments

Recipe: Super Crispy Gyoza Dumplings Filled with Keema Curry. Best Creative Twist on a Gyoza. Kind of like Mini Empanadas! 

1/4/2014

0 Comments

 
Picture
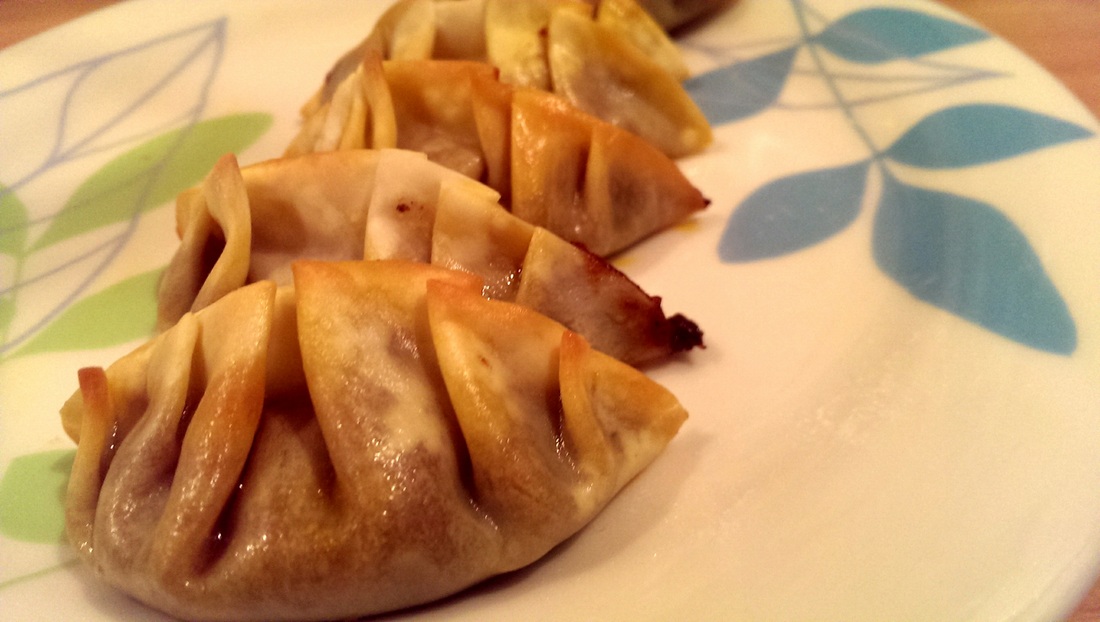
Who likes Empanadas?
Who likes Gyozas?

Who wants to hear about a fun, delicious twist on a gyoza? 

Most of us who access this blog love curry (I hope). Especially Japanese Curry.


Today, I decided to wrap up Keema curry in the Japanese Gyoza dumpling wrappers!  

Why, you ask? Because, I was craving for a snack somewhat similar to an Empanada. Unfortunately, it's very hard to find frozen Empanadas here in Japan, but dumpling wrappers are very cheap! 

These delicious dumplings were super crunchy and crispy on the outside. The curry inside and the wrapper itself matched perfectly too. Pairs great with wine or beer. Great appetizer or finger food for parties! 

Keema curry, for those of you who have not tried it yet, is basically stir fried minced meat with curry spices. It's not runny  like the traditional Japanese curry. It's more like paste. That's why I thought it would be a great idea to wrap it up with Gyoza wrappers! 

I bought the ready-made Keema curry but I plan to post a recipe for it soon as the ready-made kind may be hard to find in the US....If you cannot find the ready-made curry but want to try this a.s.a.p, I highly recommend for you to cook some minced meat and add some salt, pepper, curry spice and maybe even some cumin? 


Steps
  1. Once you have the curry cooked and ready, wrap a teaspoon of it in a Gyoza dumpling wrapper. You can use other dumpling wrappers or even some pie dough!
    If you're wondering how to wrap a gyoza dumpling, check this recipe out 
  2. Heat the oven at 200C (370F) and place the dumplings in for 10-15 minutes until gold and crispy.


That's it. If you decide to use ready-made curry/meat like me, it takes less than 20 minutes. 15 minutes of it is just waiting for it to cook in the oven...

Enjoy! 
Picture
Picture
0 Comments

Recipe: Preparing for winter recipes. Shabu shabu @ home. Cheaper, healthier, easier and heart warming.

10/6/2013

0 Comments

 
Picture
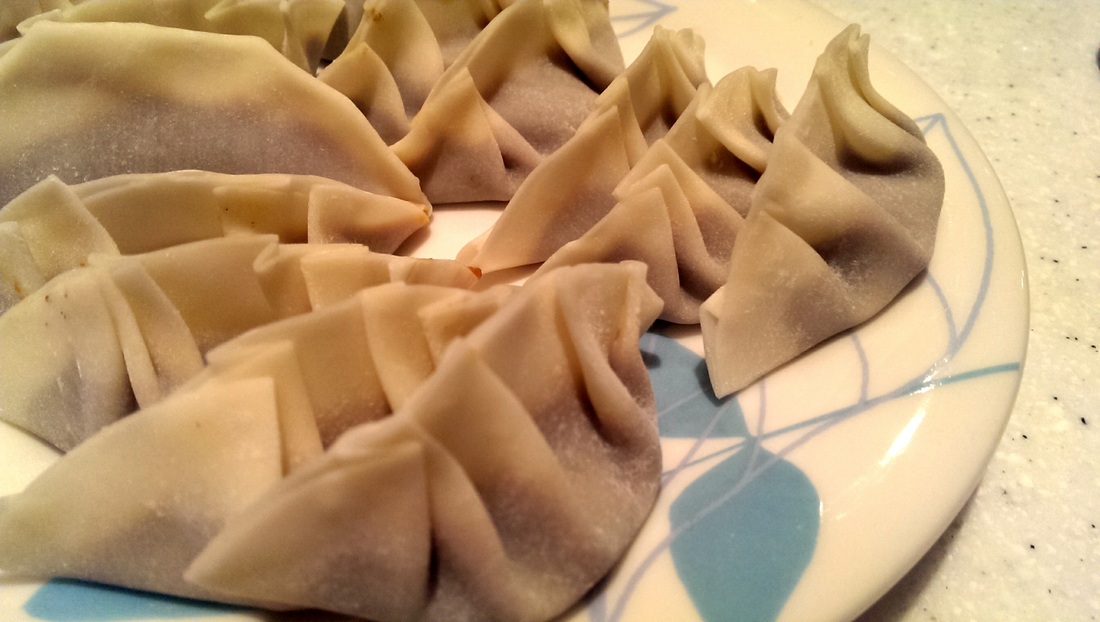
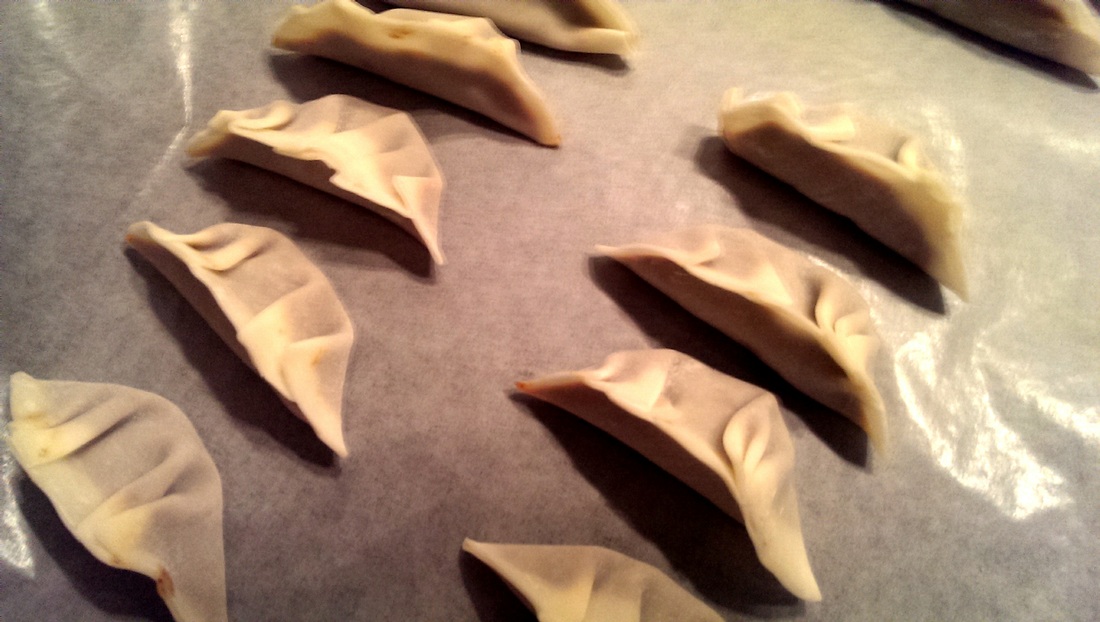
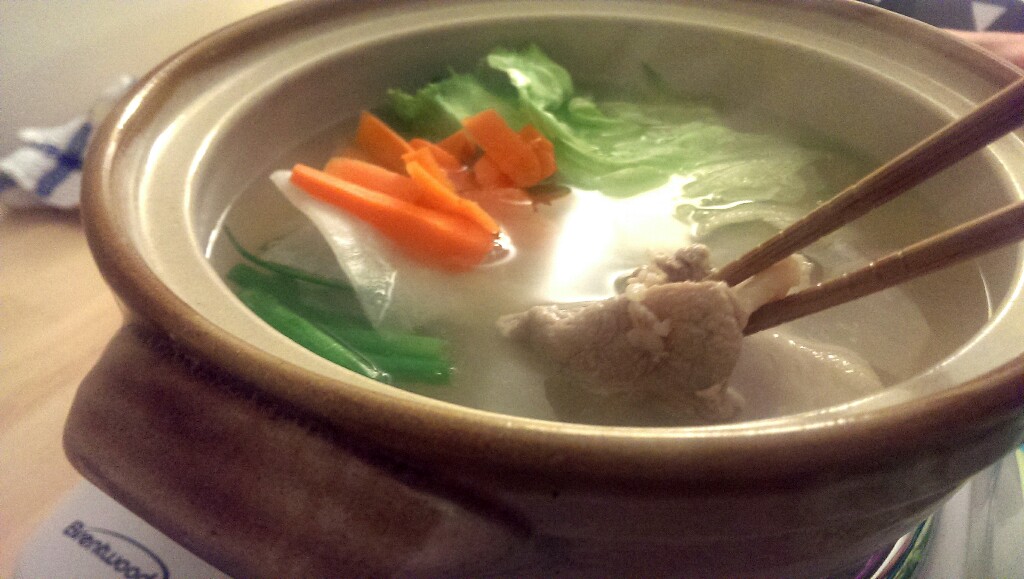
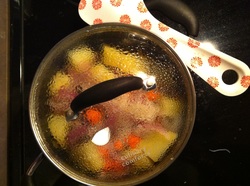
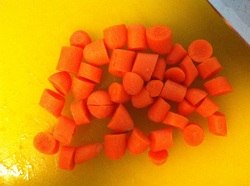
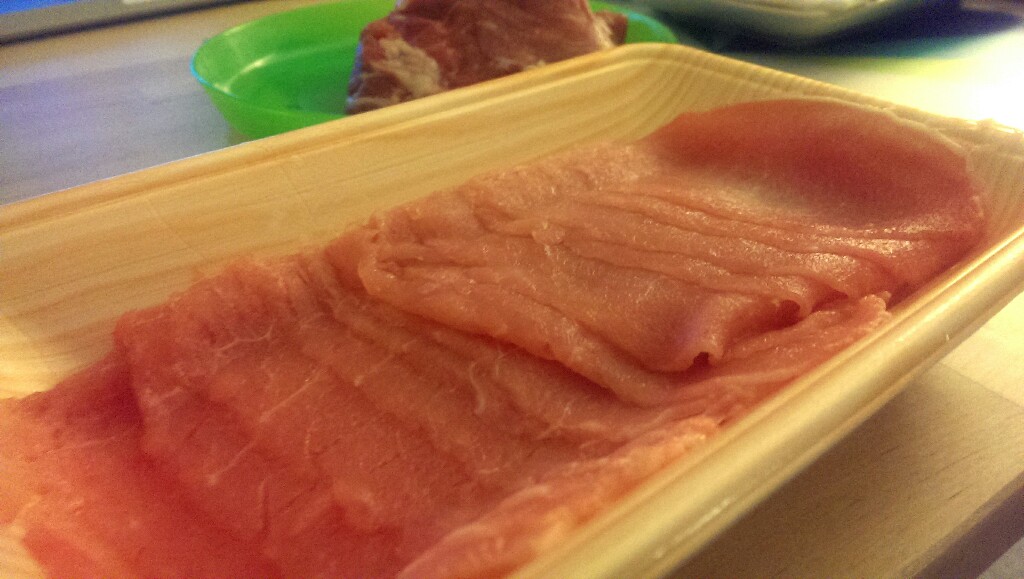
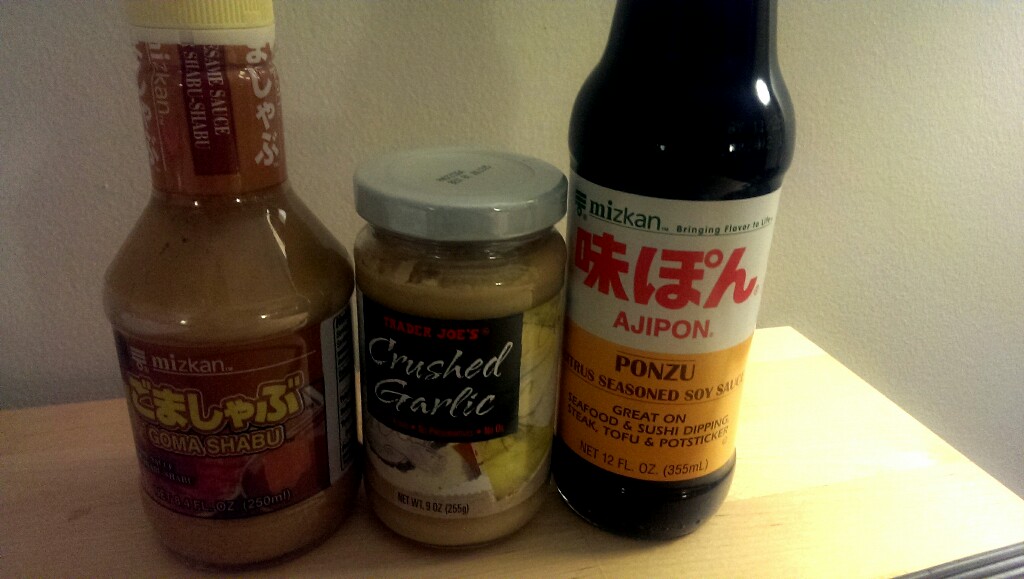
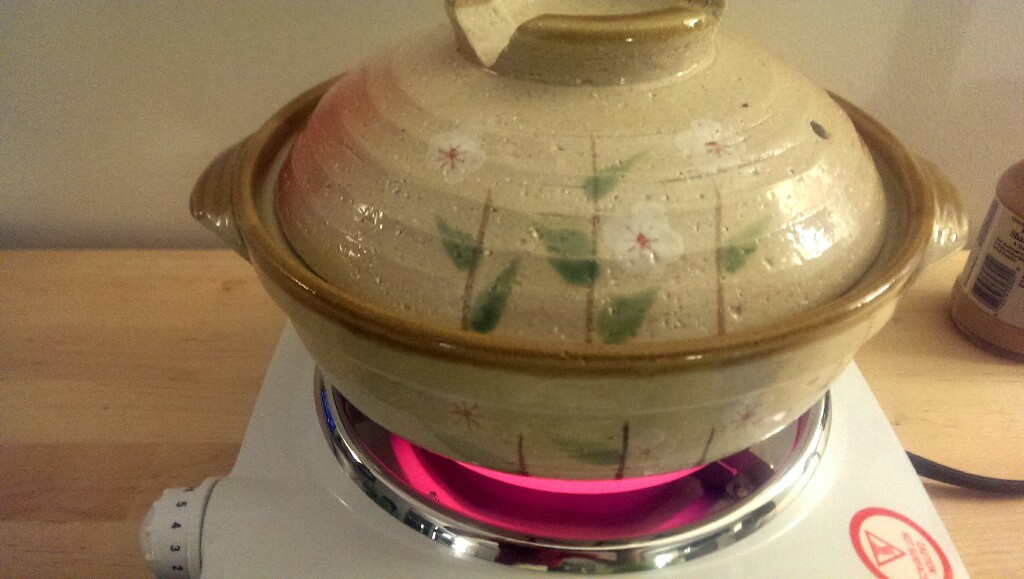
Hot pot or shabu shabu is easy to get in cities like San Francisco and Boston. There are Japanese, Korean or Mongolian restaurants who offer it for an okay price! Have you ever thought about doing it at home though? It's easier than you think :)

I bought a portable stove on Amazon (for only $15) and a Japanese pot (for only $10). After that, all you need are veggies, meat and good company (maybe some good beer and sake too).

What you need:
  • Any veggie, how ever much you want. (I had lettuce, spinach, carrots, radish, zucchini)
  • Mushrooms
  • Meat (I had thin sliced pork, some people like beef too) 
  • (Optional) Seafood
  • Tofu
  • (Optional) Noodles (e.g. udon)
  • Sauce (I bought ponzu and sesame sauce, both available on Amazon or Japanese supermarkets)


Yup. That's it! 

For your broth, you can get creative (kimchi, soy milk, tomato sauce...); but since I was out of most ingredients, I just poured some sake in water, added a pinch of salt and some dashi.

You get to eat a lot of vegetables, and this dish warms you up. It's perfect for those chilly nights which make you want to feel cozy.
Picture

Picture
Picture
Picture
0 Comments

Recipe: Simple "Yaki Udon", fried udon recipe! My go to recipe when I'm starving and in need of a healthy, substantial lunch! 

5/5/2013

1 Comment

 
Picture
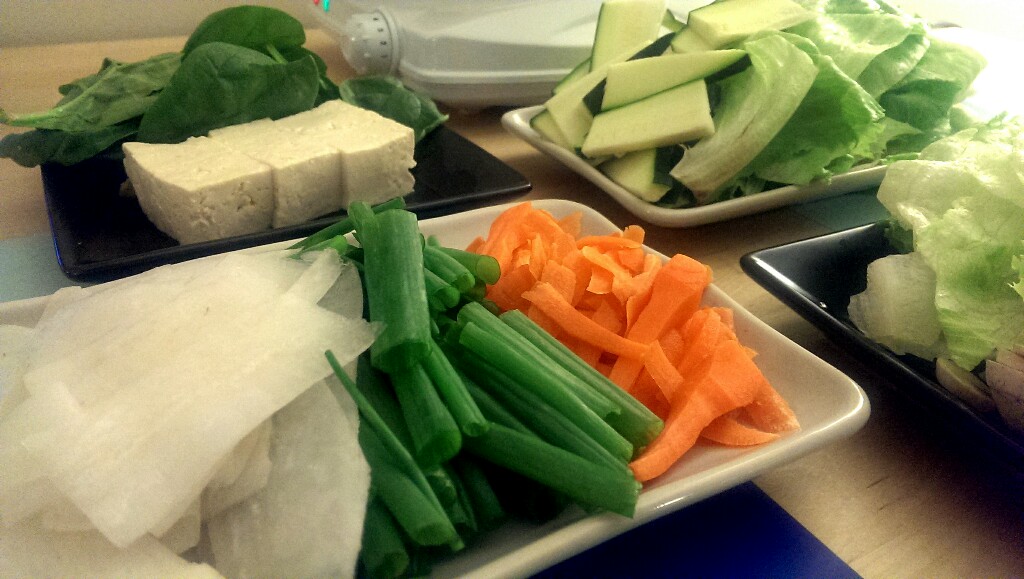
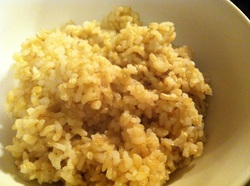
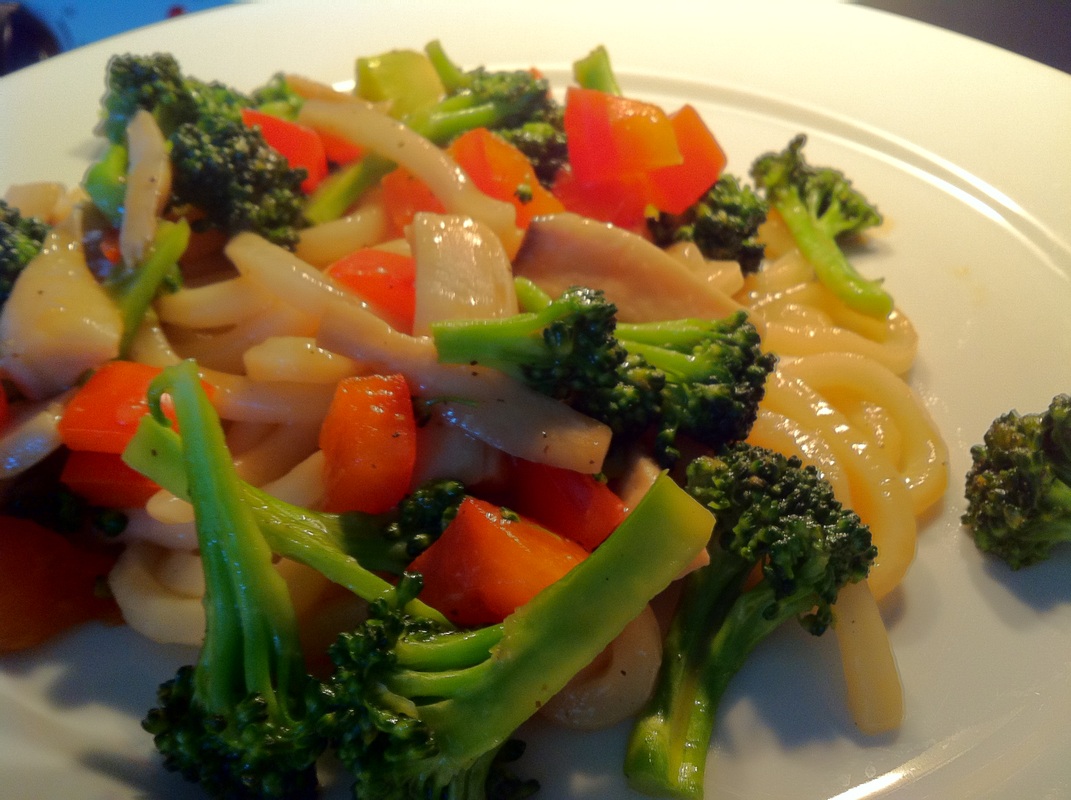
Time taken: 5 - 10 minutes
Approximately 300 kcal per serving

About This Dish:
I head over to my freezer when I find myself hungry and in need of a substantial and healthy Japanese meal at home. Why? Because I usually have a stash of udon hidden in my freezer! Yaki-Udon (Fried Udon) is one of Japan's most popular noodles, udon, stir fried with a bunch of vegetables and optionally meat. This recipe adds a delicious taste to the dish by adding a little bit of sesame oil and Japanese soy sauce! Be creative in your additions and you might end up with an amazing dish for lunch! My mom actually used to make this for me for breakfast. Good old days :) 


While you're at it, why not check out my other udon recipe as well? 

What You Need:
(Makes 2 servings)
  • 1 package of udon noodles (I use frozen ones)
  • (Optional) Vegetables of your choice (I use onion, cabbage, red pepper, mushrooms, carrots...)
  • (Optional) Meat of your choice (I often use thin sliced pork)
  • 1/2 tsp sesame oil
  • 1 - 2 tbsp Japanese soy sauce
  • Salt & Pepper to taste


Steps:
  1. Cook the udon noodles as instructed on package (I usually throw in the vegetables in the last few minute or so to boil together with the noodles)
  2. Heat a pan on MEDIUM heat and throw in the noodles, vegetables and meat (if you have it). Season with soy sauce, salt and pepper. 
  3. At the end, season with sesame oil and serve! 
Picture
1 Comment

Throwback Recipe: Beef Bowl, Gyu-don!

4/22/2013

0 Comments

 
Picture
Have you tried making this amazing beef bowl using this recipe I posted a while ago?

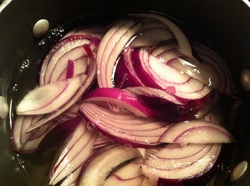
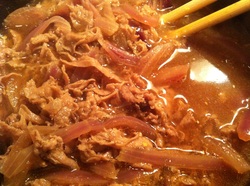
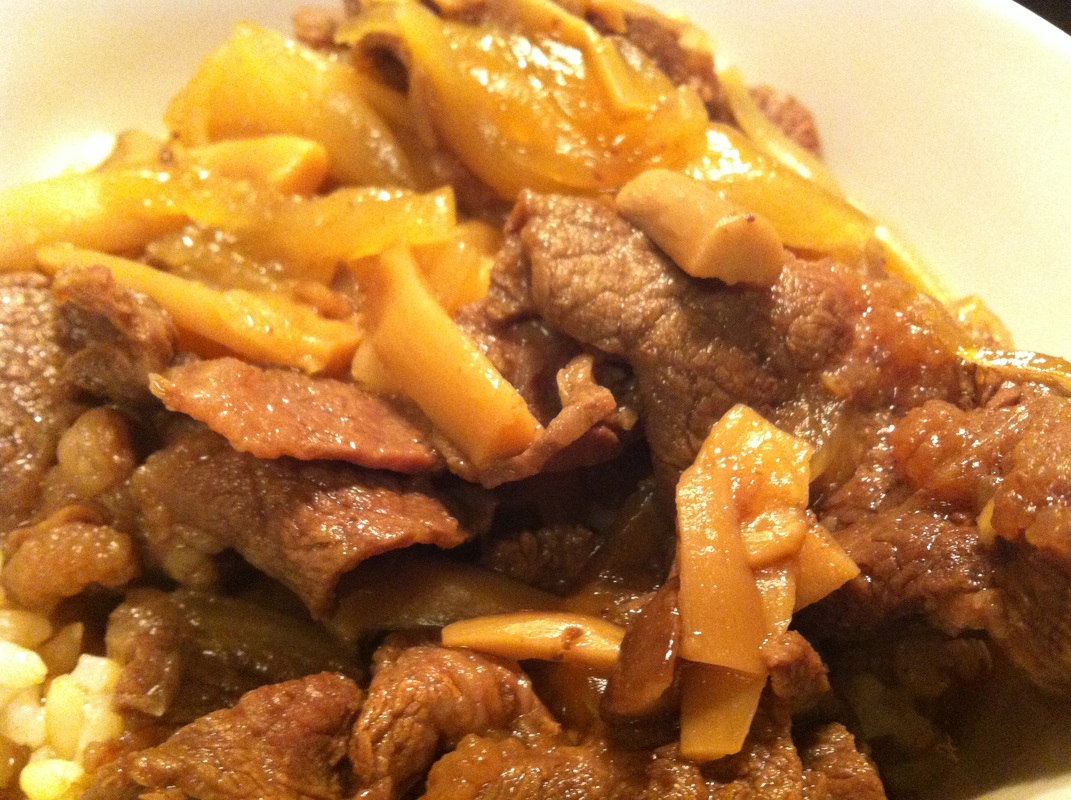
Since I had the chance to go to a large Korean supermarket (H Mart in Burlington, MA), thanks to Zipcar, I stocked up on thin sliced beef and pork usually used for Shabu Shabu or Japanese style stir fry dishes! Since the meat is usually packed in large portions, I usually wrap the meat up in smaller portions using saran wrap and freeze them for future usage. 

Using the fresh thin sliced beef, the first thing I made was gyu-don! Beef bowl! Perfectly sweet, perfectly savoury. Rice turns heavenly and irresistible when topped with this beef dish! 

I changed around the ingredients this time. I didn't use mirin! 

What I Used:
(Makes 2 servings)
  • 250ml water (~1 cup)
  • 200g (7oz) thin sliced beef (I used top blade boneless beef)
  • 1/2 large onion
  • Some eringi mushrooms
  • 1 and 1/2 tsp Dashi stock
  • 2 tbsp sugar
  • 2 tbsp Japanese sake
  • 2 and 2/3 tbsp (or simply 3 tbsp) Japanese soy sauce
  • 1 or 2 tsp grated ginger


Steps:
I used the same procedures as this recipe, but I'll post it in text here anyway :)
  1. Chop onions and other ingredients you wish to add. Heat up the water and put the onions and other ingredients into the pan with the dashi stock. Heat until soft.
  2. Add the sugar, sake, soy sauce and meat. Stir well. Put a lid onto the pan and cook on LOW-MEDIUM heat for 10 minutes.
  3. Add the grated ginger.
  4. Heat on low for an additional 5-15 minutes so the taste sinks in (with lid). 
  5. Serve on rice!
0 Comments

Recipe: Japanese Beef Hamburger Steaks, "Hambaagu".  One of the most popular dishes in Japan for all ages!

4/9/2013

0 Comments

 
Picture
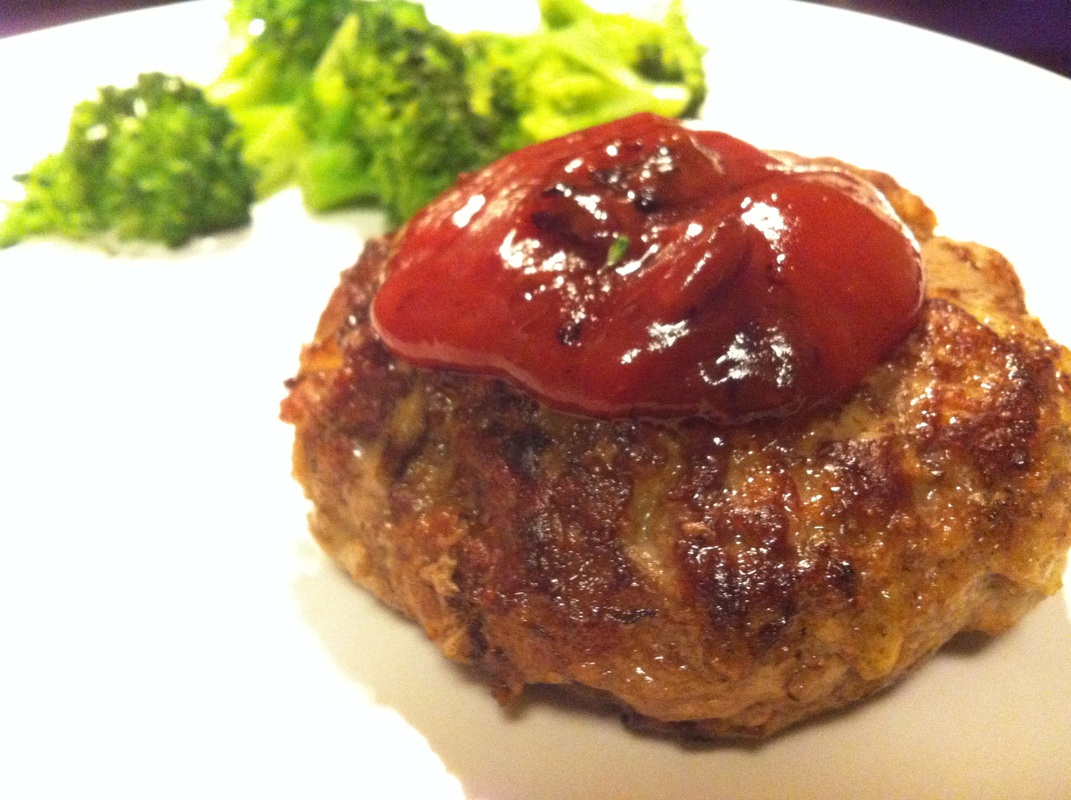
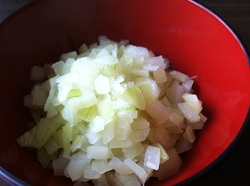
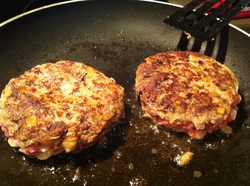
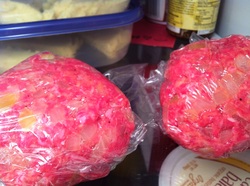
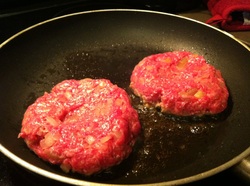
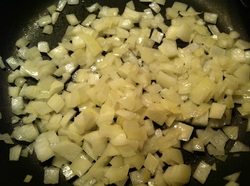
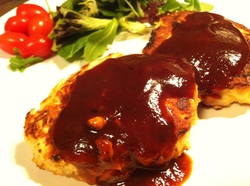
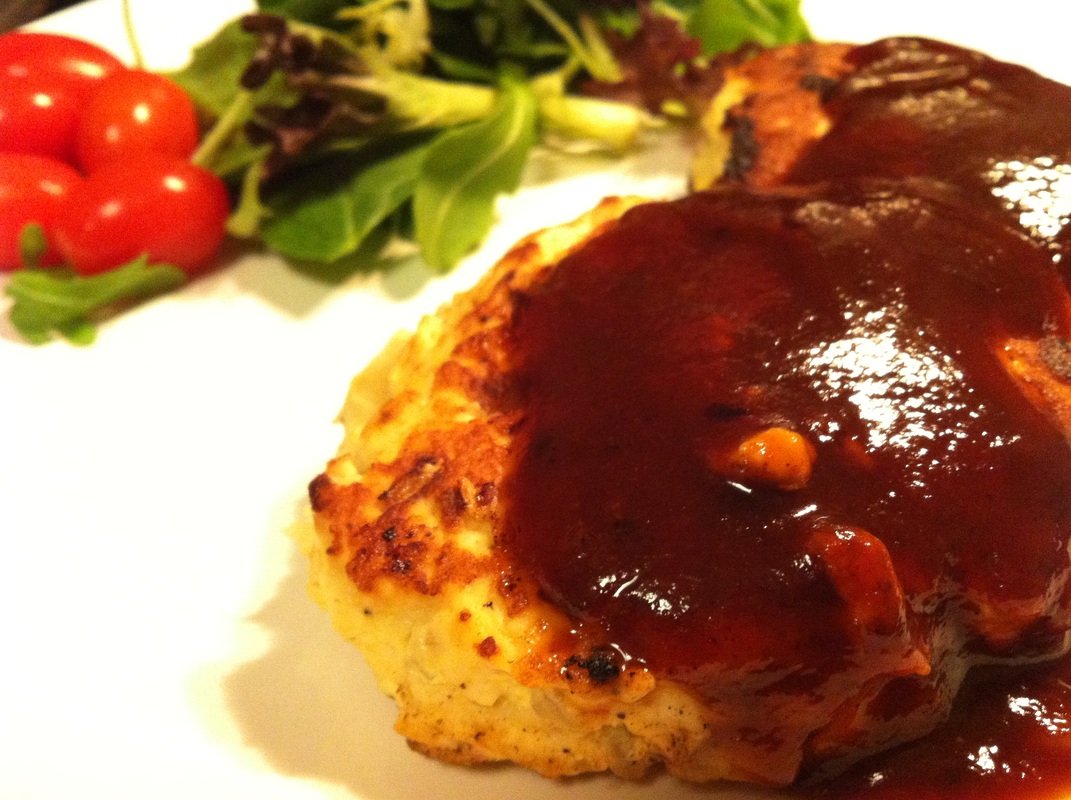
Number of steps:  5 steps
Time taken: 15 - 20 minutes
Approximately 280 kcal per serving

About This Dish:
As mentioned in my past recipes, Japanese hamburger steaks (called "Hambaagu" in Japaneses) are a very popular dish in Japan for all ages. Casual family restaurants serve great Hambaagus! Not to mention all the moms and dads around Japan who are great at it too. There are restaurants like Hungry Tiger who solely serve Hambaagus (and steaks). I've posted a recipe using ground turkey, tofu, ground chicken and a quick recipe for delicious demi glace sauce which is superb with these "Hambaagu"s. I've been posting healthy options for Hambaagu in the past, but today I'll be posting a recipe for a legitimate beef hambaagu (most restaurants serve these). My boyfriend and I melted after eating a bite, so I hope you enjoy it too! 

One important tip I have is to make sure the onion and whatever you mix into the ground meat to be cold when mixing. Even your hands; stick them into ice water. We don't want the juicy fat of the meat to run away, we aim to trap it into meat until we serve these goodies.

What You Need:
(Makes 2 servings)
  • 250g or 7-8oz of ground beef (I used lean beef)
  • 1/2 onion
  • 1 egg
  • 1/4 cup panko 
  • Salt and pepper
  • Sprinkle of numeg
  • 1 tbsp oil
Sauce
  • I mixed 2 tbsp of ketchup with 1 tbsp of katsu. I have a demi glace sauce recipe but I wanted something quick and easy today.
Picture
1. Chop the onions into small pieces, cook in a pan until clear. Now, cool the onions down. I left it out for a couple minutes and put it in the fridge. Once again, we don't want the heat of the onion to melt the juicy fat of the meat when we mix it.

Picture
4. Heat both sides on HIGH heat until they get crispy and brown. This will trap the juice of the meat and deliciousness. Once both sides are well cooked, put the heat on LOWEST and cover the skillet for a little less than 10 minutes. 

Picture
2. In a bowl mix the cold ground meat and salt with your bare hands. Add the cold onion and cold egg. Finally, add the panko, pepper and nutmeg. Create two patties, wrap it up in saran wrap and store it in the fridge until you are ready to grill them! 

Picture
3. Heat up a skillet on HIGH and heat up 1 tbsp of oil of your choice. Once the oil is hot, place the patties on the pan. Make a little dent in the middle of the patties to prevent the patties from falling apart due to swelling.

0 Comments

Recipe: Japanese beef bowl, "Gyu-don"! Try it at home yourself. Just like Yoshinoya!

3/23/2013

1 Comment

 
Picture
Picture
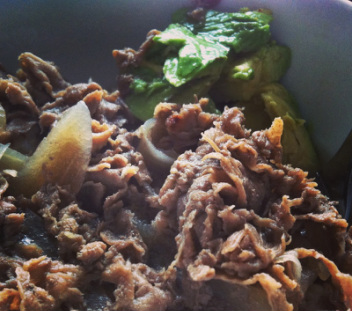
Number of steps:  5 steps
Time taken: 15 - 25 minutes
Approximately 190 kcal per serving (when serving 5)

About This Dish:
Beef bowl (Gyu-don) is a very popular dish in Japan. Usually served in fast food chains such as "Yoshinoya" and "Sukiya", gyu-dons are affordable, filling and delicious. It is also a popular dish served at home. The last time I was back home in Japan, my boyfriend and I grabbed a bowl at Yoshinoya for only 260 yen (that's around $3.00). At these chains, you can pick the size of bowl, normal to extra large. You can even add toppings like egg, natto, kimchi and so on. How fun! So how about trying to make your own at home? For those of you who are unfamiliar with the dish, it's savoury but slightly sweet because of the sugar and mirin which goes into it.

This recipe is easy, quick and tastes absolutely amazing. It made me feel like I was home. Unfortunately I couldn't find thin sliced beef in my nearby Asian market, so I ended up having to use Shaws' shaved beef steak; it still worked. I highly recommend using thin sliced beef sold in your nearby Asian supermarket, if you can! 

P.S. As you can see on the photo, I added avocado as a topping and it went very well together.

What You Need:
(Makes 4-5)
  • 16oz of shaved beef steak (or preferably thin sliced beef sold in Asian supermarkets)
  • 1 onion
  • 500ml - 550ml water (2 - 2.33 cups)
  • 1 - 2 tsp Hondashi soup stock 
  • 1/2 - 1 tbsp grated or chopped ginger
Sauce
  •  5 tbsp Japanese soy sauce
  • 2 tbsp Mirin
  • 2 - 3 tbsp Japanese sake
  • 2 tbsp sugar
Picture
1. Chop the onions into slices and place them in some hot water with Hondashi in a pot on MEDIUM heat. Cook until the onions soften.

Picture
4. Place the ginger into the mix and stir further. Let the ingredients cook through a little more on LOW or MEDIUM heat.

Picture
2. Mix the ingredients listed under "Sauce" together and pour them into the pot with the onion and water. Stir as needed.

Picture
5. Place the beef onto a bowl of rice and enjoy! 

Picture
3. Place the meat into the pot. Stir and place a lid on the pot. Cook for 10 minutes or so on MEDIUM heat. After cooking, remember to skim off the scum.

1 Comment

Recipe: Meaty and healthy Japanese hamburg steaks served with demi glace sauce.

3/13/2013

0 Comments

 
Picture
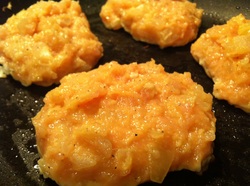
Number of steps:  5 steps
Time taken: 15 - 20 minutes
Approximately 130kcal per serving (using ground turkey)

About This Dish:
Japanese hamburg steaks are basically burger patties eaten without buns. It's a very popular dish in Japan, served in many restaurants/cafes/fast food chains and for dinner at home. Beef or pork is usually picked as the choice of ground meat, however I've picked turkey just for a more lean option. For an even healthier option, check out the tofu hamburg recipe or the chicken patty recipe I've posted. Various sauces are used; demi glace, ponzu, teriyaki, ketchup, etc. I've posted a super easy demi glace recipe so check that one out if you've got the time! People of various ages are seen eating this dish in Japan, whether it be children or a senior. You could even make a Hawaiian dish, locomoco with leftovers!

One important tip I have is to make sure the onion is cold upon mixing with the ground meat. If the meat is warm or hot, it causes the juicy fat of the meat to run away, making the patties soggy! :[

Serve with Japanese rice and plenty of veggies! 

What You Need:
(Makes 4 servings)
  • 300g or 10oz of ground meat (I used ground turkey here)
  • 1/2 - 1 onion
  • 1 egg
  • 5 tbsp panko bread crumbs
  • 5 tbsp milk
  • Salt and pepper
  • Oil (I use organic coconut oil from Trader Joes)
Picture
1. Chop the onions up into small pieces and heat them up in a pan. Once cooked through, put them aside to cool them down whether it be on the counter or in the fridge. We want the onions to be cool/cold upon mixing with the ground meat! 

Picture
4. Heat a pan with oil on HIGH heat and place the patties. Brown the surface of both sides.

Picture
2. In a separate bowl, soak the panko with the milk.


Picture
5. Once both sides are brown, put the heat down, pour in 1/4 cup of water and put the lid on the pan until the water disappears.

Picture
3. Mix the ground meat, cooled onions, panko/milk, salt/pepper and stirred egg together until it becomes well blended and sticky. Create the burger patties with your hands. I made 4!


Picture
Pour the sauce over it. I chose demi glace! 

You can wrap each left over patty in saran wrap and place them in the freezer for future consumption :)

0 Comments

Recipe: Red bell pepper "doria"; A healthy version. Sautéed ketchup rice with ingredients of your choice stuffed in a red bell pepper, topped with a slice of cheese. 

2/25/2013

0 Comments

 
Picture
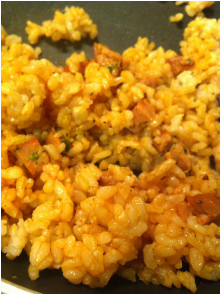
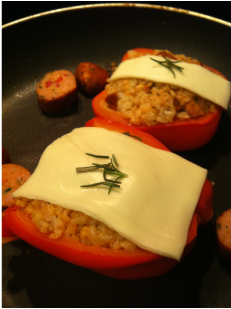
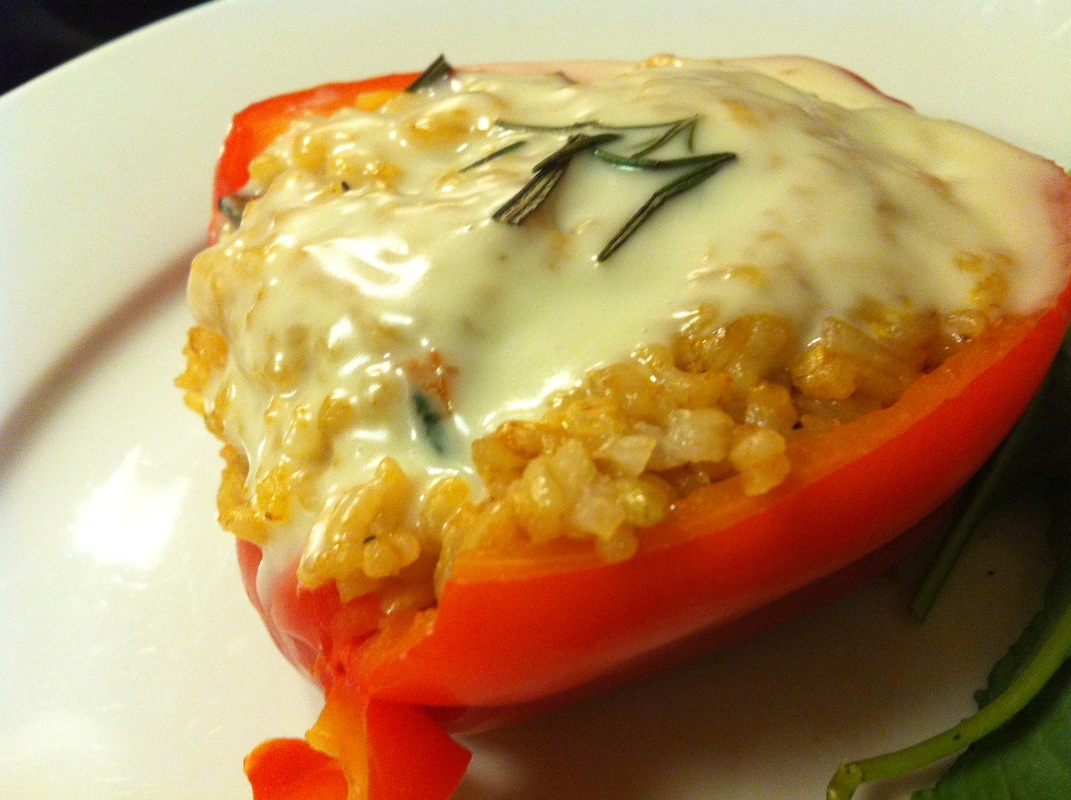
Number of steps:  3 steps
Time taken: 15 minutes
Approximately 230kcal per serving (this will vary depending on what you decide to put in the rice!)

About This Dish:
I did not know "doria" was a Italian dish until today. I had always thought it was a type of French dish since it's so similar to gratin. In Japan, apparently it got popular in the 1920's in Yokohama according to this post. Doria is basically like a gratin but is made of rice, vegetables and meat; often mixed in white cream sauce and topped with melted cheese, cooked in a toaster or oven. This version of doria is a healthy version; no heavy cream, yay! The only doria like characteristic would be the melted cheese. I also use a regular pan, not an oven, so it's easier and quicker to make. 

I added chicken sausage to the rice but I highly recommend adding onion, carrots, ground meat of your choice to make it a little more fun. This dish is cute looking, healthy and tastes great. Perfect for when you have friends over.

What You Need:
(Makes 2 servings)
  • 2/3 - 1 cup rice (I used brown rice)
  • 1 large red bell pepper 
  • 2 tbsp ketchup
  • Pinch of salt and pepper
  • 2 slices of cheese 
  • (Optional) Meat of your choice (I used 1 chicken sausage with red pepper and spinach from Casual Gourmet, otherwise you can add a ground meat of your choice or skip the meat all together!)
  • (Optional) Vegetables of your choice (I highly recommend popping in some chopped onions, carrots)
  • (Optional) Oil to saute your rice (I used 1/2 tbsp of organic coconut oil from Trader Joes)
Picture
1. Rinse the bell pepper, cut in half and put it in the microwave for 3 minutes on power level 6 (if you can select it).

Picture
2. Saute the rice and add meat/vegetables of your choice on MEDIUM to HIGH heat. If you are cooking raw meat, you might want to add the rice after the heat has gone through the other ingredients. Add ketchup, salt and pepper.

Picture
3. Stuff the bell pepper with the rice (I was able to fit around 1/3 cup). Top with sliced cheese and garnish of your choice (I happened to have rosemary). Put the lid on a LOW heated pan and cook for 10 minutes.

0 Comments

Recipe: Japanese potato korokkes! Basically Japanese style croquettes. It involves deep frying but easy and worth 20 min of cooking!

11/10/2012

0 Comments

 
Picture
Picture
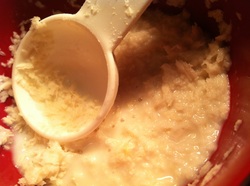
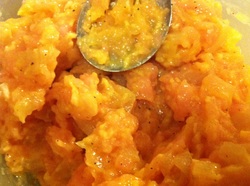
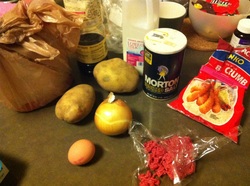
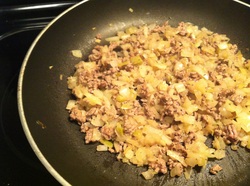
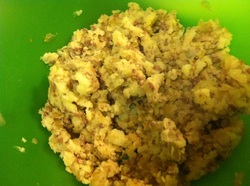
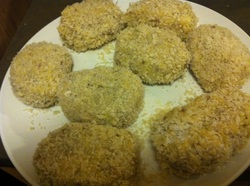
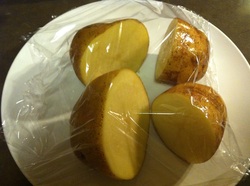
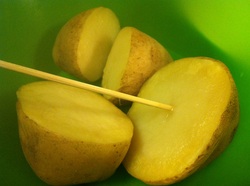
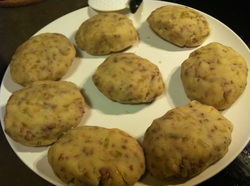
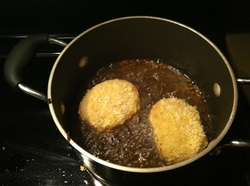
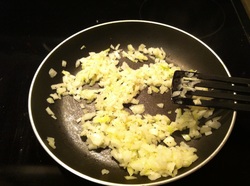
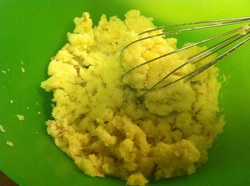
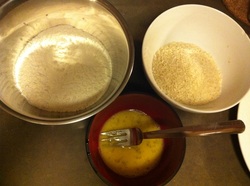
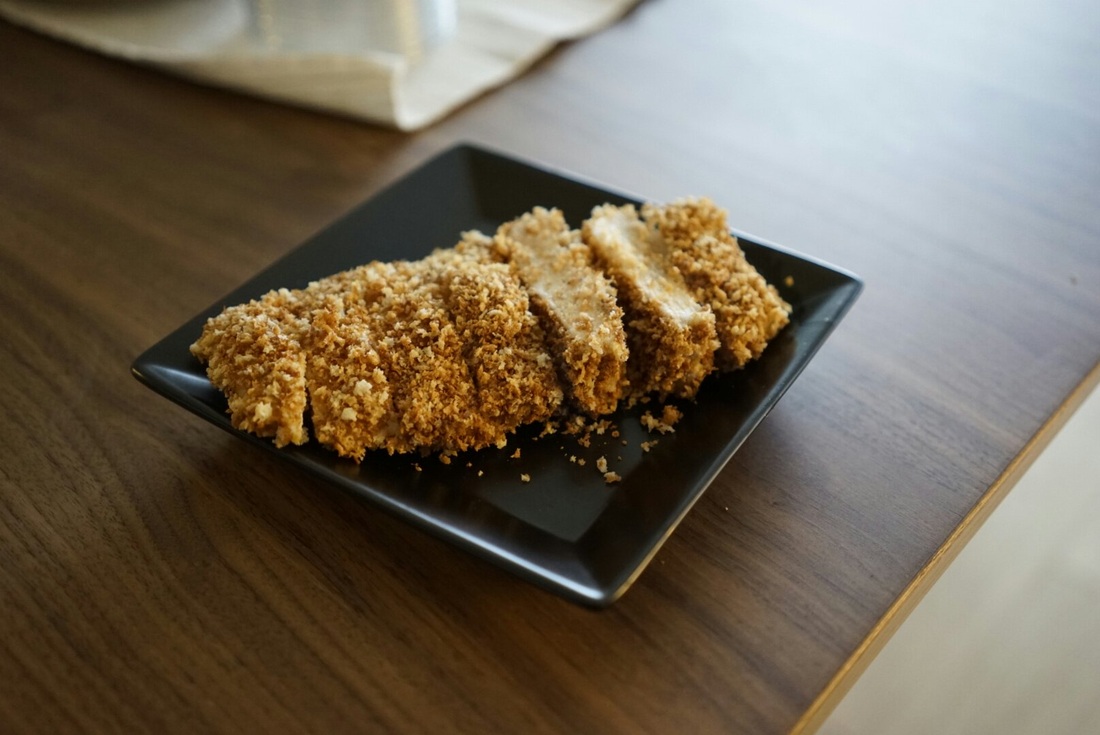
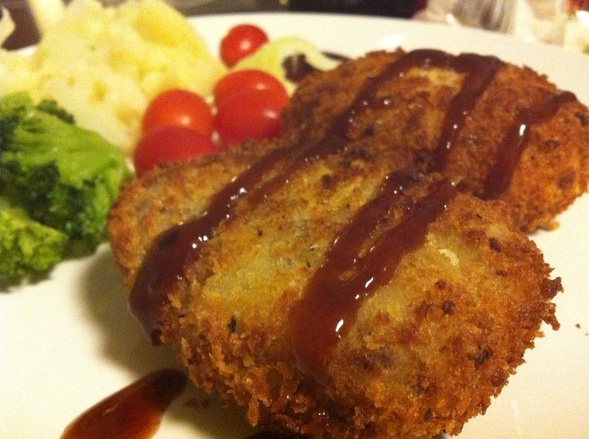
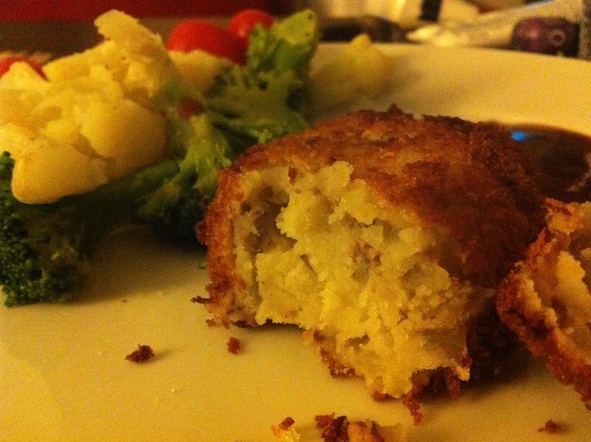
Number of steps:  9
Time taken: 20-30 min 
Approx. 170kcal per korokke 

About This Dish:
Japanese korokkes are said to have a great influence from French croquettes. French croquettes are known to have cream inside, but original Japanese croquettes have potato and ground beef inside. My first impression was "Wow, it's deep frying stuffed potato and meat, it must be so hard". After trying it out few nights ago, I realized that it was VERY easy to make, even though it involves deep frying. 

Many Japanese families get creative with their korokkes. Though the original korokke is known to be potato with ground beef, some make it with cream + bits of crab, yakisoba, veggies, tofu, cheese, the list goes on. This recipe is the original potato and ground beef filling! Additionally, there are korokke stands in Japan selling these goodies. I used to get 1 korokke after school and eat it in the winter while walking to the station. If serving at home, eat it with rice and cabbage with katsu sauce! Yum! 

What You Need:
(Makes 8 korokkes; suggested 2 korokkes per serving)
  • 2 large potatoes
  • 100g (1/4 lb) ground beef or less *Keep in mind that the potato is the leading actor here! 
  • 1 small onion 
  • 1 tbsp of milk
  • 1 tbsp of soy sauce
  • Pinch of salt and pepper
Batter
  • Breadcrumbs/Panko (start off with half a bowl) 
  • All purpose flour (start of with half a bowl) 
  • 1 egg (add more if you run out)
  • Oil (for deep frying)
Picture
Here is a glance of all your ingredients! 


Picture
3. Add the meat in the skillet to cook. Add soy sauce, salt and pepper according to your taste.


Picture
5. Add the meat/onion from the skillet into the bowl with mashed potatoes and mix. Add the milk here too.


Picture
7.2. The korokkes all battered up should look like this :)

Picture
1. Wash the potatoes well, then cut them in half, place on a microwave safe plate, place saran wrap loosely on it and place it in the microwave for 8 minutes or until soft. You can check by sticking a stick into it. If it goes in smoothly, it is done.

Picture
4. Check if the potatoes are done by simply sticking a stick into it. If it goes in without problem till the end, you're all set.

Picture
6. Using your hands, shape the korokkes! I made mine the size of my palm, but the size is all up to you of course.


Picture
8. Heat up the oil for deep frying in a pan. We want the oil to be hot, hot, hot, but be careful and do not burn yourself! You can simply check if the oil is hot enough by throwing in some of the panko. If you hear it frying, it should be hot enough. Throw in the korokkes, then deep fry each side for 20 seconds each, that's approximately 40 seconds per korokke! 

Picture
2. While the potatoes are in the microwave, you can start preparing the meat and onions. Heat a skillet with oil and heat the onions until they get clear. 


Picture
4.2. Mash the potatoes! 


Picture
7. Prepare your batter station. Dip the korokkes in this order: flour, then the egg, then the panko/breadcrumbs.


Picture
9. Deep fry each korokke and place onto a paper kitchen towel to soak up the oil. You can store these delicious things in saran wrap and toss it in the freezer too. 

0 Comments

Recipe: Super simple to make Japanese style beef donburi (rice bowl) while weathering out Sandy. 

10/29/2012

0 Comments

 
Picture
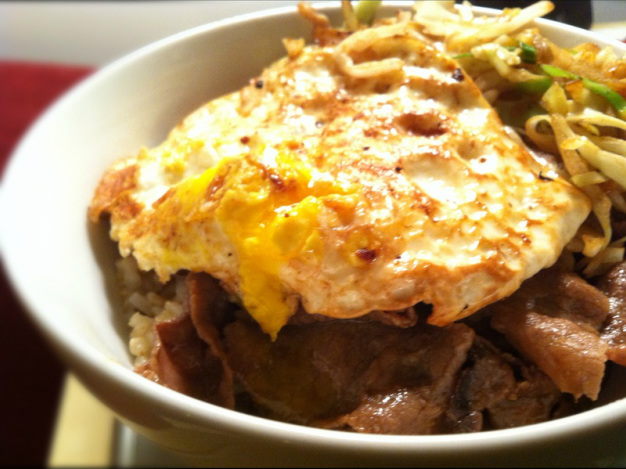
This donburi (rice bowl) was so easy to make I'm not even going to post step by step pictures! I have a bunch of frozen rice in my freezer so I used that which makes the process even quicker! 

Number of steps:  4
Time taken: Approx. 5 - 10 min

What You Need:
(Makes 1 bowl)
  • 100g of thin sliced meat (I used beef, just put in as much meat as you like)
  • Bowl of rice (I used brown rice)
  • 1 egg
  • Vegetables (I only used cabbage)
  • (sauce) 2 tbsp soy sauce 
  • (sauce) 1 tbsp sake or mirin
  • (sauce) 1 tbsp sugar
  • (optional for the sauce) shredded garlic, shredded onion, sesame oil


Steps:
  1. Cook or heat up the rice and put it in a bowl you will be eating from.
  2. Heat up a pan on MEDIUM HIGH and place a table spoon of oil. Once the pan and oil is heated, throw in the slices of meat and cook until the colour changes. Then, add the ingredients of the sauce.  Adjust the amount of sauce according to your taste. Mix until the sauce reaches throughout and put it all on top of the rice.
  3. Now, using the same pan, fry the egg! Place oil on the pan again, drop the egg, drop a couple of droplets of water onto the egg and put a lid on the pan. Flip the egg once it is fried enough and cook it for 1 minute or so. Place it on top of the meat! 
  4. Using the same pan, fry the vegetables! You can even steam your veggies if you are looking for a healthier option. 


0 Comments

Recipe: Nikujaga, Japanese dish with beef and potato in sweetened soy sauce. Perfect dish while waiting for Sandy to hit! 

10/28/2012

0 Comments

 
Picture
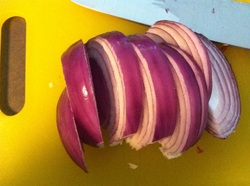
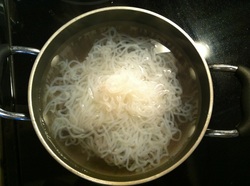
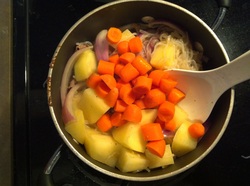
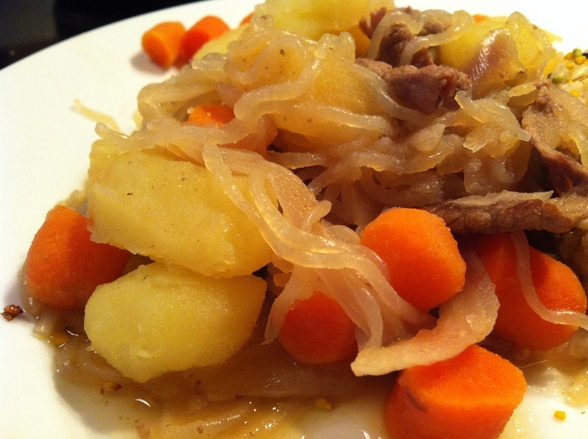
Number of steps:  7
Time taken: Approx. 30 - 40 min
Approx. 250kcal per serving (this recipe makes approximately 2 servings)

About This Dish:
Today I was stuck at home because of Sandy the hurricane, so I ended up making this Japanese homemade winter dish! This is also a type of comfort dish where every family has a distinct taste; some families might make it a strong taste using more soy sauce where some might make it more light. It's eaten with rice and miso soup (and other veggies like salad of course). Yes, I guess we love carbs. This plate is more potatoes than anything else so don't kill it with too much meat! 

What You Need:
(Makes 2 servings)
  • 1/3 pound of thin sliced beef or pork (I used beef and put of it, around 15 slices maybe?)
  • 1 large potato
  • 1/2 onion (I used red onion but it's usually regular onions)
  • 7 baby carrots 
  • 1/2 - 1 pack of shirataki noodles (They sell these at wholefoods or shaws, click here to see what the packaging looks like) 
  • 2 cup water
  • 1 tbsp Japanese sake
  • 1/2 tsp of hondashi 
  • 1/2 - 1 tbsp sugar
  • 1/2 tbsp mirin (adjust to your taste, I ended up putting in 1 tbsp)
  • 1 tbsp soy sauce (adjust to your taste, I ended up putting in 1.5 tbsp)
Picture
1. Cup up the onions like so. While you do this, boil some water in a pot. We're going to boil the shirataki real quick (to get rid of the smell)!

Picture
2. Once the water is boiling, boil the shirataki for 2 minutes or so. Once it's done, drain and cut it up in to edible sizes.

Picture
5. Add the potatoes and carrots. Continue heating on MEDIUM heat until the ingredients are warm.

Picture
1.2. Peel the potatoes and leave it in the water for a couple minutes.


Picture
3. Heat up a pot and fry the thin sliced meat on MEDIUM heat.


Picture
6. Add the water, sake and hondashi. Put a lid on the pot and put down the heat a little bit. Heat for 10 minutes while skimming the skum. After 10 minutes, check to see if the potatoes are cooked through then, add the mirin and sugar. Heat on low for another 5 minutes with the lid on. Mix whenever you think is right but don't crush the potatoes! Be gentle.

Picture
1.3. Cut up the baby carrots too.


Picture
4. Add the shirataki noodles and onion. Heat for 2 minutes  or until the ingredients are warm.


Picture
7.After 5 minutes, add the soy sauce and heat on low for another 5 minutes without the lid. Mix carefully as it heats. Start tasting it and add more soy sauce or mirin depending on the outcome.

0 Comments

    Subscribe via email

    ​Featured Fyuse:

    Popular Posts

    Picture
    Kinkakuji, Kyoto
    Picture
    Non-oil Chicken Katsu
    Picture
    Kawaii! Socks

    instagram: @jpinsider

    Categories

    All
    About Japan
    Appetizer
    Beef
    Chicken
    Dessert/sweets
    Dinner
    DIY
    Egg
    Japanese Breakfast
    Japanese Food
    Japanese Music
    Japanese Quality Series
    Japanese Recipes
    Lunch
    Matcha/green Tea
    Noodles
    Obento
    Pasta
    Pork
    Potato
    Rice
    Salmon
    San Francisco
    Sauce
    Savoury
    Seafood
    Side Dishes
    Tips/how To
    Tofu
    Traveling Japan
    Tuna
    Turkey
    Vegetables
    When In Tokyo
    Yokohama

Powered by Create your own unique website with customizable templates.
  • Feed
  • travel & culture
  • Beauty
  • Recipes
    • Shop Japanese Groceries
  • About Me