jpinsider
  • Feed
  • travel & culture
  • Beauty
  • Recipes
    • Shop Japanese Groceries
  • About Me

Here's your easy Japanese weekday dish: Pork Stirfry Donburi!

5/4/2015

1 Comment

 
Picture
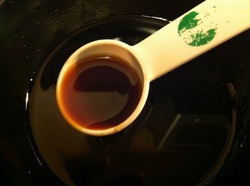
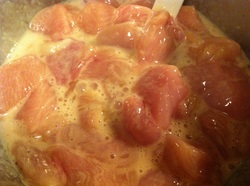
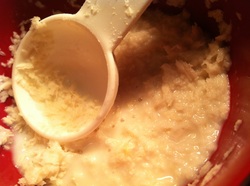
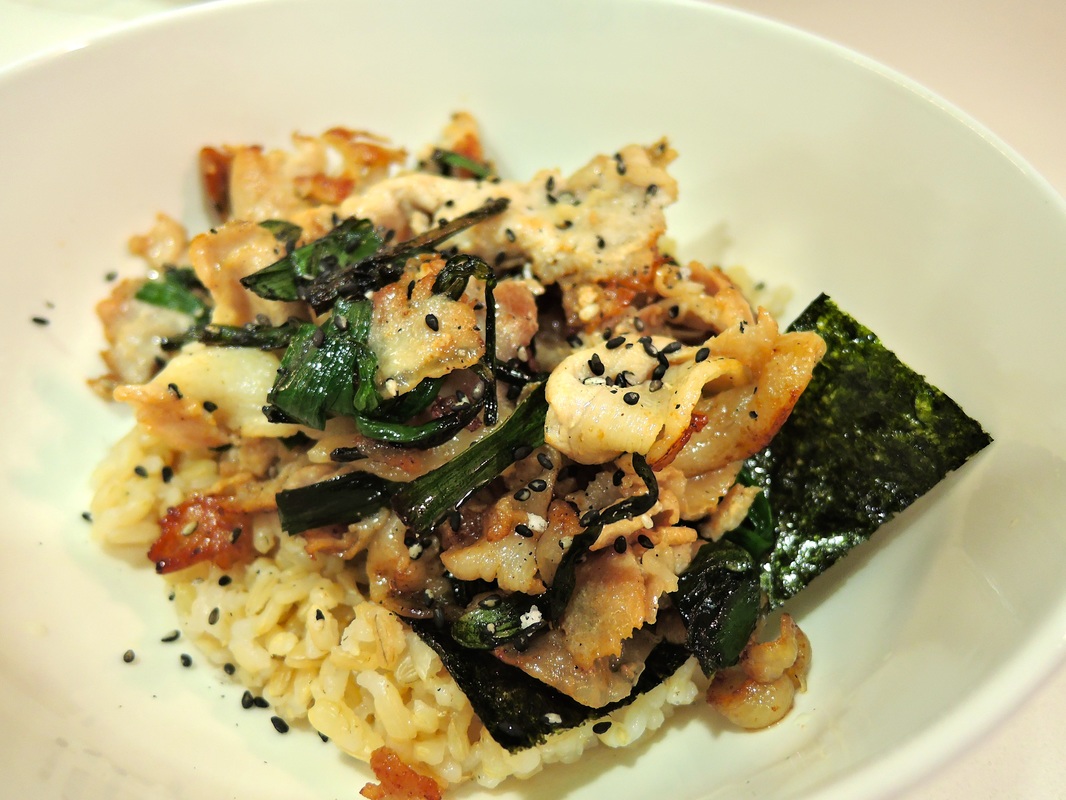
In Japan, "Donburi" is what we call a bowl of rice with goodies on top, it could be shortened to "-Don" too.

If it's Chicken on a bed of rice, we could say "Chicken-Don".

With just 4 ingredients, here's what I whipped up for dinner. It took less than 15 minutes.

Ingredients:
  • Pork (thin sliced)
  • Seaweed 
  • Rice (I used frozen)
  • Chinese Chives
  • (Optional) Add veggies & condiments of your choice (I used soy sauce, sesame oil)


Steps:
  • Simply stir fry the pork with the Chinese chives. I added salt, pepper, soy sauce and some sesame oil to taste. 
  • In a bowl, create a bed of rice and place seaweed on top for saltiness.
  • On top of the seaweed place the pork stir fry.


I promise - it's going to turn out delicious!


有り合わせで作るどんぶりって
最高ですよね♥︎
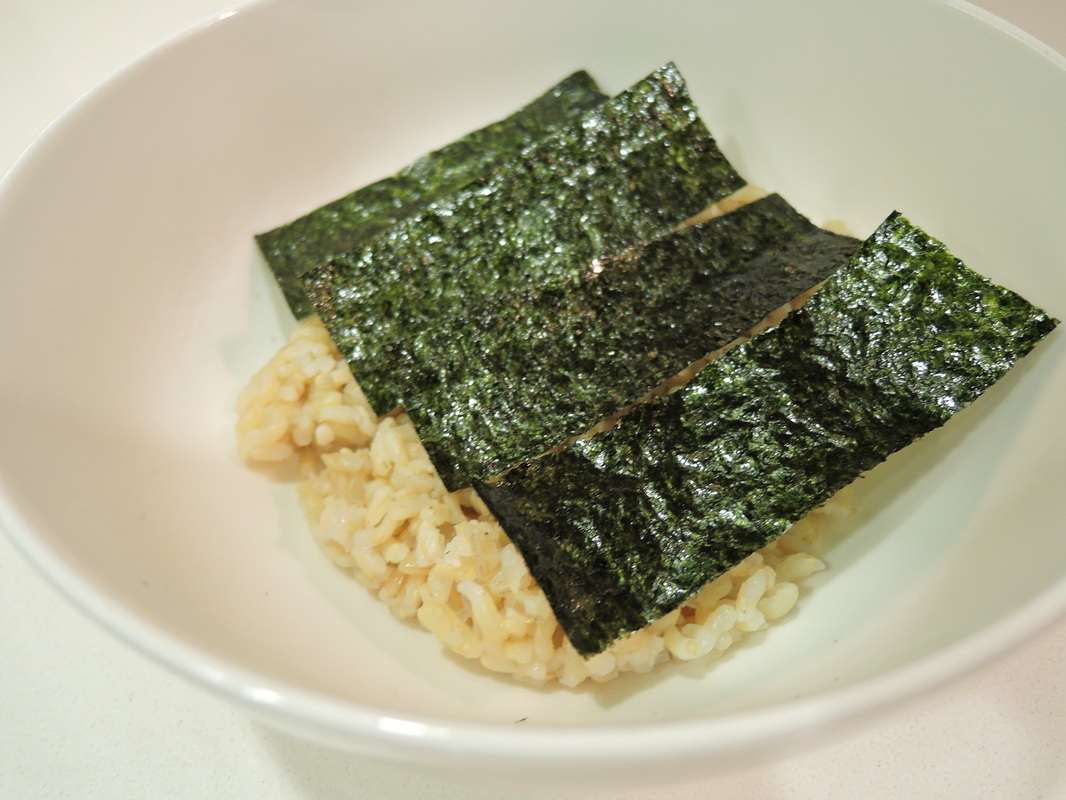
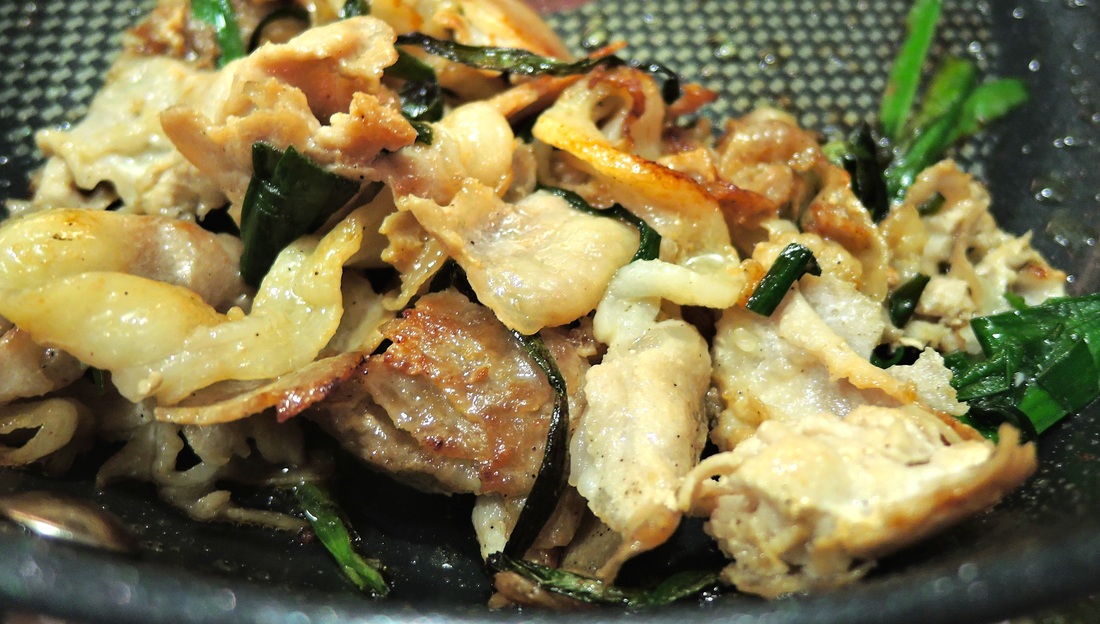
Picture
Picture
1 Comment

Hosting Guests? Try Serving This Non Oil Chicken Katsu! It Worked For My Dinner Party!

6/1/2014

0 Comments

 
Picture
Picture
Picture
As always, the most popular recipe on this blog! I served it to my guests the other night and everyone loved it.

Click here for the recipe!
0 Comments

Recipe: Too easy. Teriyaki chicken! 

4/8/2014

1 Comment

 
Picture
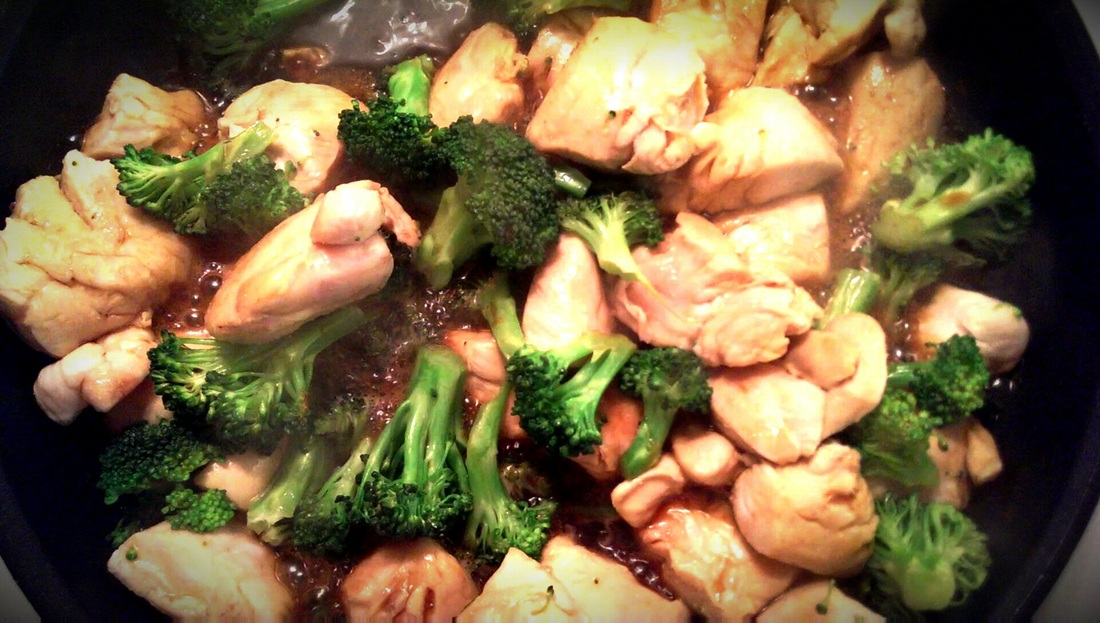
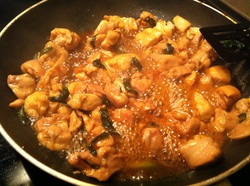
Seems like teriyaki chicken is a very popular Japanese dish here in the United States.

I never really grew up eating it, but I've learnt to love it. It's just so simple and easy. A simple stir fry is all you need sometimes. 

Here's a super simple recipe I use.  All you need is:
  • 1lb chicken
  • Veggies
  • 3 tbsp soy sauce
  • 1.5 tbsp sugar
  • 1.5 tbsp mirin
  • 1.5 tbsp Japanese sake


Heat the chicken, add the veggies and add the sauce! That's it :) 

I usually serve this dish with Japanese rice and miso soup. Perfect! 

1 Comment

Recipe: Super Crispy Gyoza Dumplings Filled with Keema Curry. Best Creative Twist on a Gyoza. Kind of like Mini Empanadas! 

1/4/2014

0 Comments

 
Picture
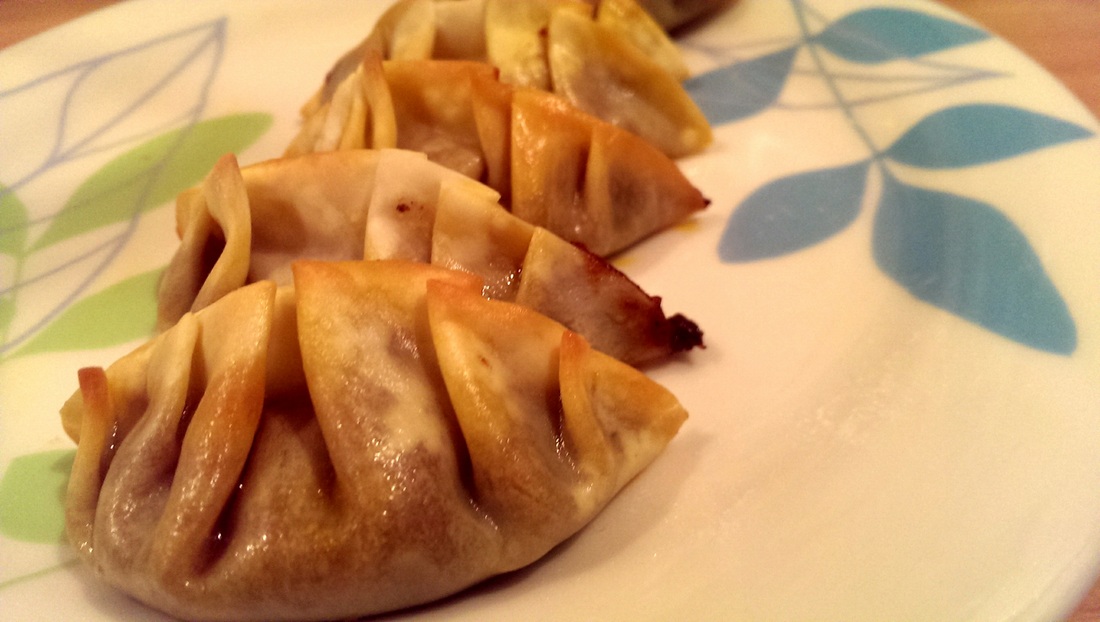
Who likes Empanadas?
Who likes Gyozas?

Who wants to hear about a fun, delicious twist on a gyoza? 

Most of us who access this blog love curry (I hope). Especially Japanese Curry.


Today, I decided to wrap up Keema curry in the Japanese Gyoza dumpling wrappers!  

Why, you ask? Because, I was craving for a snack somewhat similar to an Empanada. Unfortunately, it's very hard to find frozen Empanadas here in Japan, but dumpling wrappers are very cheap! 

These delicious dumplings were super crunchy and crispy on the outside. The curry inside and the wrapper itself matched perfectly too. Pairs great with wine or beer. Great appetizer or finger food for parties! 

Keema curry, for those of you who have not tried it yet, is basically stir fried minced meat with curry spices. It's not runny  like the traditional Japanese curry. It's more like paste. That's why I thought it would be a great idea to wrap it up with Gyoza wrappers! 

I bought the ready-made Keema curry but I plan to post a recipe for it soon as the ready-made kind may be hard to find in the US....If you cannot find the ready-made curry but want to try this a.s.a.p, I highly recommend for you to cook some minced meat and add some salt, pepper, curry spice and maybe even some cumin? 


Steps
  1. Once you have the curry cooked and ready, wrap a teaspoon of it in a Gyoza dumpling wrapper. You can use other dumpling wrappers or even some pie dough!
    If you're wondering how to wrap a gyoza dumpling, check this recipe out 
  2. Heat the oven at 200C (370F) and place the dumplings in for 10-15 minutes until gold and crispy.


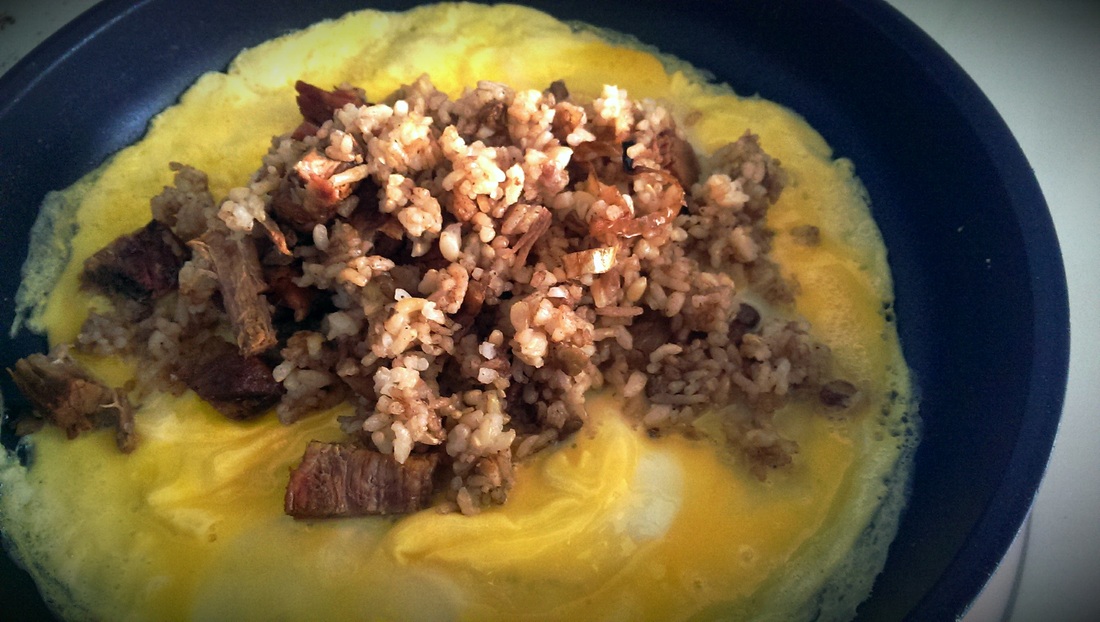
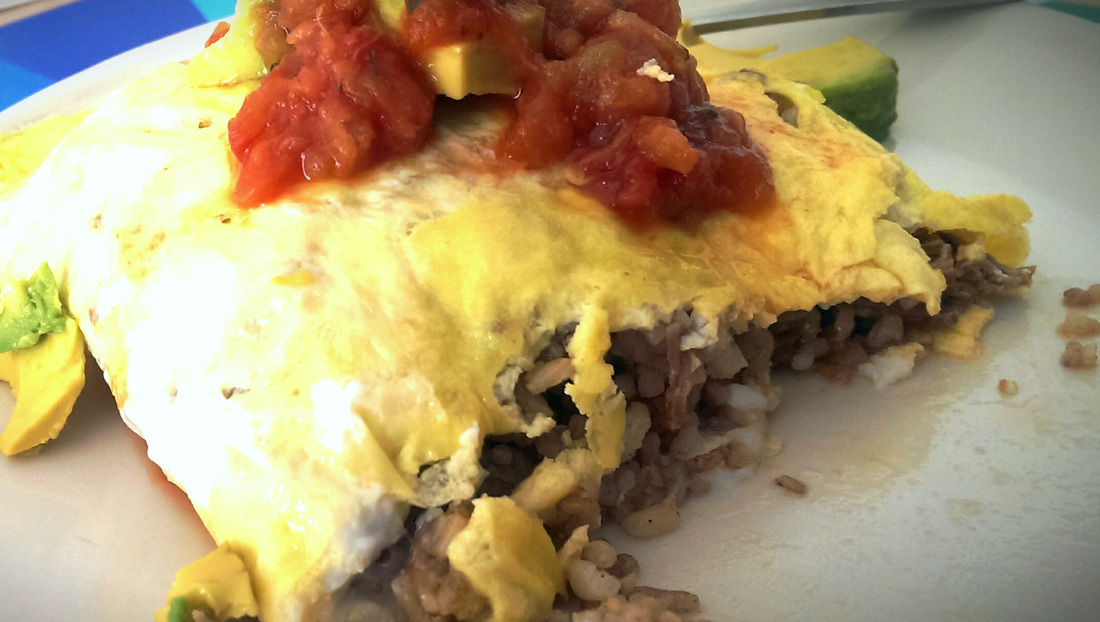
That's it. If you decide to use ready-made curry/meat like me, it takes less than 20 minutes. 15 minutes of it is just waiting for it to cook in the oven...

Enjoy! 
Picture
Picture
0 Comments

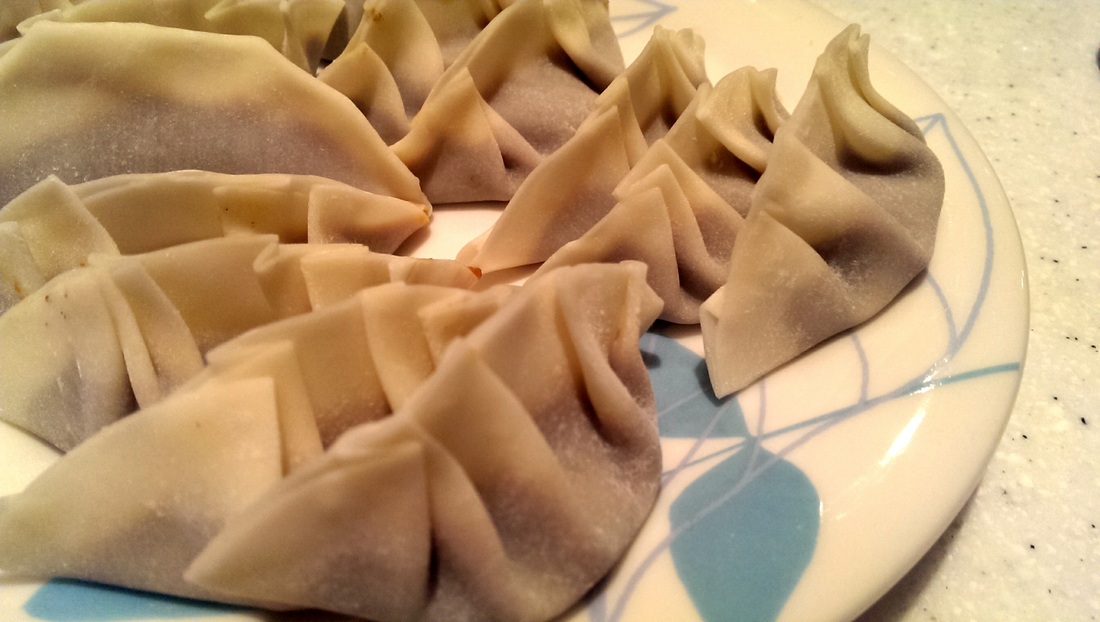
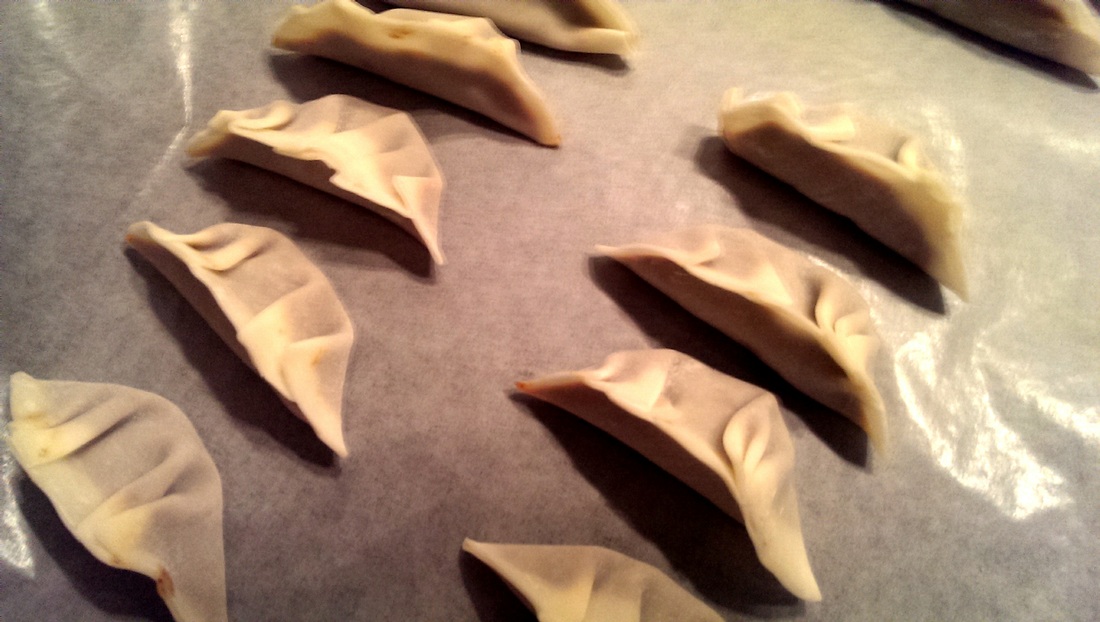
Recipe: Super fluffy omelette stuffed with chicken rice. We call is "om-u-rice" in Japan! 

10/29/2013

2 Comments

 
Picture
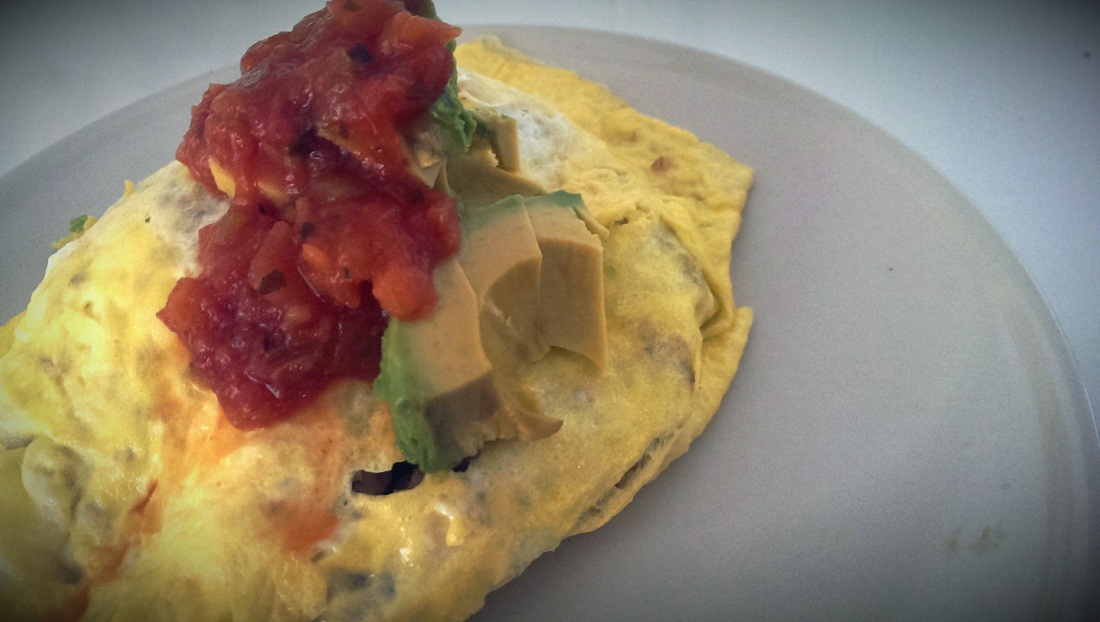
Though I've already introduced this recipe for omelette rice (omu-rice), I'm posting it again. 

Very fun dish to make. Popular dish to make for your boyfriend in Japan ;) Show some love! 

Ketchup chicken rice is a typical stuffing for this dish in Japan but you can get creative as well. This time, I stuffed my omelette with some left overs from burrito night; rice with black beans and some South American spices. Mm! 

What you need (serves 1 dish) :

  1. 2 large eggs
  2. Oil
  3. Rice (chicken rice, ketchup rice, any type of rice works here. See this recipe)
  4. (optional) Veggies 


Steps
:
  1. Start by preparing the stuffing. You can use this recipe or simply stir fry some rice with optional veggies and chicken. It's good to throw in some ketchup or tomato sauce before adding in the rice. This will help prevent blotches of ketchup/sauce in the rice. Throw in the rice after and you'll see a more even tone.
  2. Put the rice out of the pan and keep it to the side while you prepare the omelette.
  3. Heat the pan on HIGH, put a little bit of oil. Mix the egg in a separate bowl and pour it into the heated pan. Quickly scramble the egg and throw in the rice. 
  4. Start wrapping the egg up on one side of the rice (Be careful not to overcook the egg here). Flip the omelette+rice onto a plate. It's okay to toss the omelette onto the plate by turning the pan up side down! :)
  5. Top it off with ketchup or be fun like me and place some pineapple salsa and avocado! 


Note: Steps #3 and #4 should only take 2-3min as the egg heats fast! 
Picture
Picture
Picture
2 Comments

Best seasoning I've discovered for stir frying vegetables. Easiest Japanese dish you could probably prepare using any veggie you want.

7/7/2013

0 Comments

 
Picture
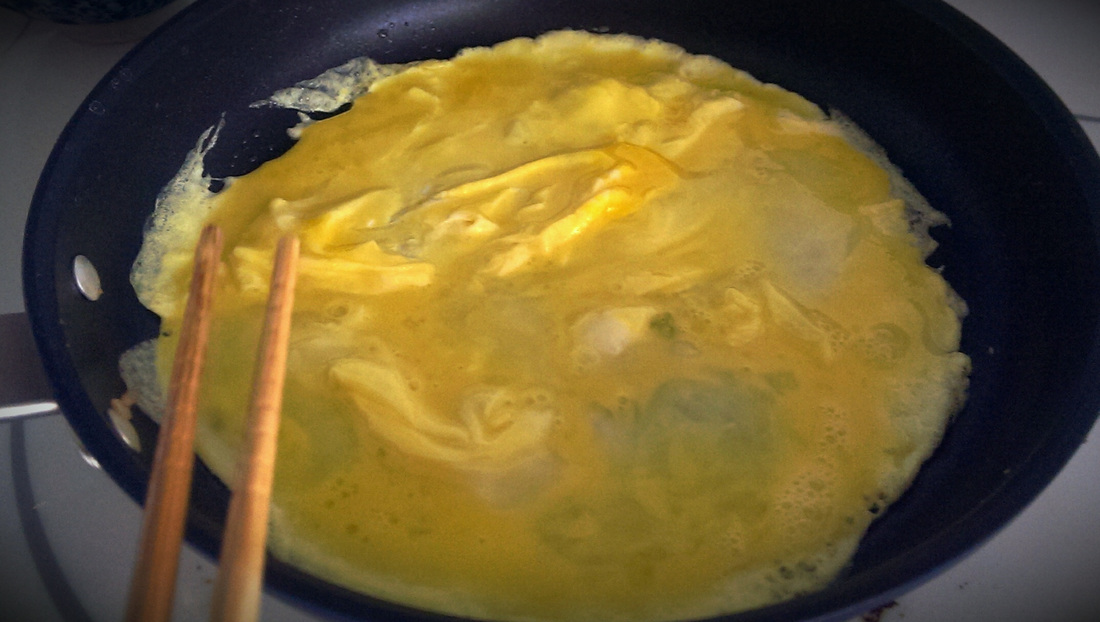
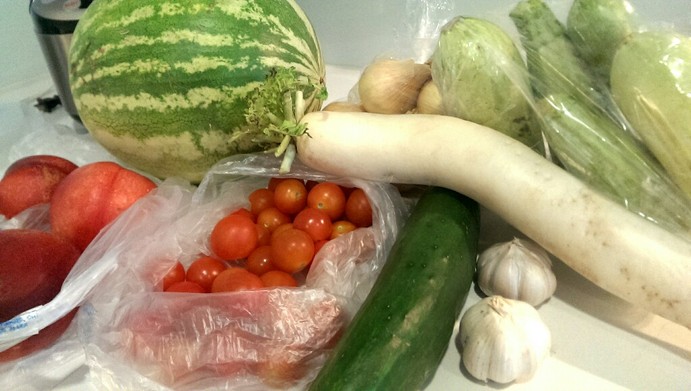
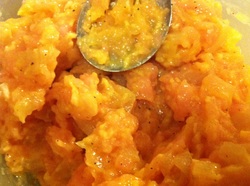
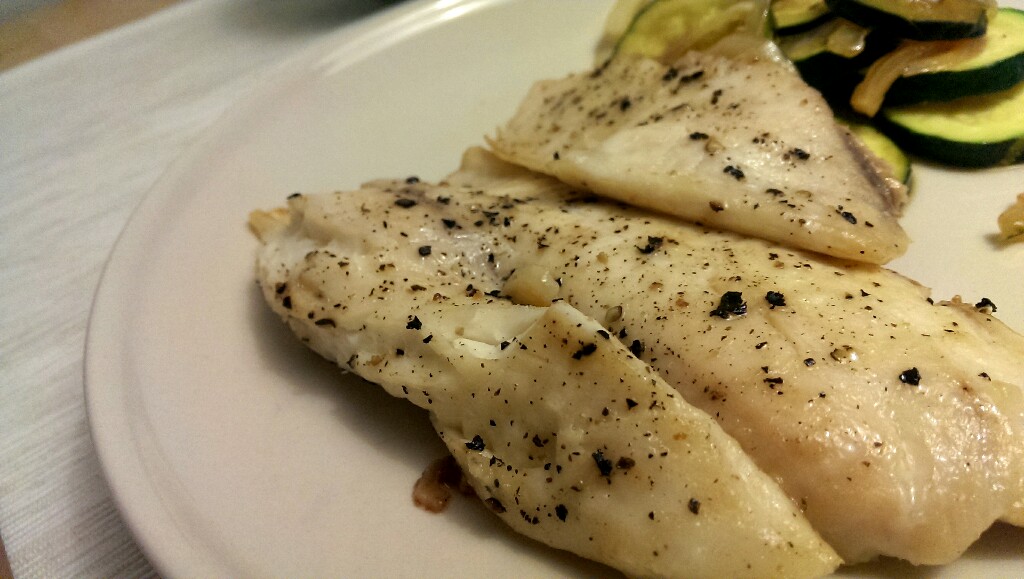
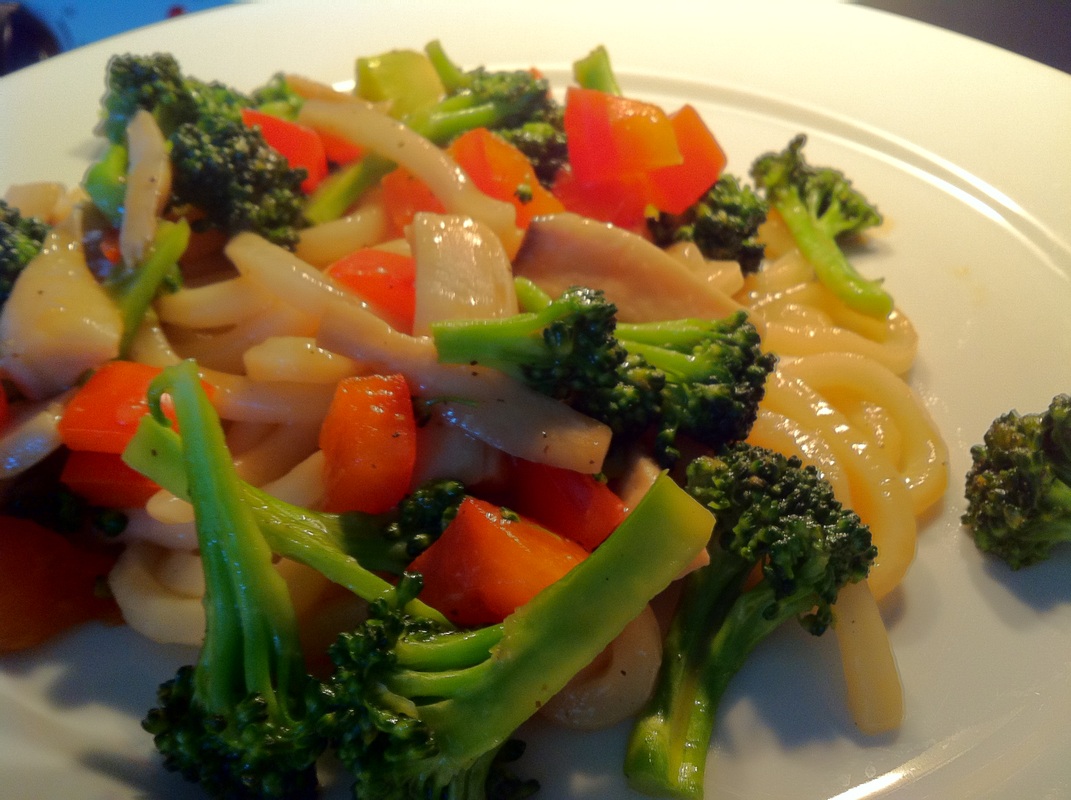
With all the amazing vegetables in season and my visits to the farmers markets here in San Francisco, I've been needing to find a way to consume the vegetables but in an easy manner; especially for those weekday dinners at home after work. I've discovered the simplest Japanese vegetable stir fry recipe!

Ingredients (for 2 people):
  • Any vegetable(s) you like  (e.g. 1 zucchini, 1 onion, broccoli)
  • Any other additional ingredients (e.g. mushrooms)
  • 1 tbsp Japanese soy sauce
  • 1 tbsp vinegar
  • 2 tsp Hondashi (Japanese soup stock)
  • 1/2 - 1 tbsp sugar
  • Oil


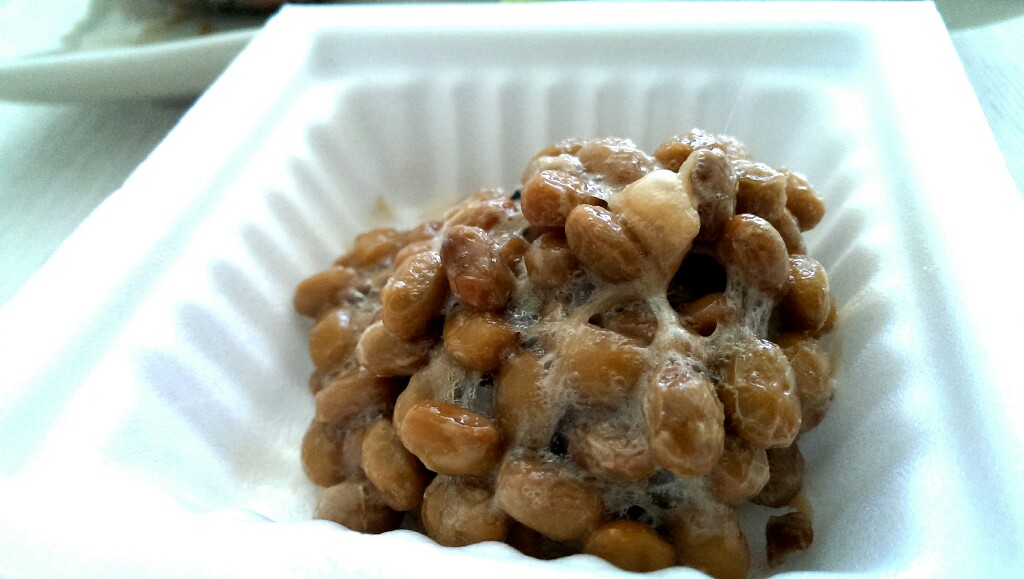
Steps: 
Simply stir fry the veggies your pan until they are cooked through, then add the Hondashi, soy sauce, vinegar and sugar. Heat until water is evaporated. 


It's delicious and makes your dish taste like a true Japanese dish despite its simplicity and ease! Please give it a try! 

It goes well as a side dish with grilled chicken, grilled fish and even my favourite natto! 
Picture
Picture
Picture
Picture
0 Comments

Recipe: Homemade Tortillas and fun, healthy dips and spreads!

6/1/2013

0 Comments

 
Picture
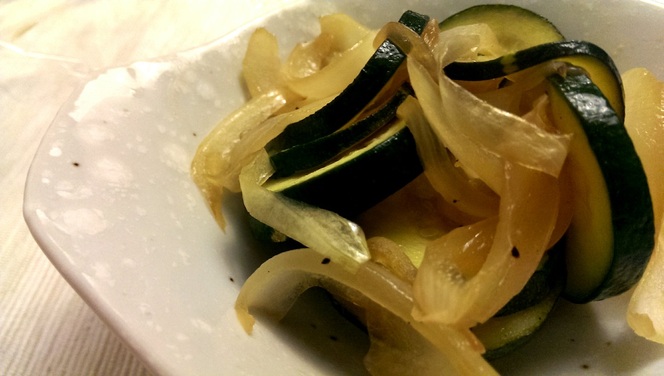
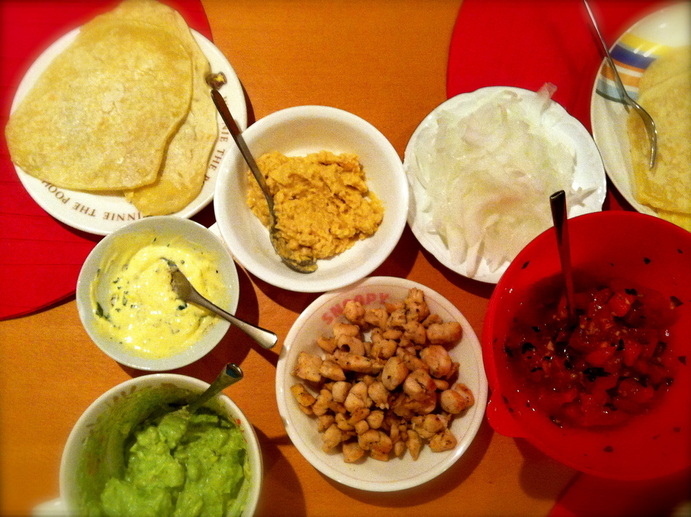
Tortillas are very expensive here in Japan. I went to a local supermarket (known to provide low prices) and found 10 tortillas for around $6. Ouch. This didn't stop me from sharing the concept of wraps, dips and spreads to my family in Japan. I decided to make my own tortillas instead! I make my own pizza with my boyfriend sometimes so this tortilla making ended up being very similar to that.

- - - T O R T I L L A - - - 

My first homemade tortillas ended up being chewy, soft and on the thicker side. Instead of wrapping things inside, we ended up dipping or placing the spreads and dips on top. After thorough research online about making tortillas, here's what I used:
  • 1.5 cup of all purpose flour
  • 1 tbsp olive oil
  • A little less than half a cup of warm water (I highly recommend you adjust the amount of water you put in throughout the process while you kneed the dough)
  • Salt 

Steps:
  1. In a bowl, mix the flour, olive oil and salt together. 
  2. Start to add in the warm water (little by little!) while you mix the dough. We want the dough to become like pizza dough! Maybe as soft as your ear lobe.
  3. Settle the dough in saran wrap or in a kitchen towel for a while.
  4. Separate the dough into sections. Roll them into balls and flatten them so they are thin like tortillas. 
  5. Place them onto a MEDIUM heated pan and cook both sides for approximately 1 minute each.
  6. After you're done cooking them, place them onto a plate and cover it with saran wrap or a towel to prevent it from drying out.


- - - D I P S / S P R E A D S - - -

Simple Yoghurt Guacamole 
  • Mix 1/2 avocado, 1/4 to 1/3 cup of strained/greek yoghurt, salt, pepper, garlic (optional), onions (optional). This guacamole becomes super creamy! My absolute favourite. 


Garlic Basil Mayo
  • Mix 2 tbsp mayo, 1/2 tbsp basil, salt, pepper and a little bit of minced garlic and mix! Goes great with meat, veggie sticks and bread.


Tomato and Basil Marinade
  • Mix tomatoes, basil, parmesan cheese, salt, pepper and minced garlic together. 


Hummus
  • Blend 1 can of chick peas and 1 minced garlic clove until smooth. Then add 1 - 1.5 tbsp tahini (ground sesame seed paste), 2-4 tbsp lemon juice, salt, pepper and a few tbsp of the left over water from the chick pea can (~2 tbsp) and blend until creamy. You could also add olive oil into the mixture. Serve with a drizzle of olive oil and other spices (if you like).


0 Comments

Recipe: Simple "Yaki Udon", fried udon recipe! My go to recipe when I'm starving and in need of a healthy, substantial lunch! 

5/5/2013

1 Comment

 
Picture
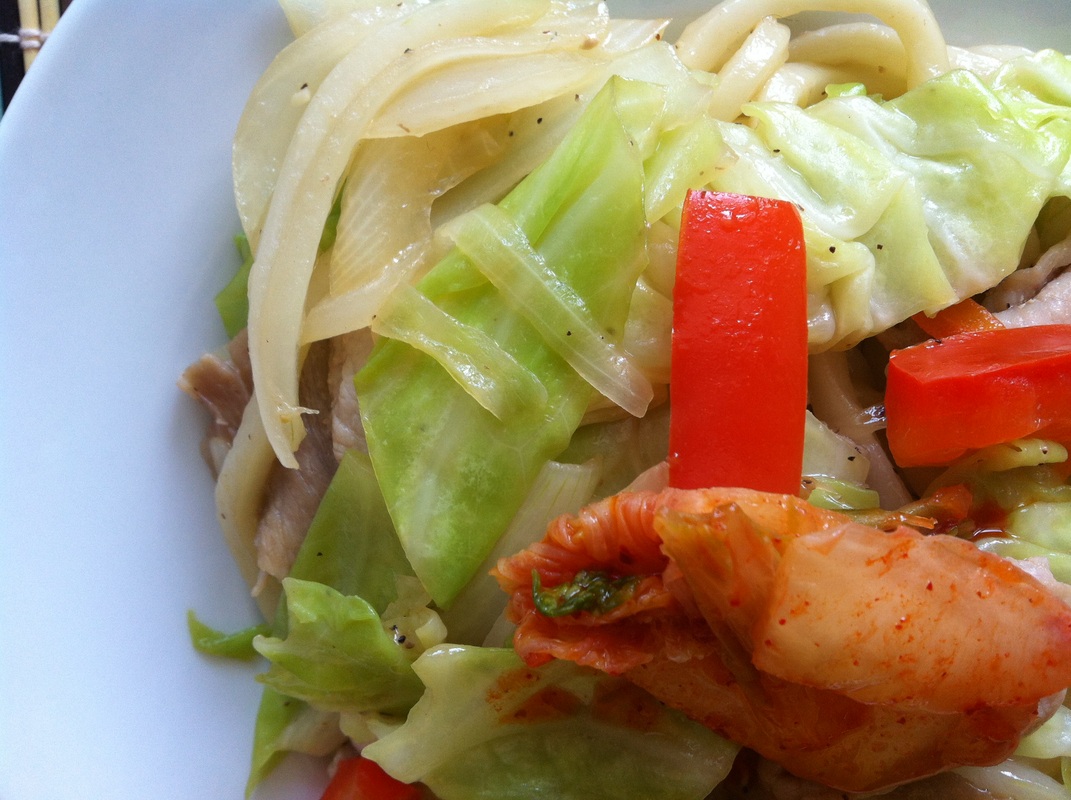
Time taken: 5 - 10 minutes
Approximately 300 kcal per serving

About This Dish:
I head over to my freezer when I find myself hungry and in need of a substantial and healthy Japanese meal at home. Why? Because I usually have a stash of udon hidden in my freezer! Yaki-Udon (Fried Udon) is one of Japan's most popular noodles, udon, stir fried with a bunch of vegetables and optionally meat. This recipe adds a delicious taste to the dish by adding a little bit of sesame oil and Japanese soy sauce! Be creative in your additions and you might end up with an amazing dish for lunch! My mom actually used to make this for me for breakfast. Good old days :) 


While you're at it, why not check out my other udon recipe as well? 

What You Need:
(Makes 2 servings)
  • 1 package of udon noodles (I use frozen ones)
  • (Optional) Vegetables of your choice (I use onion, cabbage, red pepper, mushrooms, carrots...)
  • (Optional) Meat of your choice (I often use thin sliced pork)
  • 1/2 tsp sesame oil
  • 1 - 2 tbsp Japanese soy sauce
  • Salt & Pepper to taste


Steps:
  1. Cook the udon noodles as instructed on package (I usually throw in the vegetables in the last few minute or so to boil together with the noodles)
  2. Heat a pan on MEDIUM heat and throw in the noodles, vegetables and meat (if you have it). Season with soy sauce, salt and pepper. 
  3. At the end, season with sesame oil and serve! 
Picture
1 Comment

Throwback Recipe: Healthy Chicken Katsu cooked with no oil. Tastes just as good but is way healthier.

4/16/2013

0 Comments

 
Picture
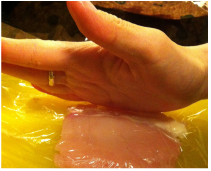
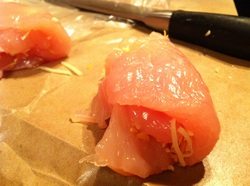
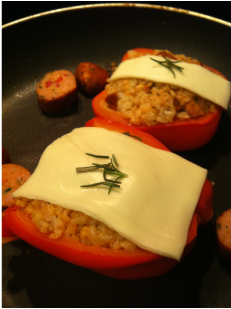
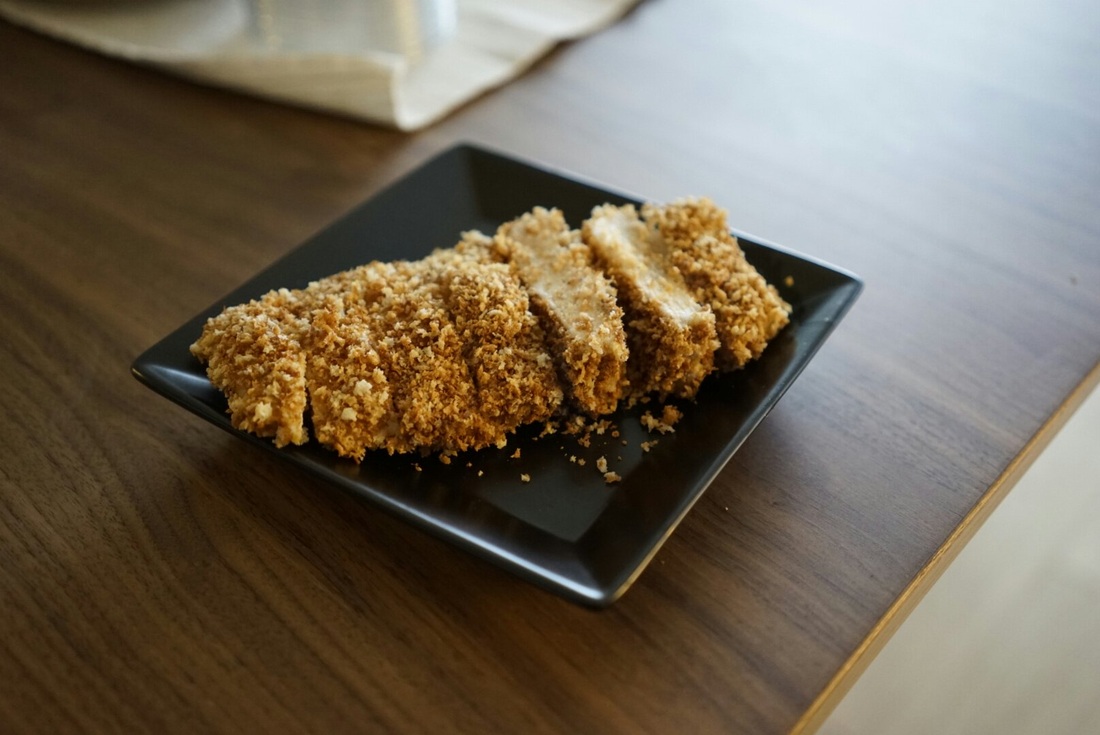
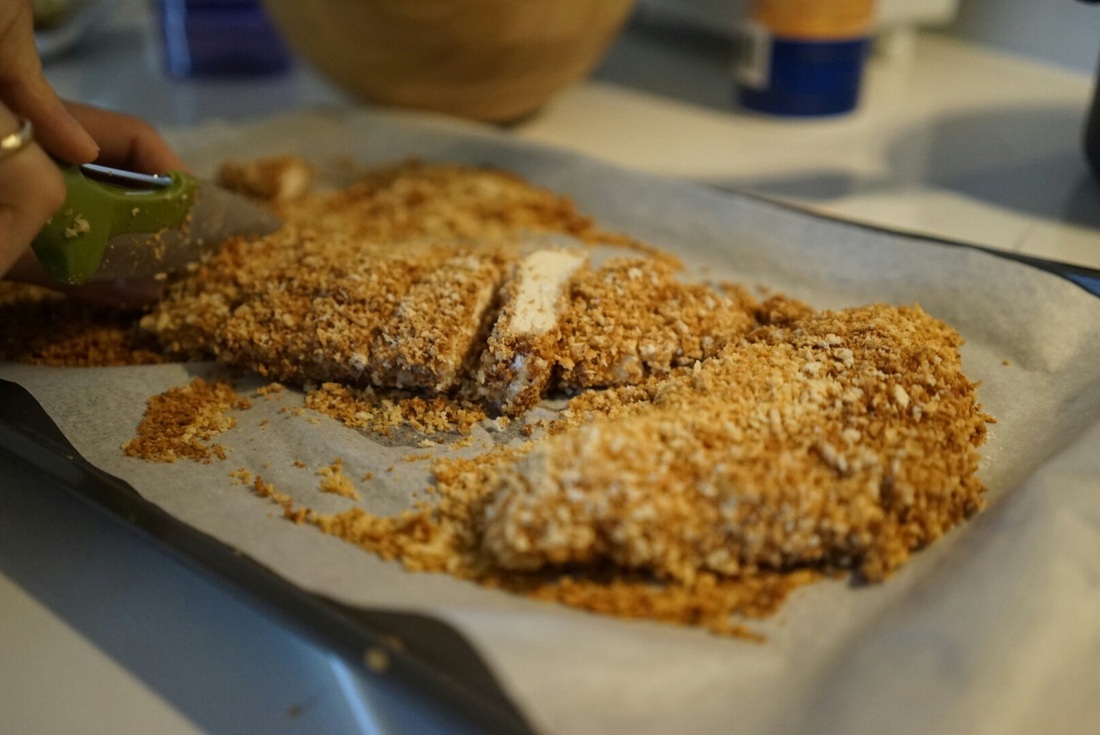
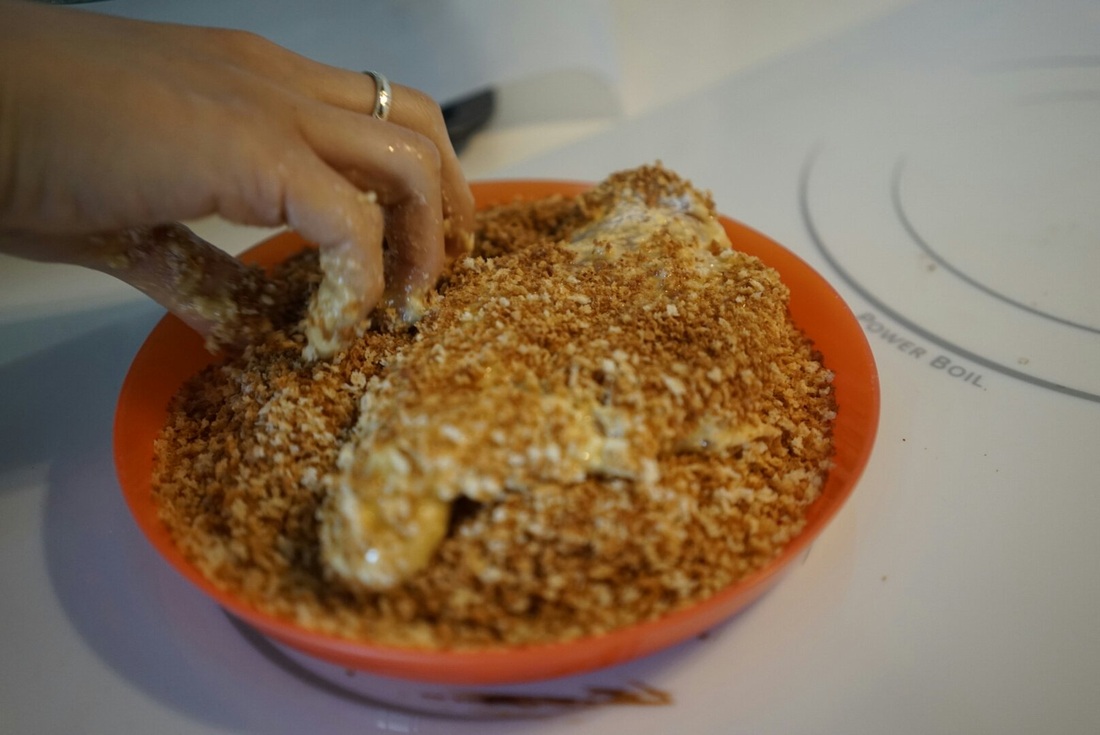
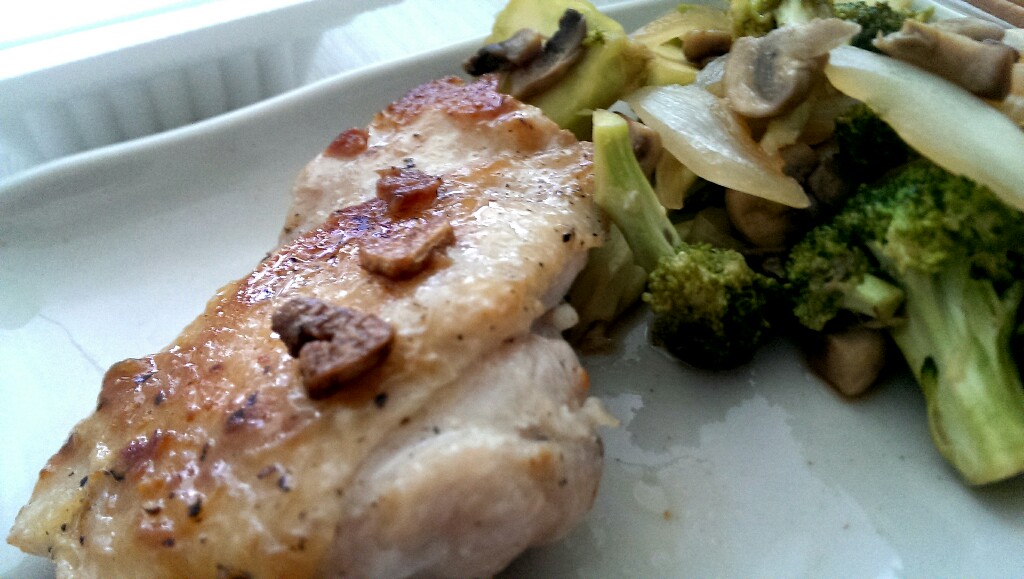
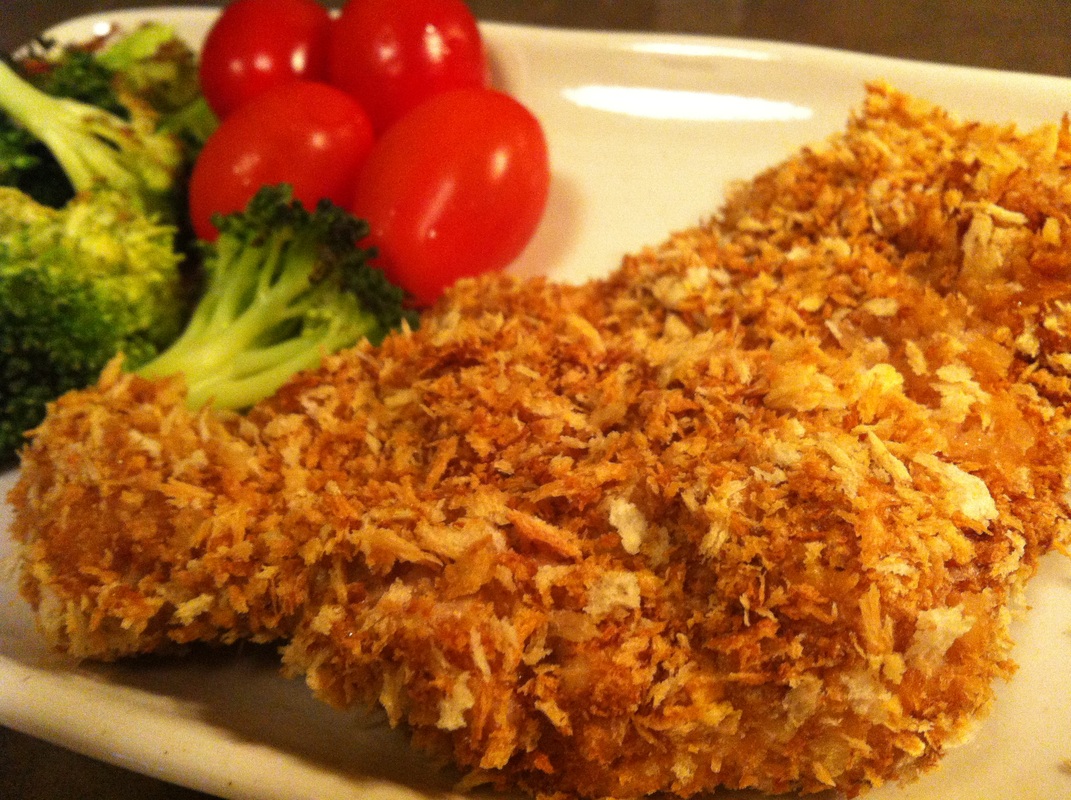
For those of you who haven't tried this popular recipe on my blog, YOU MUST! 

Chicken or pork katsu (essentially Japanese style fried chicken or pork) is a very popular dish in Japan and in the US. This recipe provides a healthy alternative; it uses absolutely no oil. It's as crunchy, delightful and satisfying as the deep fried version, I promise. I also must mention that it is much less of a hassle to make since you don't have to clean up the oily mess on your counters.  Instead, you pop it in the oven to bake! 

Last night, I topped one of the katsus with some mexican cheese. It simply melted in my mouth! 

Why did I decide to make katsu last night? Not only because it's delicious; but also because it signifies good luck! Many students applying for schools/jobs eat katsu dishes to wish for a good result; to win ("katsu" (勝つ) in Japanese) ! 
Picture
0 Comments

Recipe: Melted cheese chicken! Perfect as dinner, lunch or even a snack while having a couple drinks!

4/10/2013

0 Comments

 
Picture
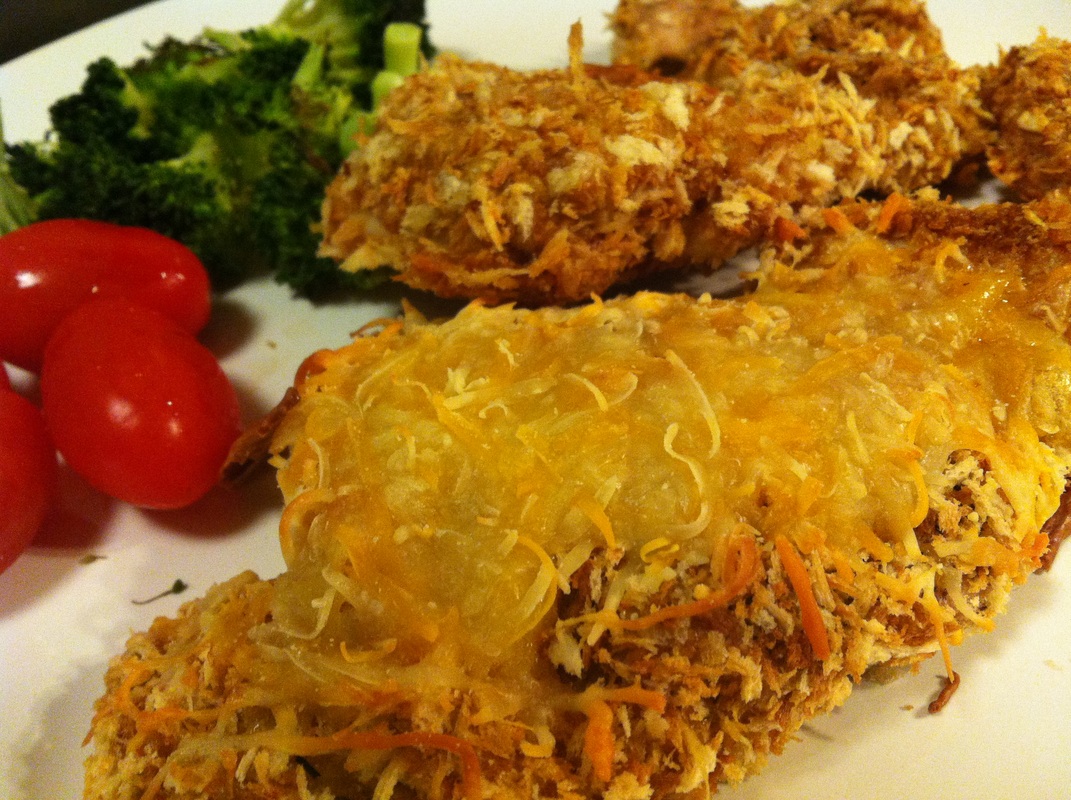
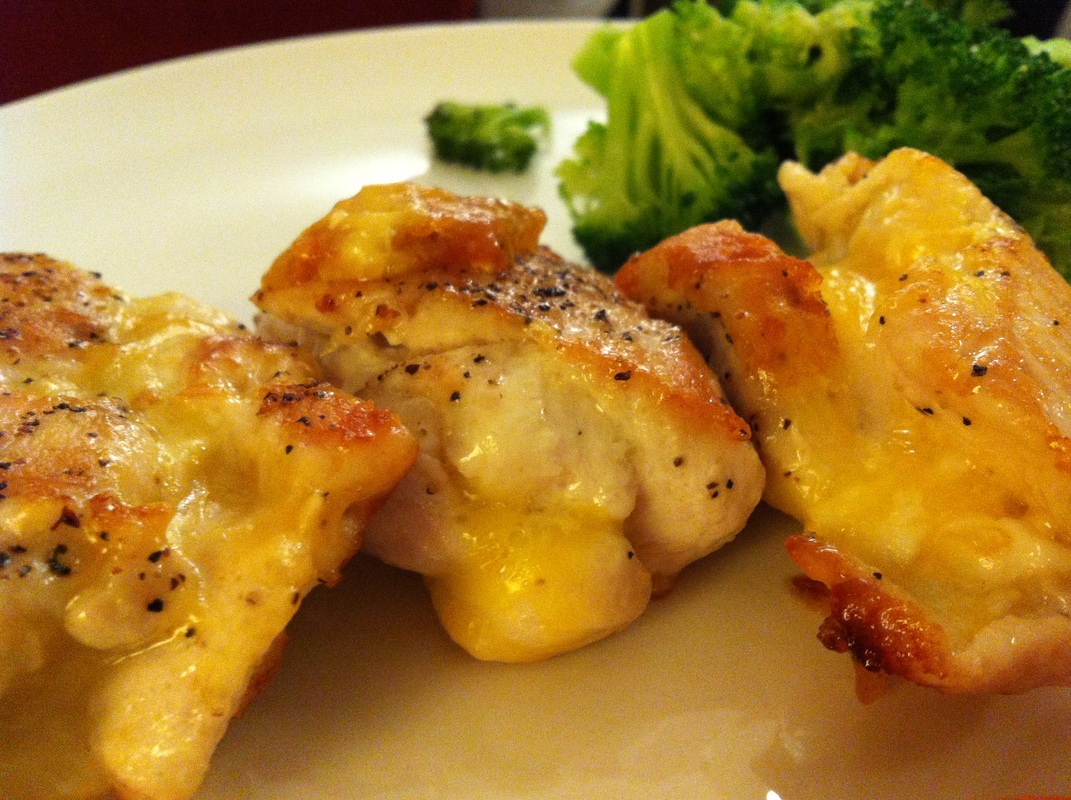
Number of steps:  5 steps
Time taken: 15 - 20 minutes
Approximately 240 kcal per serving

About This Dish:
If you have followed my blog you probably know by now that I love chicken! With so much shredded cheese leftover in my fridge, I had to think of a quick and simple dish to make for dinner. This dish may sound childish and too simple, but let me tell you...It is definitely worth trying! The cheese is placed in the center of the chicken then is wrapped up. After cooking, the cheese then melts in your mouth. Additionally, the pan makes some of the melted cheese crunchy and irresistible. 

Enjoy with just salt and pepper! The taste of the chicken and cheese is perfection. 

You could also try frying or making this chicken a fake katsu using this popular recipe! 

What You Need:
(Makes 3 servings)
  • 1lb Boneless Skinless Chicken Thigh
  • Salt and pepper
  • 1/2 cup cheese (I used Trader Joes' Lite Shredded 3 Cheese Blend)
  • ~1 tbsp oil (I used Trader Joes' Organic Virgin Coconut Oil)
Picture


1. Cut the chicken into smaller pieces and flatten. You can buy thin sliced chicken if you want to skip this step. 

Picture
4. Heat a pan on HIGH heat and pour some oil in it. Once the pan and oil is heated, place the chicken onto the pan. Make sure the chicken doesn't open up!

Picture
2. Place the cheese onto the flattened chicken.


Picture
5. Flip the chicken once the surface is crispy and brown. Once both surfaces are crispy, turn the heat down to LOW, cover the pan and cook for an additional 5-10 minutes.

Picture
3. Wrap the chicken up like a spring roll. Sprinkle some salt and pepper on the surface.

0 Comments

Recipe: Chicken sautéed in sweet soy vinegar sauce. Remains delicious even after cooling. 

3/14/2013

0 Comments

 
Picture
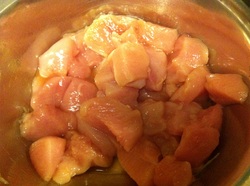
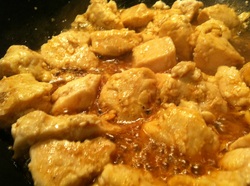
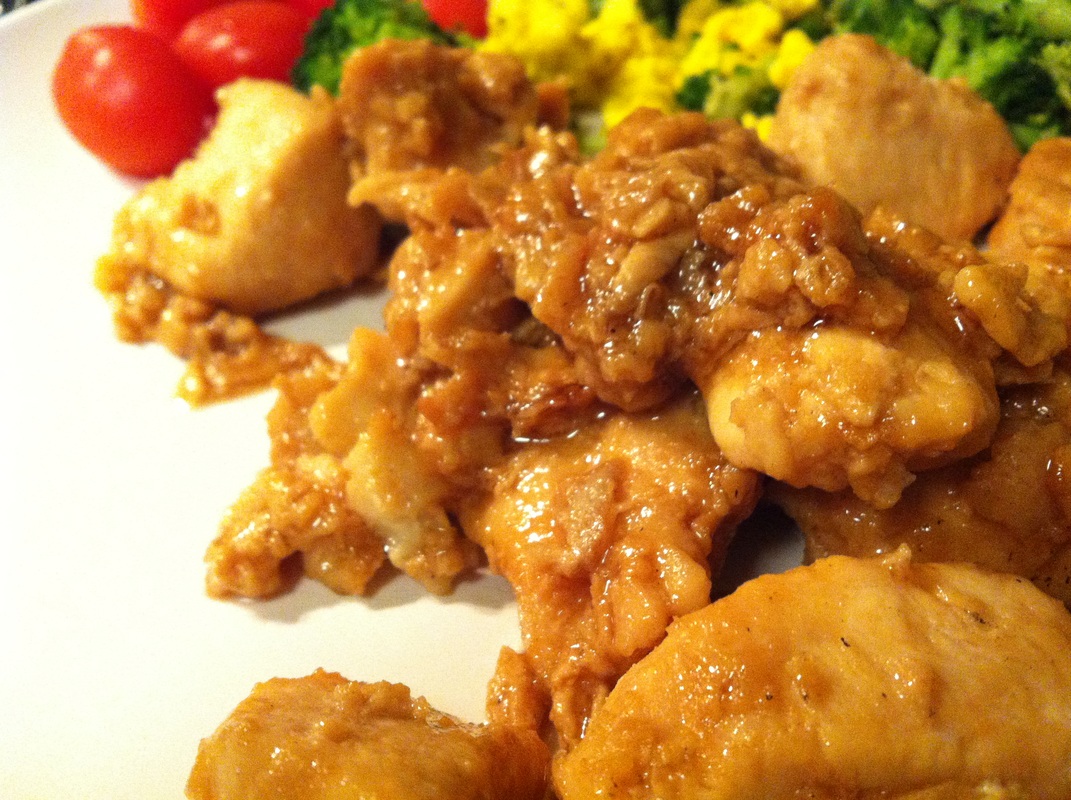
Number of steps:  4 steps
Time taken: 15 minutes
Approximately 200 per serving (when serving 4)

About This Dish:
Chicken, chicken, chicken. One of my favourite meats, especially for cooking at home. It's versatile and goes great with various Japanese sauces. As you can see on my recipe list, lots of dishes can be made with chicken! 

This dish like any other Japanese chicken dish goes perfectly with rice. I found myself pouring the chicken and leftover sauce all over my Japanese brown rice like a "donburi" which is literally a bowl of rice with food on top like this dish with a bed of chicken and eggplant with delicious eel sauce!  By using egg white and potato starch, the chicken becomes soft and chewy as well as helps to thicken the delicious vinegar sauce. 

Vinegar has various health benefits; given the increase in health consciousness in Japan, vinegar has become popular and have been used greatly in dishes in the recent years. What are the health benefits? The main 5 benefits of vinegar according to this article in Japan is: Recovery, better appetite, increase in ability for the body to take in calcium, reduction in body fat, blood sugar level and blood pressure. 


What You Need:
(Makes 3-4 servings)
  • Chicken breast (I used boneless/skinless chicken breast) 1lb
  • 1 egg white
  • 2 tbsp potato starch
  • 1/2 - 1 tbsp oil (I used organic coconut oil but any oil works)

Marinade
  • 1/2 tsp sugar
  • 1 tsp Japanese soy sauce
  • 1 tsp Japanese rice vinegar

Sauce
  • 2 tbsp sugar
  • 3 tbsp rice vinegar
  • 2.5 tbsp Japanese soy sauce
Picture
1. Marinate the chicken for a couple of minutes in the "Marinade" listed above. Make sure you mix it or even massage it :)


Picture
4. Heat a pan on LOW to MEDIUM heat and heat some oil. Throw in the chicken and cook until brown. Once it browns, turn the heat to HIGH and pour in the sauce. Mix it well with the meat. Once the sauce starts bubbling and is thick, you're done! 

Picture
2. While the chicken is marinating, go ahead and make the sauce by mixing all the ingredients into a small bowl.

Picture
3. Add the egg white and starch into the marinating chicken and mix well. Once again, this will help soften the chicken and thicken the sauce when we cook it.

0 Comments

Recipe: Meaty and healthy Japanese hamburg steaks served with demi glace sauce.

3/13/2013

0 Comments

 
Picture
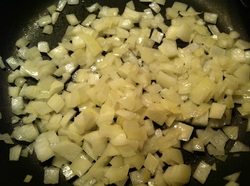
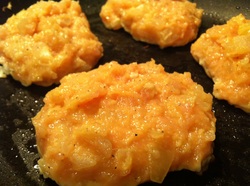
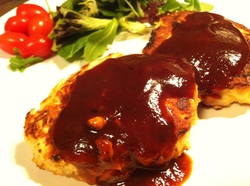
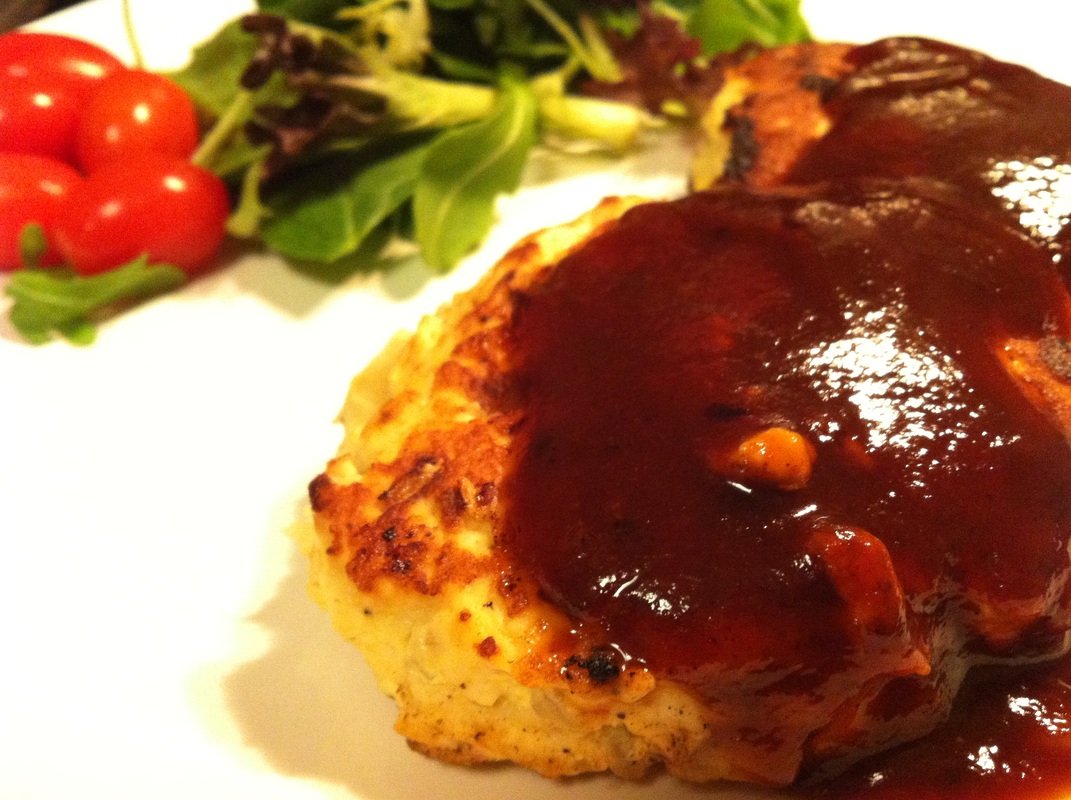
Number of steps:  5 steps
Time taken: 15 - 20 minutes
Approximately 130kcal per serving (using ground turkey)

About This Dish:
Japanese hamburg steaks are basically burger patties eaten without buns. It's a very popular dish in Japan, served in many restaurants/cafes/fast food chains and for dinner at home. Beef or pork is usually picked as the choice of ground meat, however I've picked turkey just for a more lean option. For an even healthier option, check out the tofu hamburg recipe or the chicken patty recipe I've posted. Various sauces are used; demi glace, ponzu, teriyaki, ketchup, etc. I've posted a super easy demi glace recipe so check that one out if you've got the time! People of various ages are seen eating this dish in Japan, whether it be children or a senior. You could even make a Hawaiian dish, locomoco with leftovers!

One important tip I have is to make sure the onion is cold upon mixing with the ground meat. If the meat is warm or hot, it causes the juicy fat of the meat to run away, making the patties soggy! :[

Serve with Japanese rice and plenty of veggies! 

What You Need:
(Makes 4 servings)
  • 300g or 10oz of ground meat (I used ground turkey here)
  • 1/2 - 1 onion
  • 1 egg
  • 5 tbsp panko bread crumbs
  • 5 tbsp milk
  • Salt and pepper
  • Oil (I use organic coconut oil from Trader Joes)
Picture
1. Chop the onions up into small pieces and heat them up in a pan. Once cooked through, put them aside to cool them down whether it be on the counter or in the fridge. We want the onions to be cool/cold upon mixing with the ground meat! 

Picture
4. Heat a pan with oil on HIGH heat and place the patties. Brown the surface of both sides.

Picture
2. In a separate bowl, soak the panko with the milk.


Picture
5. Once both sides are brown, put the heat down, pour in 1/4 cup of water and put the lid on the pan until the water disappears.

Picture
3. Mix the ground meat, cooled onions, panko/milk, salt/pepper and stirred egg together until it becomes well blended and sticky. Create the burger patties with your hands. I made 4!


Picture
Pour the sauce over it. I chose demi glace! 

You can wrap each left over patty in saran wrap and place them in the freezer for future consumption :)

0 Comments

Recipe: Red bell pepper "doria"; A healthy version. Sautéed ketchup rice with ingredients of your choice stuffed in a red bell pepper, topped with a slice of cheese. 

2/25/2013

0 Comments

 
Picture
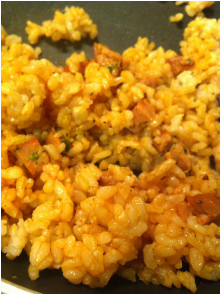
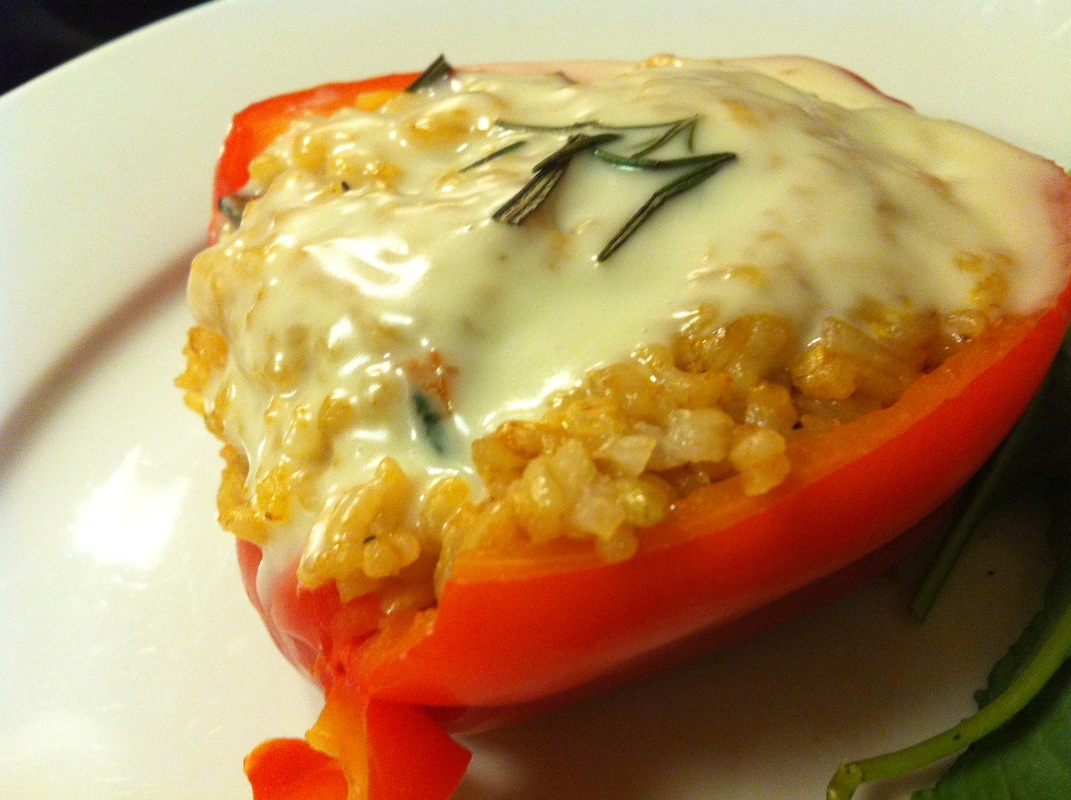
Number of steps:  3 steps
Time taken: 15 minutes
Approximately 230kcal per serving (this will vary depending on what you decide to put in the rice!)

About This Dish:
I did not know "doria" was a Italian dish until today. I had always thought it was a type of French dish since it's so similar to gratin. In Japan, apparently it got popular in the 1920's in Yokohama according to this post. Doria is basically like a gratin but is made of rice, vegetables and meat; often mixed in white cream sauce and topped with melted cheese, cooked in a toaster or oven. This version of doria is a healthy version; no heavy cream, yay! The only doria like characteristic would be the melted cheese. I also use a regular pan, not an oven, so it's easier and quicker to make. 

I added chicken sausage to the rice but I highly recommend adding onion, carrots, ground meat of your choice to make it a little more fun. This dish is cute looking, healthy and tastes great. Perfect for when you have friends over.

What You Need:
(Makes 2 servings)
  • 2/3 - 1 cup rice (I used brown rice)
  • 1 large red bell pepper 
  • 2 tbsp ketchup
  • Pinch of salt and pepper
  • 2 slices of cheese 
  • (Optional) Meat of your choice (I used 1 chicken sausage with red pepper and spinach from Casual Gourmet, otherwise you can add a ground meat of your choice or skip the meat all together!)
  • (Optional) Vegetables of your choice (I highly recommend popping in some chopped onions, carrots)
  • (Optional) Oil to saute your rice (I used 1/2 tbsp of organic coconut oil from Trader Joes)
Picture
1. Rinse the bell pepper, cut in half and put it in the microwave for 3 minutes on power level 6 (if you can select it).

Picture
2. Saute the rice and add meat/vegetables of your choice on MEDIUM to HIGH heat. If you are cooking raw meat, you might want to add the rice after the heat has gone through the other ingredients. Add ketchup, salt and pepper.

Picture
3. Stuff the bell pepper with the rice (I was able to fit around 1/3 cup). Top with sliced cheese and garnish of your choice (I happened to have rosemary). Put the lid on a LOW heated pan and cook for 10 minutes.

0 Comments

Recipe: Super healthy edamame and chicken stir fry! 3 steps to make a perfect dinner for a lazy night in. Perfect for a quick lunch too!

2/21/2013

2 Comments

 
Picture
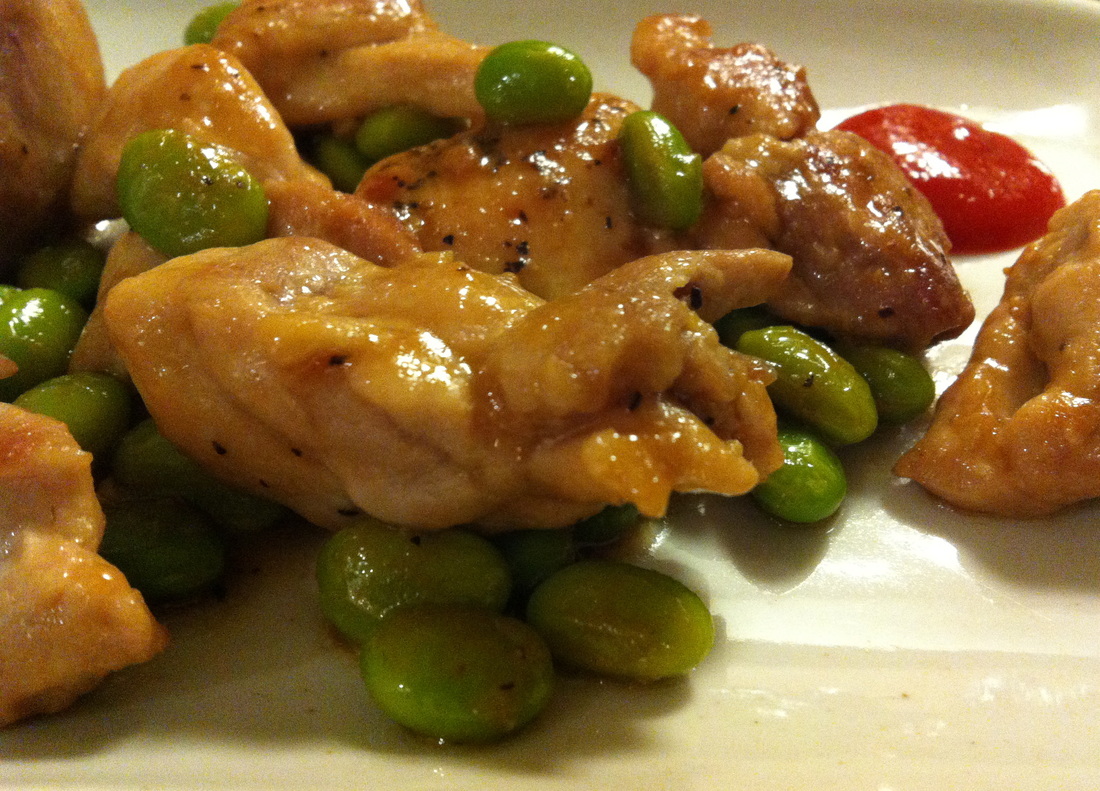
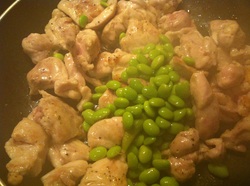
Number of steps:  3 steps
Time taken: 10 minutes
Approximately 200 kcal per serving if divided by 4

About This Dish:
I like eating edamame in pods as a side dish but how about stir frying it with chicken and Japanese sauce? It turned out to be delicious! A wonderful match with rice and miso soup. It took 5 - 10 minutes to make too. My boyfriend kept asking for more! The sauce blends in perfectly with the chicken. The chicken remains soft and juicy by massaging the potato starch into the chicken before cooking. If you are lazy to make an extravagant dinner but seek for something simple, healthy and Japanese, this recipe is perfect for you!  

What You Need:
(Makes 3-4 servings)
  • 1 - 1.25 lb (20oz, ~500g) boneless, skinless chicken breast
  • 1 tbsp potato starch
  • 1 tsp olive oil or coconut oil
  • Sliced or chopped garlic
  • Frozen edamame (as much as you like, I put in 1/2 cup of edamame in pods from Trader Joes)

Sauce
  • 1 or 2 tbsp Japanese soy sauce (I put in 1 tbsp but feel free to add more if you like)
  • 1 tbsp mirin
  • 1 tbsp Japanese sake
  • (Optional) Salt, pepper
Picture
1. Cut up the chicken into bite sized pieces and massage the potato starch into the meat. This will help get the meat juicy and soft even after cooking!

Picture
2. Heat a pan onto HIGH heat with a tiny bit of oil and garlic. Throw in the chicken and cook until all sides are crispy and brown. Then, turn down the heat to LOW or MEDIUM and throw in the edamame.

Picture
3. Mix the ingredients listed under "Sauce" above (soy sauce, mirin, sake). Cook until the sauce starts bubbling!

2 Comments

Recipe: Homemade Yakitori! Japanese chicken skewers. Tasty, goes with beer and a perfect dish when you have company!

1/26/2013

0 Comments

 
Picture
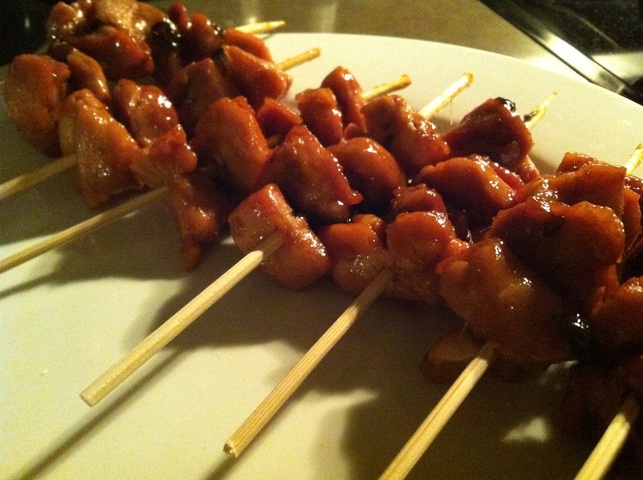
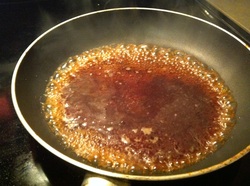
Number of steps:  6, 7 steps
Time taken: 20 - 30 min
Approx. 50 - 80 kcal per skewer

About This Dish:
When you go to a casual drinking dining (a.k.a. Izakaya) in Japan, one of the dishes people usually order is yakitori. Chicken on skewers. Easy to eat, goes great with beer and sake and tasty. Although there are a bunch of other skewers (such as chicken meatballs, liver, skin, cartilage, vegetables, fish) people order, chicken on skewers is the most common. Usually it is char-boiled but given the fact that we are home, this recipe calls for the regular pan you usually cook your regular dishes with. 

When you are at a restaurant, you usually pick if you want the sauce version or if you want the salted version. Most of the skewers are usually eaten with the sauce but once again, it's all your preference ;) This dish turned out great! My izakaya lover boyfriend even said "It tastes better than izakaya!" My friends who were over for dinner also loved it! 


What You Need:
(For 2 - 3 servings)
  • 1 - 1.5 lb of chicken (I used 1.3 lb of chicken breast here)
  • (Optional) Green onion 

Sauce
  • 3 tbsp soy sauce
  • 3 tbsp Japanese sake
  • 2 tbsp mirin
  • 1 tbsp water
  • 1 tsp Hon-dashi powder (If you don't have it, I don't think it'll make too much of a difference)
  • 1 piece of garlic grated (Around 2 - 4 cm if you are using tubed grated garlic)

Add Later
  • 1.5 - 2 tbsp sugar (Depending on how sweet you like it, I usually put 1.5)


1. Cut the chicken into little bite sized pieces. Probably around 2-3 cm big. You can also cut up green onions to the same size if you decide to put it on the skewer with the chicken. 


4. Put a lid on the pan and cook the chicken/veggies through on MEDIUM heat for 3 minutes. After that, put the heat off and let it stand for approximately 5 minutes.


Picture


7. If you haven't put them on skewers, put them on the sticks after and serve!

2. If you have a pan big enough to grill the skewers, go ahead an stick the raw meat and vegetables on the skewers. If not, skip this step. We can put the meat and veggies on skewers after (which is what I did).


Picture
5. Take out the chicken. Wipe of any excess oil on the pan. On MEDIUM heat, pour in the mixture of soy/sake/etc from earlier. Once it starts bubbling, add the sugar and mix.

3. Put some oil on the pan and grill the chicken and meat on a HIGH heat. We want the meat and veggies to be crispy on the outside. Meanwhile, mix the soy sauce, sake, mirin, water, dashi powder and garlic into a bowl.


Picture
6. If you put the chicken and veggies on skewers, just put them into the sauce. If you don't have them on skewers, do the same and add the chicken and veggies into the sauce. Leave on LOW to MEDIUM heat until the sauce disappears.

0 Comments
<<Previous

    Subscribe via email

    ​Featured Fyuse:

    Popular Posts

    Picture
    Kinkakuji, Kyoto
    Picture
    Non-oil Chicken Katsu
    Picture
    Kawaii! Socks

    instagram: @jpinsider

    Categories

    All
    About Japan
    Appetizer
    Beef
    Chicken
    Dessert/sweets
    Dinner
    DIY
    Egg
    Japanese Breakfast
    Japanese Food
    Japanese Music
    Japanese Quality Series
    Japanese Recipes
    Lunch
    Matcha/green Tea
    Noodles
    Obento
    Pasta
    Pork
    Potato
    Rice
    Salmon
    San Francisco
    Sauce
    Savoury
    Seafood
    Side Dishes
    Tips/how To
    Tofu
    Traveling Japan
    Tuna
    Turkey
    Vegetables
    When In Tokyo
    Yokohama

Powered by Create your own unique website with customizable templates.
  • Feed
  • travel & culture
  • Beauty
  • Recipes
    • Shop Japanese Groceries
  • About Me